
PPT isn’t just about piling on text, it relies heavily on images to capture your audience’s attention. But sometimes those same images carry details you don’t want everyone to see—like email addresses, client names. PowerPoint’s built-in blur feature does this perfectly.
In this article, I’ll share how to blur image in PowerPoint. I’ve also compiled some common questions and tips to help you out.
Benefits of Blurring a Picture in PowerPoint
Blurring image in PowerPoint isn’t just about hiding things. Done right, it can actually make your presentation look sharper and more professional. Here are a few situations where blur really helps:
- Protecting privacy: I often blur screenshots if they show emails, phone numbers, or account details.
- Highlighting key points: If the background is too busy, blurring it makes your text or main graphic pop out.
- Cleaner layouts: Using a blurred background image makes slides feel less cluttered and easier on the eyes.
- Boost visual appeal: A soft blur can double as a design element, especially for transitions or title slides.
How to Blur an Image in PowerPoint (Entire Image)
The steps of how to blur an image in PowerPoint is straightforward and simple.
1. Select the image you want to blur in your PowerPoint presentation.
2. Double-click the image to open the “Picture Format” menu.
3. Under the menu, locate “Artistic Effects”, click the dropdown, and select “Blur”.
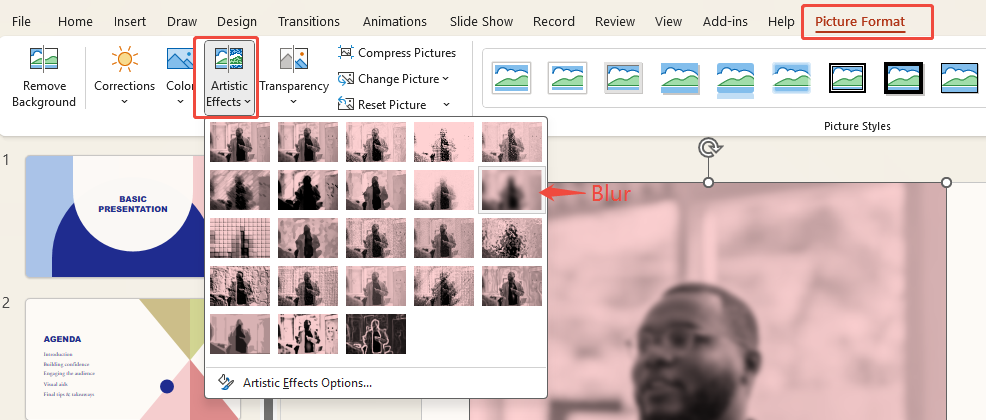
4. Click apply, and the entire image will instantly become blurred.
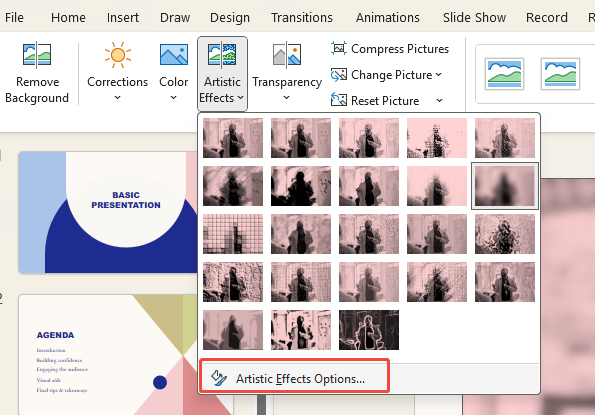
That’s it—the whole image will blur instantly. If it looks too faint or too strong, tweak the blur intensity under “Artistic Effects Options” until it feels right.
How to Blur a Part of an Image in PowerPoint
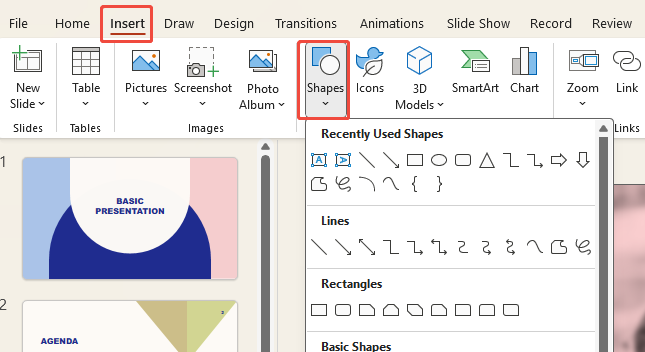
Sometimes you don’t need to blur everything—just a small part, like an ID number. Here’s how I handle that:
1. Open your PPT file and click “Insert” in the top menu.
2. Then click “Shapes” and select a shape suitable for covering the image.
3. Place the shape over the area you want to blur and select it.
4. In “Shape Format”, choose “Shape Fill”, then select “Eyedropper” from the dropdown.
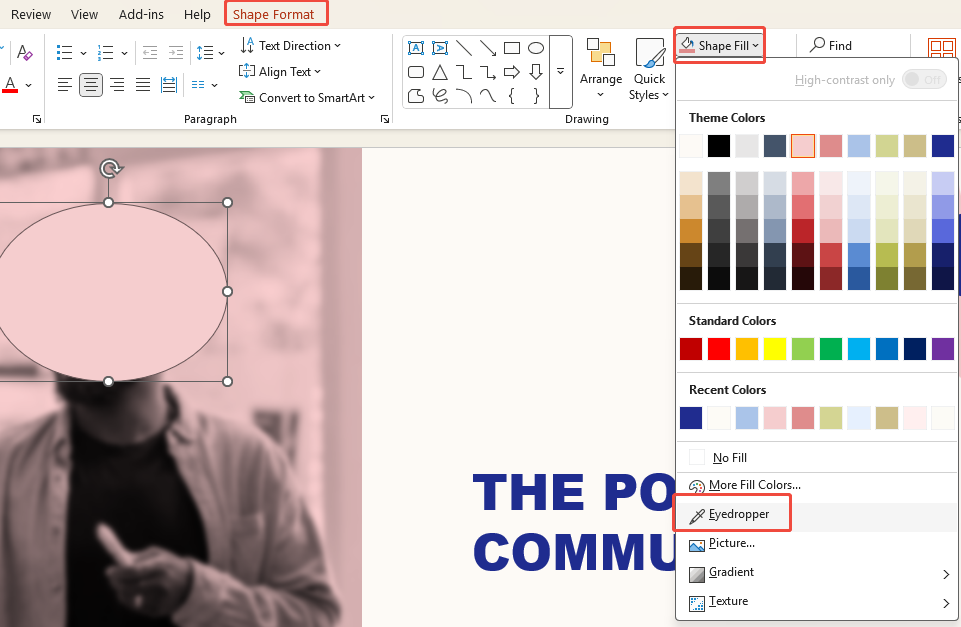
5. Use the eyedropper to pick a color from the background, blending the shape with the image.
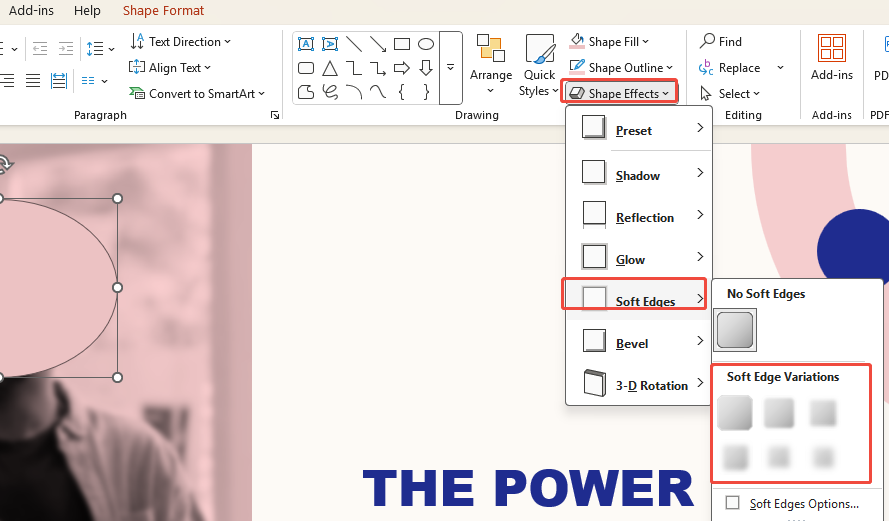
6. Next, choose “Shape Effects”, click “Soft Edges”, and select one of the “Soft Edges Variations” to achieve a partial blur effect.
This blends in surprisingly well. It’s not a true “mosaic” tool, but it works great for quickly covering sensitive spots without making the slide look awkward.
Extra Tips: Create Stunning Slides Faster with WorkPPT
If you only use PowerPoint now and then, the “how to blur an image in PPT” methods above work fine. But if you make presentations often, tasks like formatting, finding images, and tweaking styles can eat up a lot of time. I started using AI tools like WorkPPT, and it instantly doubled my efficiency.
- One-Click Slides: Just type your text or upload a Word/PDF, and it instantly turns it into a PowerPoint.
- Smart Layout: Picks the right templates and layouts for you—no need to waste time on formatting.
- Built-in Image Processing: Finds images automatically, and lets you swap or edit them in seconds.
- Extra AI Features: It also works with PDFs, summarizes documents, and even Mind Map—your all-in-one productivity helper.
If you only use PowerPoint occasionally, you probably don’t need this. But if you’re like me and make decks every week, tools like this feel like a secret weapon.

FAQs about How to Blur an Image in PPT
Q1: Does PowerPoint have a "mosaic" feature?
Q2: Can I undo the blur after applying it?
Q3: Does blurring affect file size?
Q4: Can I blur image in Powerpoint on mobile?
Q5: Can I save blurred PowerPoint images?
💬 Conclusion:
Blurring a picture in PowerPoint may seem like a minor thing, but it can make a real impact in presentations. It keeps private info safe, makes your slides look cleaner, and even adds a nice design touch.
Next time you’re putting together a deck, try using blur on purpose—you’ll be surprised at how much more polished your slides look.