
Ever run into this problem? You carefully pick a stylish PowerPoint template, but during class or meetings, everyone ends up staring at the background instead of your content.
This is where the foggy background trick comes in. It keeps the texture of the background but shifts the focus back to your text and visuals. Let’s explore how to make a foggy background using Google Slides gradients.
- What is Foggy Background in Google Slides
- How to Create a Foggy Background Using Google Slides Gradient
- Tips for a Perfect Foggy Background Effect
- FAQs about Creating Foggy Backgrounds Using Gradients
- Q1: What if the background image looks too busy?
- Q2: Which is better for foggy backgrounds: gradients or solid colors?
- Q3: Are there recommended gradient color combinations?
- Q4: Can I use fog-effect images instead of gradients?
- Q5: How do I ensure text remains legible on foggy backgrounds?
- Q6: Can I apply fog effects to multiple slides at once?
What is Foggy Background in Google Slides
A foggy background applies a blur filter to the background. It softens sharp, high-contrast backgrounds through blurring, gradients, or opacity, thereby highlighting text content.
While Google Slides doesn’t hace a blur tool, buy we can fake the effect with gradients or semi-transparent shapes. Its advantages include:
- Highlighting presentation focus: Softened backgrounds naturally draw viewers’ eyes to text and charts.
- Elegant and sophisticated: Compared to solid colors, foggy backgrounds add depth and appear more refined.
- Enhanced visual comfort: Audiences won’t feel overwhelmed by overly bright or cluttered backgrounds.
A foggy background acts as an invisible assistant in presentations—it never steals the spotlight but helps establish the overall atmosphere.
How to Create a Foggy Background Using Google Slides Gradient
1. Create Foggy Effect with Gradient Feature
Step 1. Open Google Slides and select the slide where you want to apply the effect.
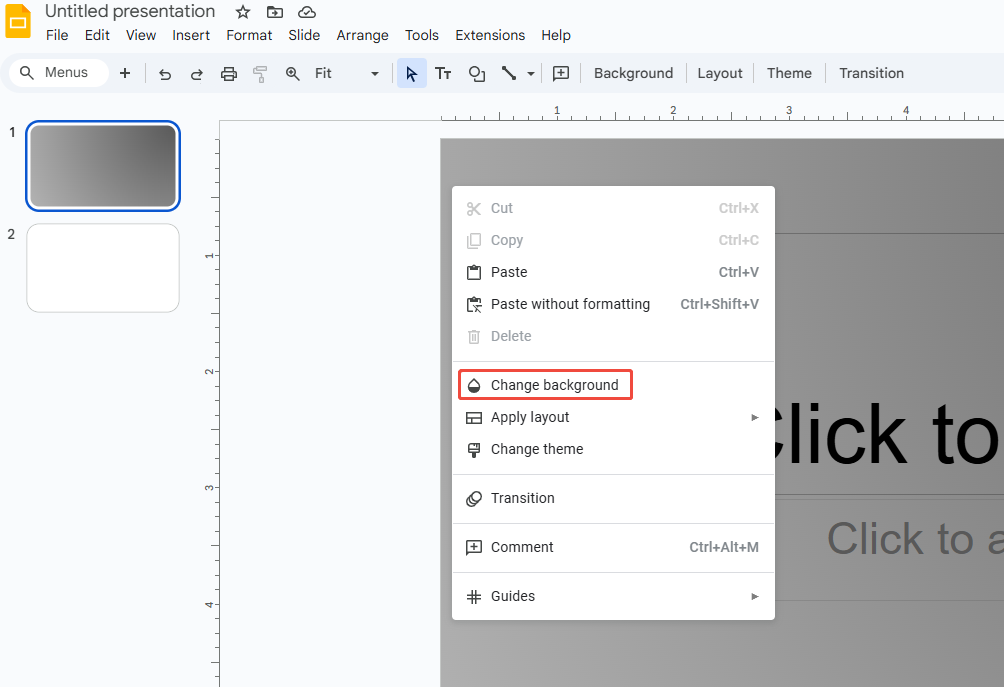
Step 2. Right-click in a blank area and select “Change background”.
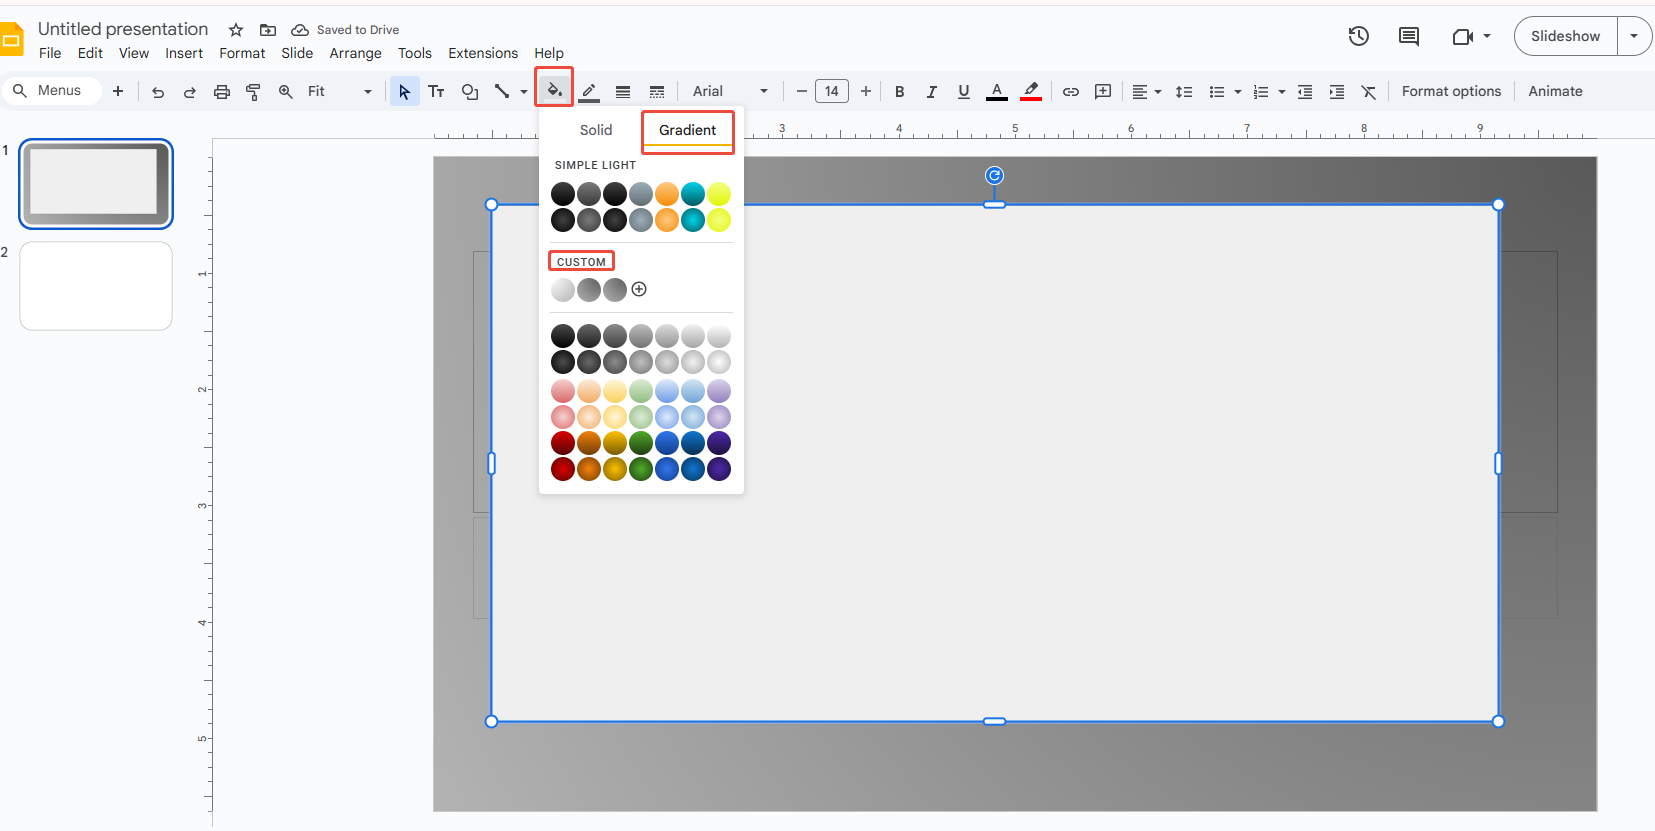
Step 3. In the pop-up window, click “Color”, then select “Gradient” from the dropdown. Choose a gradient that complements your background.
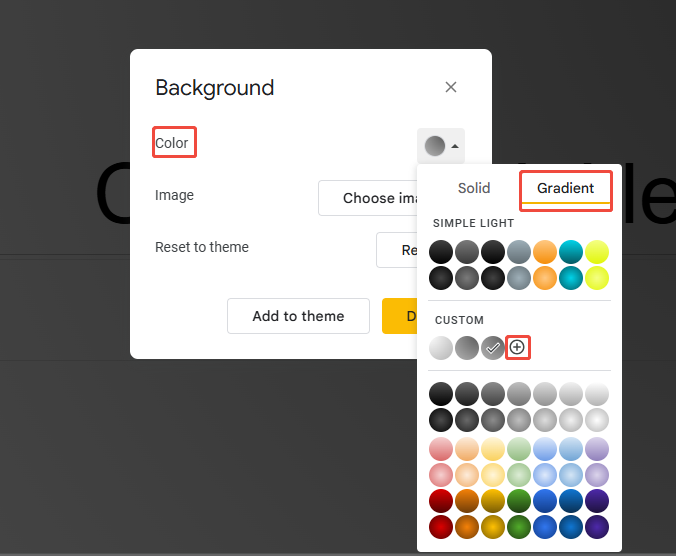
Step 4. Click “Custom Gradient” to adjust the gradient direction, color intensity, and more for a smoother transition.
Step 5. Use the slider to reduce the transparency of the color stops. Aim for 10% to 20% transparency to achieve a more blurred, foggy effect.
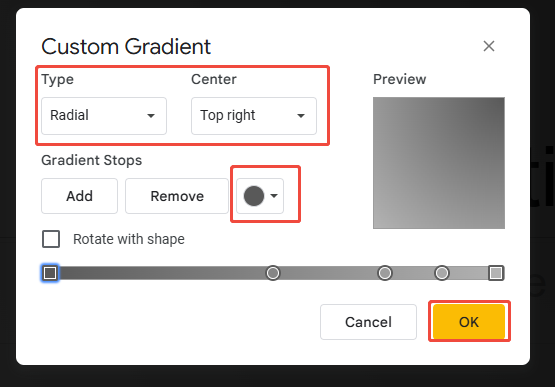
Step 6. Finally, click OK to save your foggy background.
2. Overlaying Semi-Transparent Shapes
If you prefer not to modify the background pictures for slides, you can achieve a fogged effect through layering.
Step 1. Insert a rectangle that covers the entire slide.
Step 2. Set the fill color to white or light gray.
Step 3. Adjust the transparency to 30%–50% to allow the background image to show through while adding a “fogged” layer.
Step 4. For added depth, apply a gradient fill to the rectangle.
Making a good PPT usually takes time, but WorkPPT makes it fast and easy. WorkPPT turns a simple theme into logical, well-designed presentations with a single click. Its 5000+ templates save you hours on design so you focus on content.
💡 What you’ll get from WorkPPT:
- Template library: WorkPPT comes equipped with a rich library of professionally designed border templates ready for you to use.
- AI Presentation Maker: Generate full slides with layouts, text, and visuals-60s, one-click.
- Seamless export: Download to Google Slides or PowerPoint in one click.

Tips for a Perfect Foggy Background Effect
While gradients alone can achieve the effect, elevating the Google Slides background to look truly sophisticated requires attention to detail:
- Fog effects inherently soften visuals, so light color palettes work best.
- Transparency levels between 30%–50% yield the most pleasing results.
- Opt for linear or radial gradients to ensure smooth color transitions.
- For business presentations, choose gray-white or blue-gray palettes for a professional look.
- Educational materials may benefit from lighter hues like pale blue or mint green.
FAQs about Creating Foggy Backgrounds Using Gradients
Q1: What if the background image looks too busy?
Q2: Which is better for foggy backgrounds: gradients or solid colors?
Q3: Are there recommended gradient color combinations?
A: Common effective combinations include:
White → Light Gray
White → Translucent Gray
Light Blue → White
Light Purple → Translucent White
These palettes are soft and create a “hazy” atmosphere.
Q4: Can I use fog-effect images instead of gradients?
Q5: How do I ensure text remains legible on foggy backgrounds?
Q6: Can I apply fog effects to multiple slides at once?
💬 Conclusion:
Creating a foggy background using Google Slides gradients is a simple yet practical trick. Next time you build a deck, try adding a touch of “fog” to your background. This naturally draws your audience’s attention to your content without distractions.
If you want to create polished PPTs effortlessly in one go, definitely try WorkPPT AI Slide Maker. It combines AI PDF and AI Mind Map into one tool, significantly boosting your productivity and serving as your reliable workplace assistant.