
If your PowerPoint feels a bit flat even after all the effort you’ve put in, the issue might be the text! Regular text can make slides look plain, but WordArt gives titles and key point a stylish boost.
It’s an easy way to make your presentation look polished. Let’s look at how to change existing text to WordArt in PowerPoint, making your slides shine.
- The Advantages of Using WordArt in PowerPoint
- How to Change Existing Text to WordArt in PowerPoint
- Tips for Using WordArt Effectively
- FAQs about Converting Existing Text to WordArt in PPT
- Q1: Can I edit the text after converting it to WordArt?
- Q2: Does existing text to WordArt in PPT increase file size?
- Q3: Does WordArt look the same across different PowerPoint versions?
- Q4: Can existing text to WordArt be used in charts or tables?
- Q5: Does existing text to WordArt in PPT affect print quality?
The Advantages of Using WordArt in PowerPoint
PowerPoint WordArt transforms ordinary text into eye-catching designs that make your presentation stand out:
- Applying WordArt makes the text stand out with colors, outlines, or 3D effects, so people notice the important parts right away.
- WordArt lets you easily change colors and transparency so it matches the presentation’s design.
- Text with color and design is more memorable than plain black-and-white text.
Whether for classroom presentations, assignment reports, or business promotions, WordArt is a powerful way to make your PowerPoint more refined and eye-catching.

Is There an Easier Way?
How to Change Existing Text to WordArt in PowerPoint
A lot of people think you can only use PowerPoint WordArt when adding new text, but actually, you can turn any existing text into WordArt with just a few clicks. It’s quick and simple.
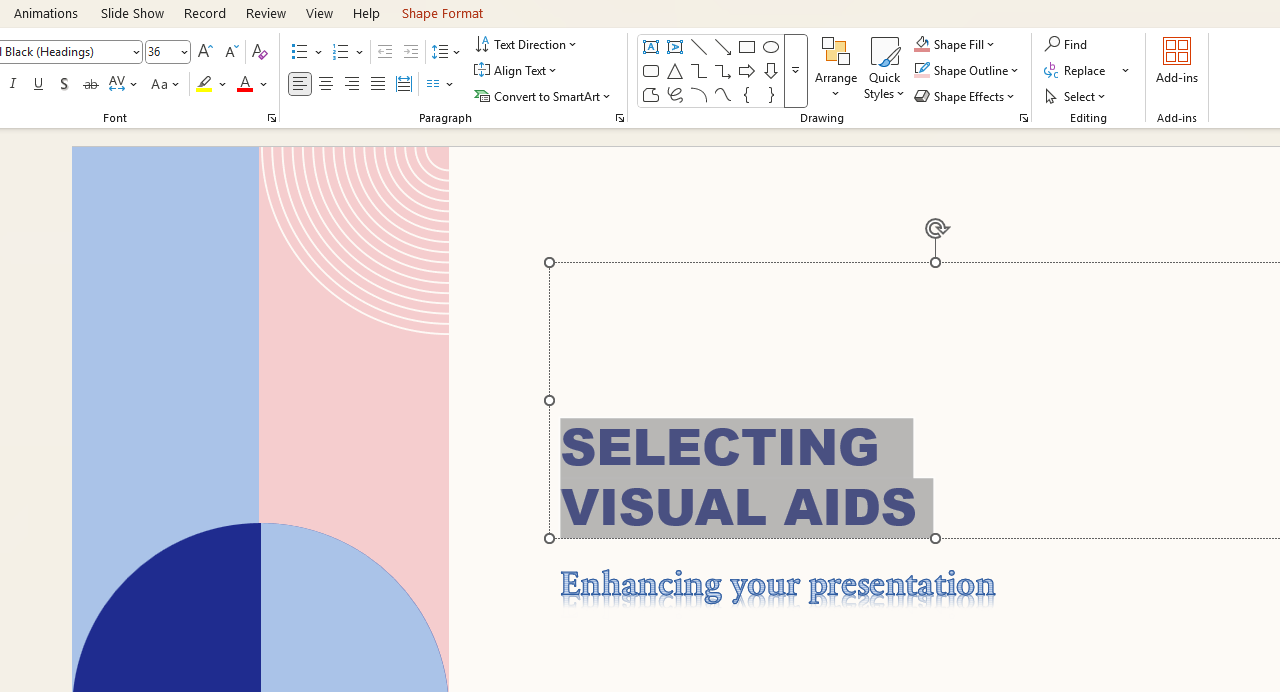
Step 1: Select the Text
Launch PowerPoint, open your presentation. Locate the text you want to convert, and select it with your mouse.
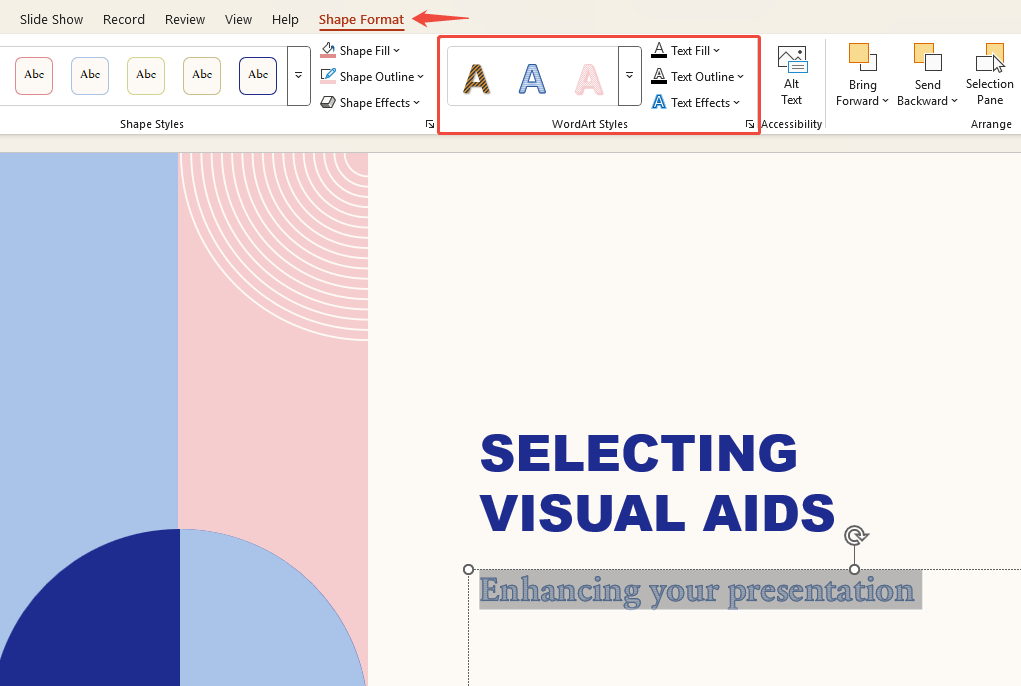
Step 2: Browse WordArt Styles
In the top toolbar, click “Shape Format”. Under “WordArt Styles” group, try different effects to see how they look, then pick one you like.
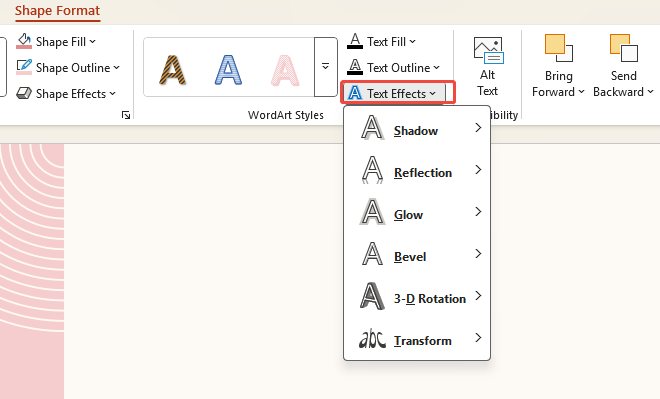
Step 3: Adjust Details and Effects
Once you add a WordArt style, click “Text Effects”. You’ll see options like “Shadow”, “Reflection”, “Glow”, and “3-D Rotation”. Try these to make your titles and key points pop.
And that’s it! You’ve effortlessly turned plain text into stylish, eye-catching WordArt.
Tip: If the default styles seem too flashy, apply one first and then adjust it to fit your presentation’s vibe.
Tips for Using WordArt Effectively
WordArt can certainly make text stand out, but overuse can backfire. Here are a few tricks to help you use WordArt in PowerPoint more professionally:
- Keep it simple: Don’t add WordArt on every slide. Use it only for title slides, section dividers, or key content.
- Match the colors: Pick WordArt colors that work with your background. Skip flashy effects that make text hard to read.
- Maintain Consistency: Stick to one WordArt style per presentation. Too many styles create clutter.
- For business Presentations: Opt for clean outlines or shadows for a professional, authoritative look.
- For school events or talks: Try bold gradients or 3D styles to add visual interest.
FAQs about Converting Existing Text to WordArt in PPT
Q1: Can I edit the text after converting it to WordArt?
Q2: Does existing text to WordArt in PPT increase file size?
Q3: Does WordArt look the same across different PowerPoint versions?
Q4: Can existing text to WordArt be used in charts or tables?
Q5: Does existing text to WordArt in PPT affect print quality?
💬 Conclusion:
WordArt in PowerPoint is easy to miss, but it can make your text stand out. It adds visual interest and helps your audience grasp key points faster. Next time you create a presentation, try existing text to wordart—you’ll see the difference.
And if you’re rather skip the manual work, WorkPPT AI PPT Maker can create a perfect slides for you in just one click.