
To reduce PPT file size, you must first understand its size and structure to optimize it effectively.
On Windows: Go to “File > Info”, then look under “Properties” to see the file size.

On Mac: Click “File > Properties”, and check the “General” section for the size.
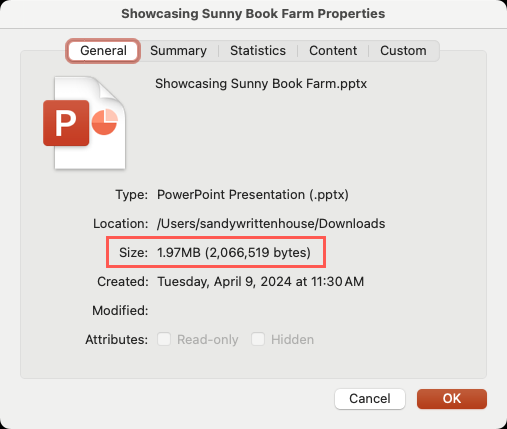
Before compressing a PPT, record the original file size. This allows for a more intuitive comparison of the results after compression.
Method 1: Compressing Images
Images usually take up most of the space in a PowerPoint file, so compressing them is the easiest way to make your PPT smaller.
Windows Steps:
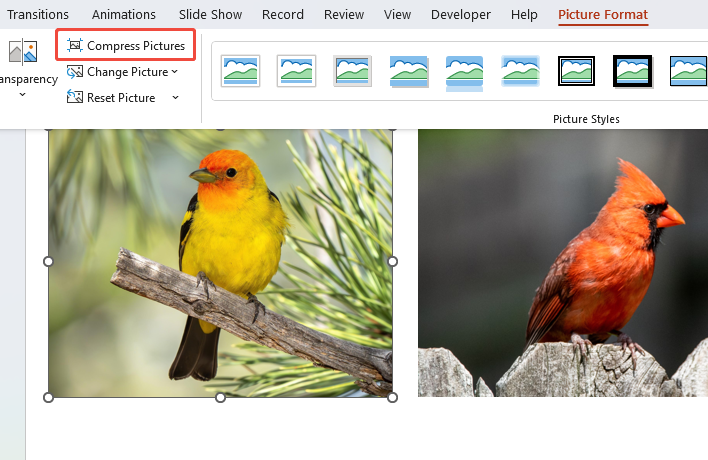
Step 1: Open the PPT file and select any image you wish to compress.
Step 2: In the top menu, click “Picture Format”, then select “Compress Pictures”.
Step 3: In the pop-up window, decide whether to compress just this image or all images in the file.
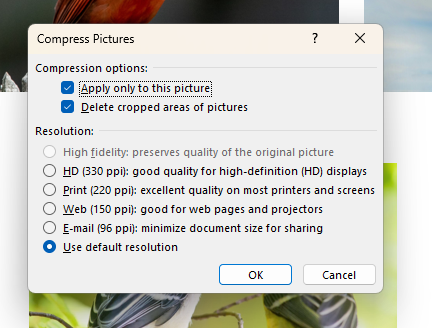
Step 4: Click “OK” to complete compressing the images in the PPT.
Mac Steps:
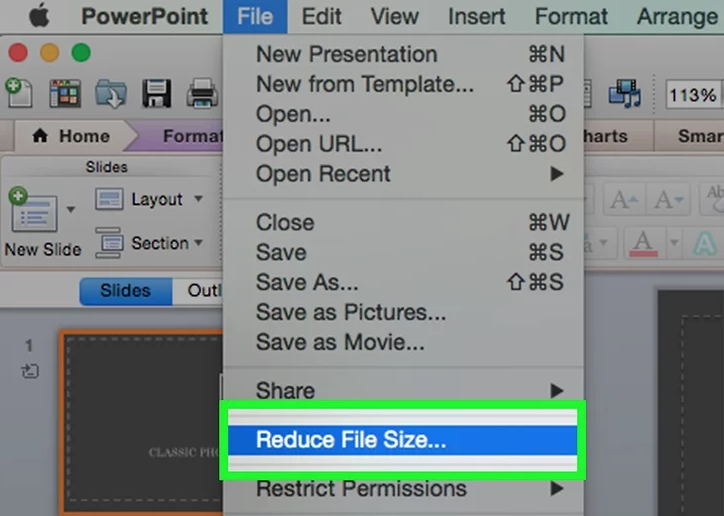
Step 1: Select any image, then click “File > Reduce File Size”.
Step 2: In the pop-up window, click the “Picture Quality” dropdown menu and select Best for sending in e-mail. This option reduces all images in the PPT to 96 ppi.
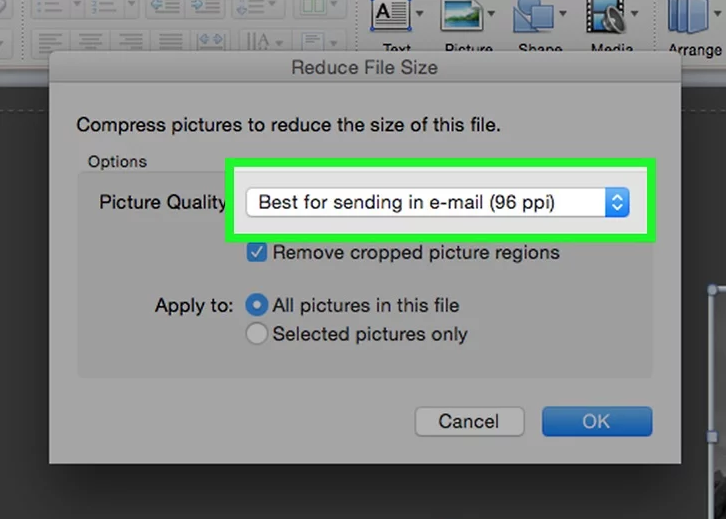
Step 3: Click “Remove cropped picture regions” to delete unused image parts.

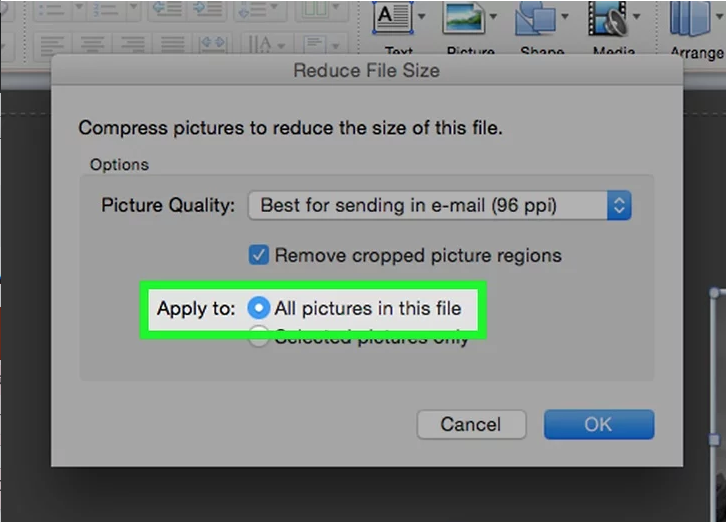
Step 4: Check “All pictures in this file” to compress all images in the presentation, then click “OK” to finish.

 [You May Also Like]: How to Add Music to PowerPoint
Method 2: Convert Images to Compatible Formats
Some image formats, like PNG, are much larger than JPG. Switching to a lighter format can help minimize PowerPoint file size.
Step 1: Locate the image in the PPT, right-click it, and select “Save as Picture”.
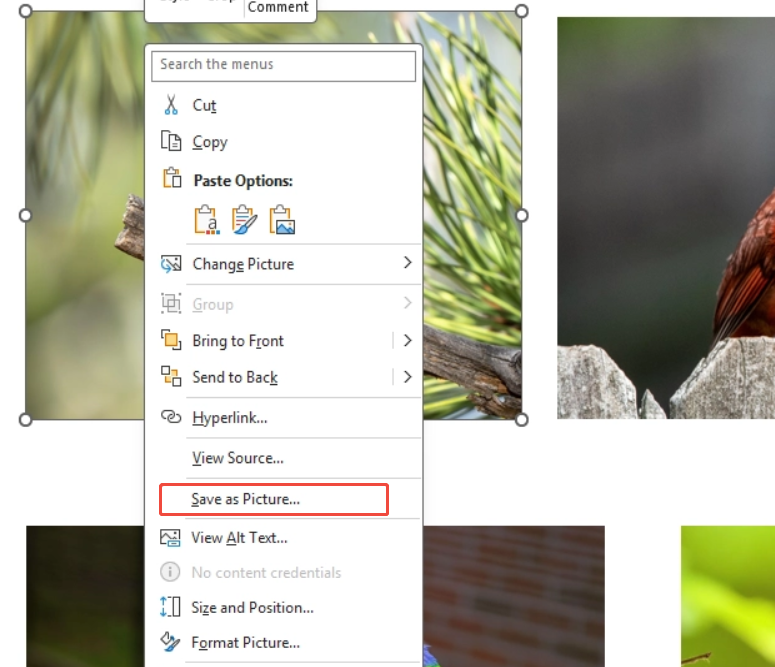
Step 2: Choose JPG for photos or keep PNG/SVG for icons and graphics. Then replace the original image.
Vector graphics or icons can remain in SVG/PNG format, while reducing the space occupied by photo-type images.
Method 3: Compress Audio and Video
Audio and video files are typically quite large. You can use PowerPoint’s built-in compression tool to decrease PowerPoint file size.
Step 1: Open and select the media file you want to compress, then click “File > Info”.
Step 2: Under “Media Size and Performance”, click “Compress Media” and choose a quality level.

Step 3: Wait for PowerPoint to finish. Then check if the video still looks and sounds good.
Before compressing, make a backup copy. Too much compression can lower video or audio quality. If compression doesn’t work, make sure your media is in MP4 or MP3 format.
Method 4: Link Videos Instead of Embedding
Linking to a video takes up less space than embedding it, but make sure the video path stays correct when you play it.
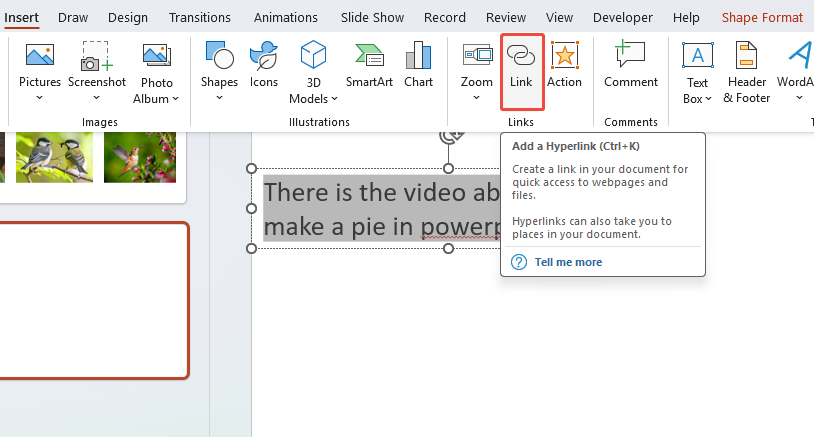
Step 1: Prepare text for the video link. Select the text, then click “Insert > Link”.
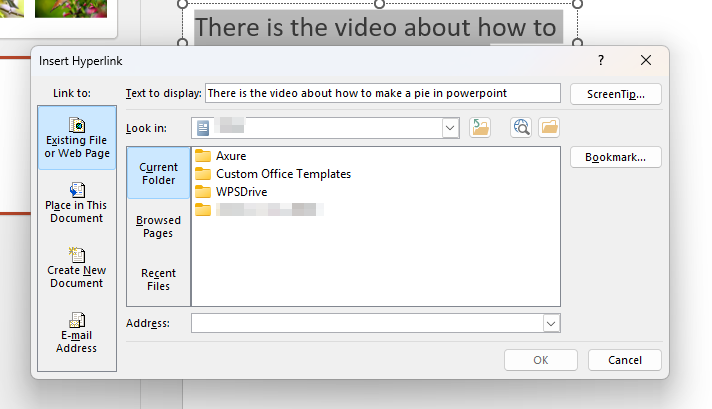
Step 2: Paste the online video link or the local file path in the box.
If you move your PowerPoint file, remember to move the video file too. Otherwise, it won’t play.
Method 5: Reduce Embedded Characters
Embedding custom fonts increases file size. If not used across computers, uncheck this option to reduce PowerPoint file size:
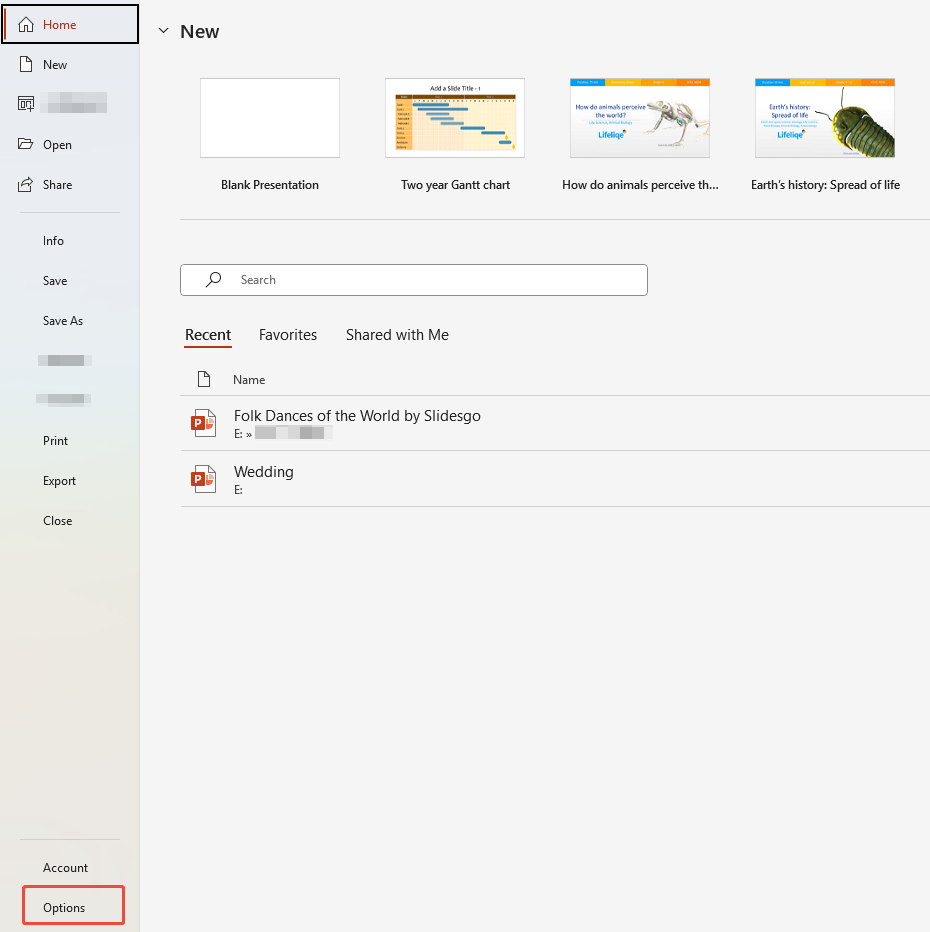
Step 1: Click “File > Options”.
Step 2: In the window that appears, locate the “Save” section. Under “Preserve fidelity when sharing this presentation”, uncheck “Embed fonts in the file”.

Step 3: Save the settings.
Only embed fonts if you need them to display correctly on other devices.
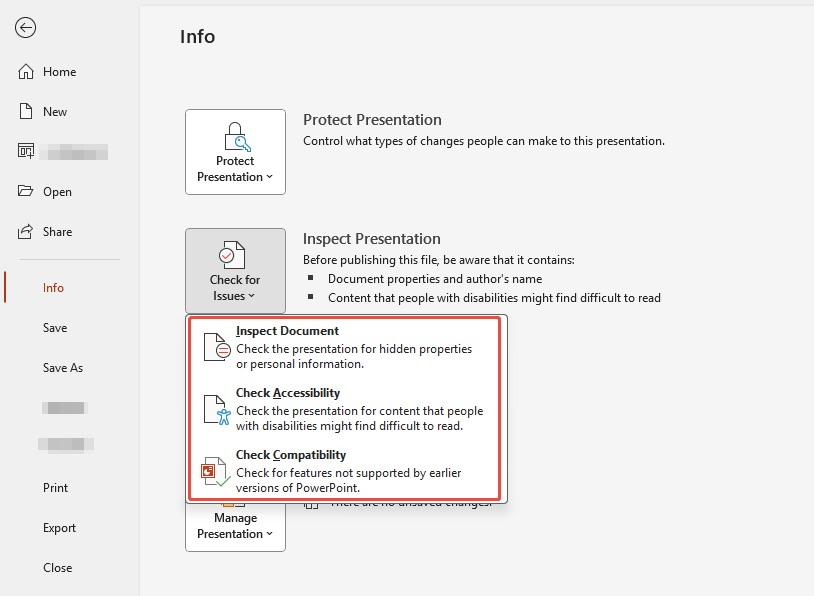
Method 1: Remove Hidden Slides and Notes
Hidden slides and notes also take up space, so clearing them can effectively shrink PPT file size.
Step 1: In “Slide Sorter” view, review all slides and right-click to delete hidden slides.
Step 2: Click “File > Info > Inspect Presentation”, then review the document to remove speaker notes.
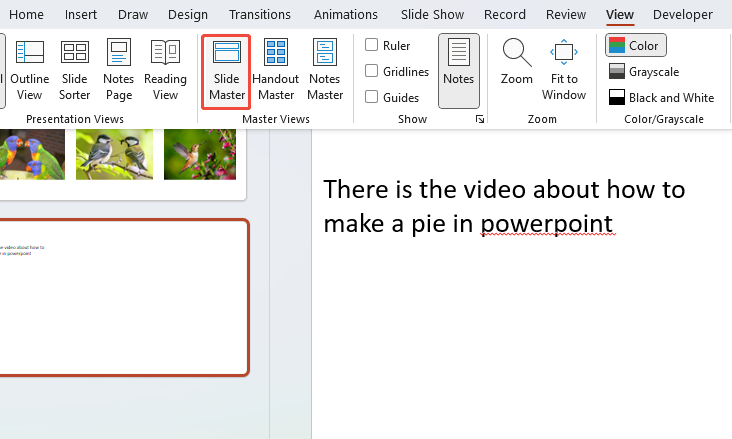
Method 2: Delete Unused Master Slides
Extra master slides can make your file bigger. Deleting the ones you don’t use keeps your presentation smaller.
Step 1: Click “View”, then “Slide Master”.
Step 2: Review each master slide and layout, deleting all unused layouts and master slides.
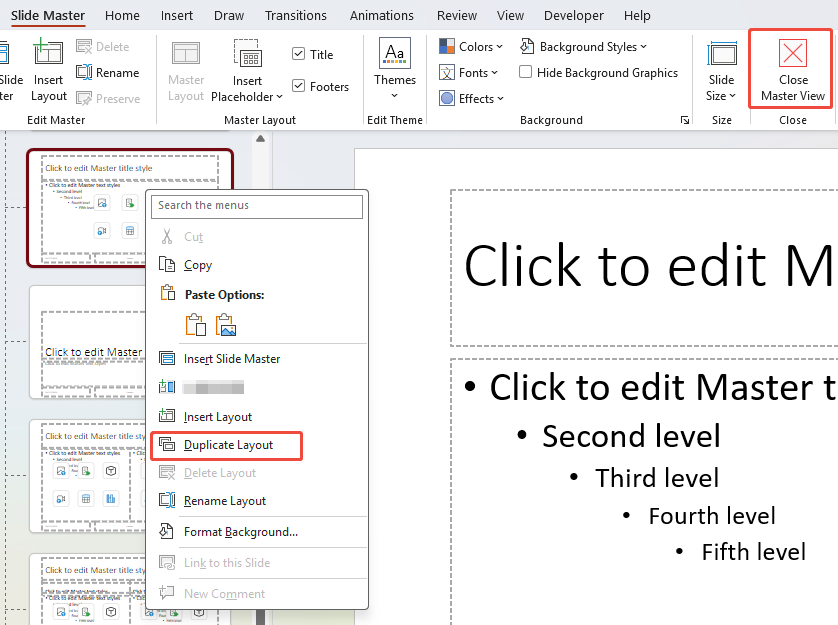
Step 3: Finally, save and exit Master View.
Tip: Deleting master slides won’t affect slides you’re already using.
Method 3: Remove Editing Data
Removing history, version information, and similar content also increases file size. Cleaning these elements can reduce size of PPT.
Step 1: Open the PPT and click “File > Options”.
Step 2: In the dialog box that appears, click “Advanced” and check “Discard editing data”. This will remove redundant information from PowerPoint.
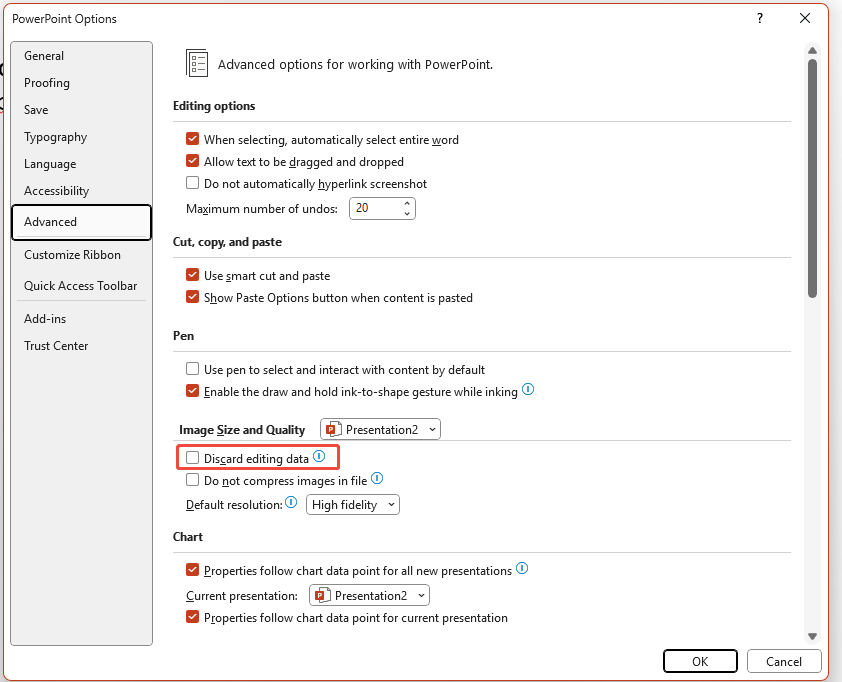
After completing these steps, save the settings and the PPT.
WorkPPT AI Presentation Maker is an AI presentation maker. You simply enter your text, and Workppt generates a professional PowerPoint presentation in 30 seconds.