The Slide Master is a powerful tool for ensuring a professional, consistent look across your entire presentation. This guide will show you how to edit the Master Slide in PowerPoint, making changes like applying a logo, setting default fonts, and customizing layouts with just a few clicks.
- Ⅰ. Understanding and Accessing the Slide Master in PowerPoint
- Ⅱ. Managing the Slide Master and Layouts
- III. Core Edits to the Master Slide (Global Design Control)
- Ⅳ. Working with Placeholders on Slide Layouts
- V. Finalizing and Deployment
- FAQs About Editing Master Slide in PowerPoint
- Q1: Where is slide master in PowerPoint?
- Q2: Why can't I edit a slide in PowerPoint?
- Q3: Can I use multiple slide masters in one presentation?
- Q4: How to add editable text box in slide master PowerPoint?
- Q5: How to add footer in powerpoint slide master?
- Q6: How to add a logo to the master slide in PowerPoint?
- Q7: How to add slide number in PowerPoint slide master?
- Q8: How to apply master slide in PowerPoint?
Ⅰ. Understanding and Accessing the Slide Master in PowerPoint
Before you can make changes, you need to know what is a Slide Master in PowerPoint and where is Slide Master in PowerPoint.
What is a Slide Master?
The Slide Master is the top template slide in a hierarchy. Think of it as the ‘parent’ slide. Any change you make to this main Master Slide will automatically apply to all its ‘children'(Slide Layouts), and subsequently to every slide in your presentation.
Master Slide vs. Layouts
- Master Slide (the parent): The big thumbnail at the top. It controls global elements like your company logo, main background color, and default fonts.
- Slide Layouts (the children): The smaller thumbnails below. Each one represents a specific slide type (like Title Slide or Title and Content). They follow the master’s design but can have their own tweaks, such as different text or image placeholder positions.
How to Access the Master Slide in PowerPoint
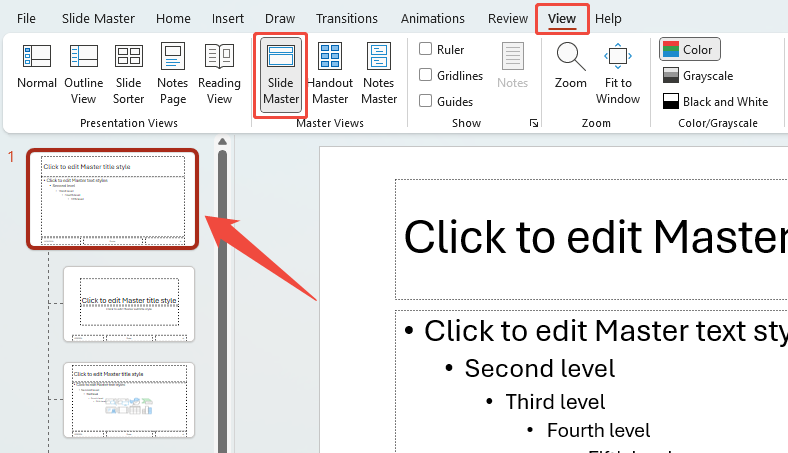
Go to the View tab in the PowerPoint ribbon, then click Slide Master under the “Master Views” group. In the left panel, scroll to the very top and select the largest slide — this is your main Slide Master.

If you need professional, custom-branded slides instantly, consider using WorkPPT, turning hours of design work into minutes.
Ⅱ. Managing the Slide Master and Layouts
Once you are in the Slide Master View in PowerPoint, you have full control over your templates:
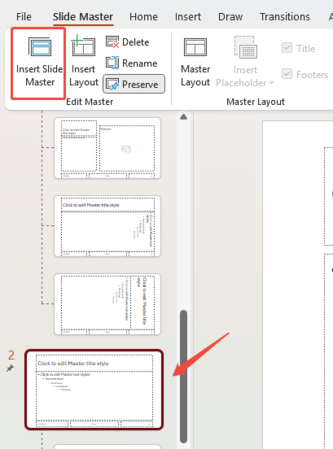
- Create a new master slide: Click “Insert Slide Master” on the Slide Master ribbon (Useful for different presentation sections or multi-brand decks).

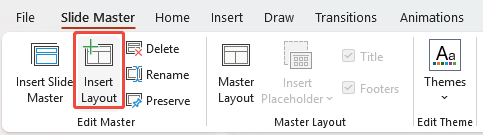
- Create New Layouts: Select your desired Master Slide, then click Insert Layout to add a blank slide template to the hierarchy for custom use.

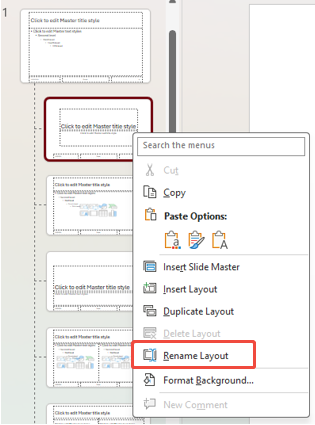
- Renaming Layouts:Right-click a layout thumbnail and choose Rename Layout. This makes it easy to find specific layouts when applying them in Normal View.

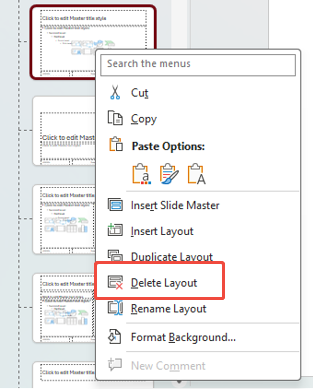
- Deleting Layouts: Delete Layout: Right-click any layout you don’t use and select Delete Layout to keep your New Slide menu clean and organized.

III. Core Edits to the Master Slide (Global Design Control)
These changes are applied directly to the top Master Slide and instantly affect all slides in your presentation.
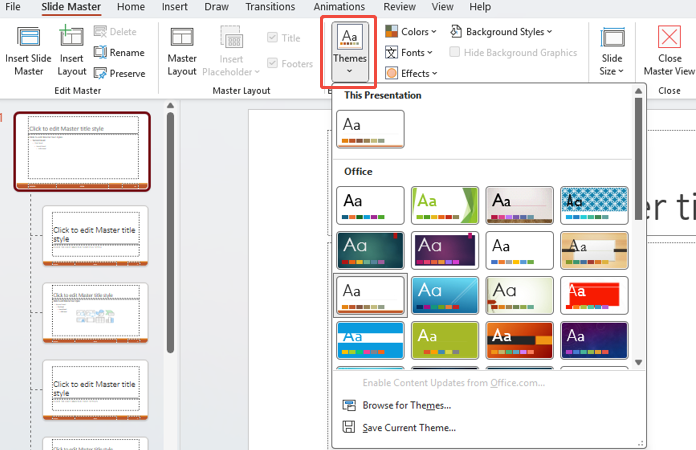
Applying a Theme and Color Scheme
- Selecting or modifying the overall Theme for a unified look.

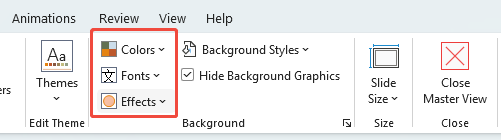
- Customizing Theme Colors and Theme Fonts (one for headings, one for body text).

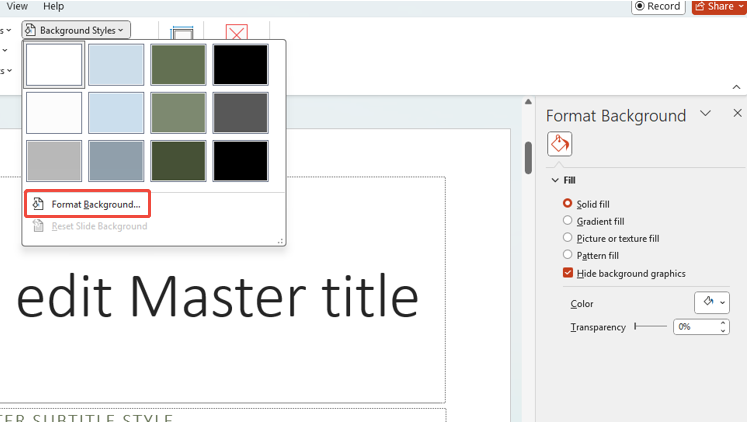
Background Style and Graphics
- Background Style: Applying a solid fill, gradient, or picture (Format Background pane).

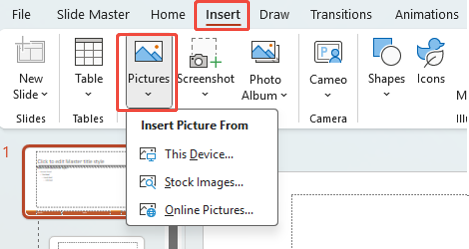
- Inserting a Logo or watermark:Go to Insert tab > Pictures > This Device

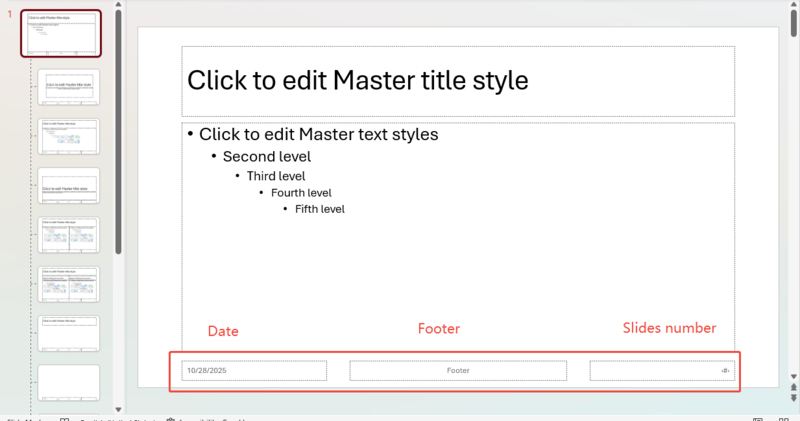
Date, Footer & Numbers
You can control the appearance and position of the Footer, Date, and Slide Number placeholders.

✍ [You May Also Like]: How to Draw on Google Slides?
Ⅳ. Working with Placeholders on Slide Layouts
Placeholders are boxes where content (text, image, or chart) is inserted in Normal View. They can define the structure and content type for each slide. Here are some tips about how to use them:
- Inserting: Selecting a layout > Slide Master tab > Insert Placeholder drop-down menu.

- Modifying and Positioning: Adjusting the size, position, and formatting (e.g., border style) of individual placeholders on a specific layout.
- Managing Default Placeholders: Using the Master Layout option to show/hide default title and footer placeholders.
V. Finalizing and Deployment
1. Exiting the Master View: Clicking Close Master View to apply all changes to the presentation slides.

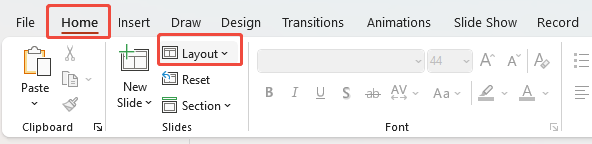
2. Applying Layout Updates: Reapplying a modified layout to existing slides (Home tab > Layout > select the updated layout)..

3. Saving the Custom Design: Saving the file as a PowerPoint Template (*.potx) for future reuse and sharing.
FAQs About Editing Master Slide in PowerPoint
Q1: Where is slide master in PowerPoint?
A: The Slide Master is located in the main ribbon. Go to the View tab, and then click Slide Master in the Master Views group.
Q2: Why can't I edit a slide in PowerPoint?
A: Confirm whether the file is preventing editing. To solve this problem, please contact the file owner or verify your folder permissions. If the presentation is password-protected, you must enter the correct password to view it.
Q3: Can I use multiple slide masters in one presentation?
A: Yes! Use the Insert Slide Master button in the Slide Master tab. This allows you to have multiple distinct themes within one presentation.
Q4: How to add editable text box in slide master PowerPoint?
A: You must use a Placeholder. Select your desired layout, go to the Slide Master tab, click Insert Placeholder, and choose Text or Content. Do not use the standard “Insert Text Box.”
Q5: How to add footer in powerpoint slide master?
A: In the Slide Master View, select the main master slide. Go to the Slide Master tab, click Master Layout, and ensure the Footer checkbox is checked. You can then reposition and format the footer text box.
Q6: How to add a logo to the master slide in PowerPoint?
Q7: How to add slide number in PowerPoint slide master?
A: First, ensure the Slide Number placeholder is visible (using the Master Layout option). Then, exit the Master View, go to the Insert tab, click Header & Footer, and check the Slide number box to activate the numbering on your slides.
Q8: How to apply master slide in PowerPoint?
A: To apply the Master’s design to a slide, select the slide in Normal View, go to the Home tab, click Layout, and choose one of the layouts associated with the Master.
💬 Conclusion:
Knowing how to edit master slide in PowerPoint is a vital skill for anyone who presents professionally. By mastering the slide master view in PowerPoint, you eliminate repetitive work and guarantee your presentations are always consistent and perfectly polished.
While the Master Slide handles consistency beautifully, remember that modern presentation workflows are faster than ever. If you need to generate custom, rapidly consistent design slides without manual layout work, tools like WorkPPT offer a powerful way to accelerate your design process.


