Circular images in slides look cleaner, modern, and visually balanced, whether for profile photos, team introductions, or creative designs. But if you’ve never tried it before, how to make an image a circle in Google Slides can be a little tricky. Don’t worry, we’ll walk you through it step by step.
- How to Make an Image a Circle in Google Slides
- Common Mistakes to Avoid When Cropping Picture into Circles
- How to Revert or Edit a Circular Crop
- How to Make a Circular Picture Border in Google Slides
- Effortlessly Create PPT with AI Tools - WorkPPT
- FAQs about How to Make an Image Circular in Google Slides
How to Make an Image a Circle in Google Slides
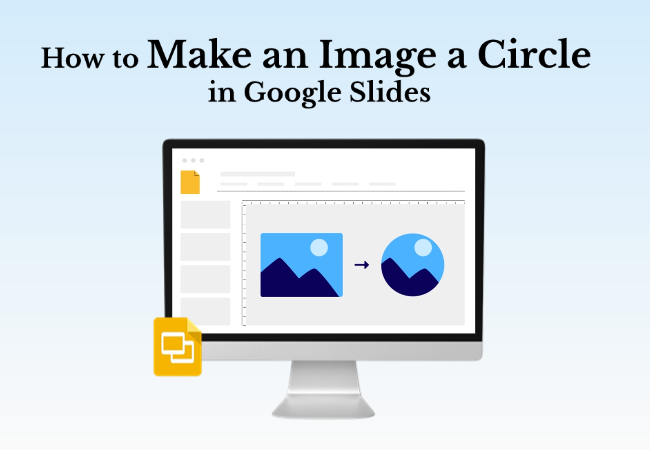
This is the easiest and most reliable method to crop images into a circle directly inside Google Slides without extra software needed.
Step 1: Insert Your Image
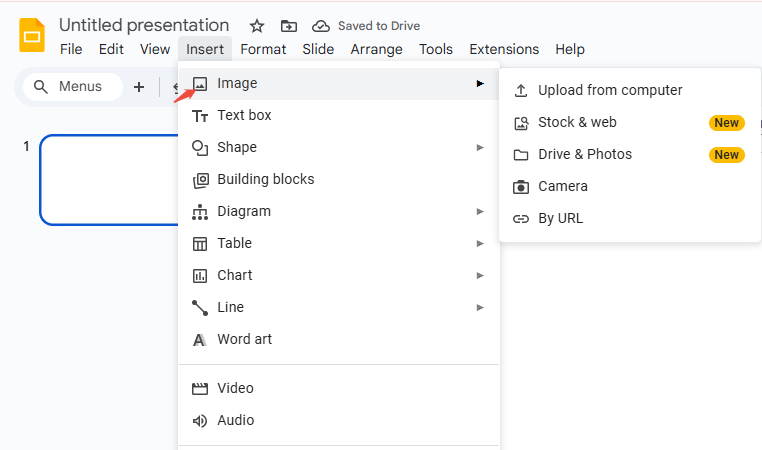
Open your presentation in Google Slides.
Go to the top menu and click “Insert > Image”.
Choose how you want to upload your image:
- Upload from computer
- Stock & web
- Drive & photos
- By URL
Once uploaded, the image will appear on your slide in a rectangular frame.

Step 2: Select the Image
Click on your image once. A blue outline will appear around it, this means the image is selected and ready for editing.
Step 3: Click the Crop Icon
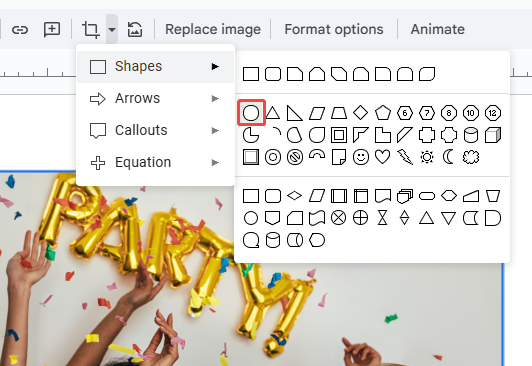
On the toolbar above, click the Crop icon (it looks like a square with overlapping corners).
Click the small arrow next to it to open the shape options.
![]()
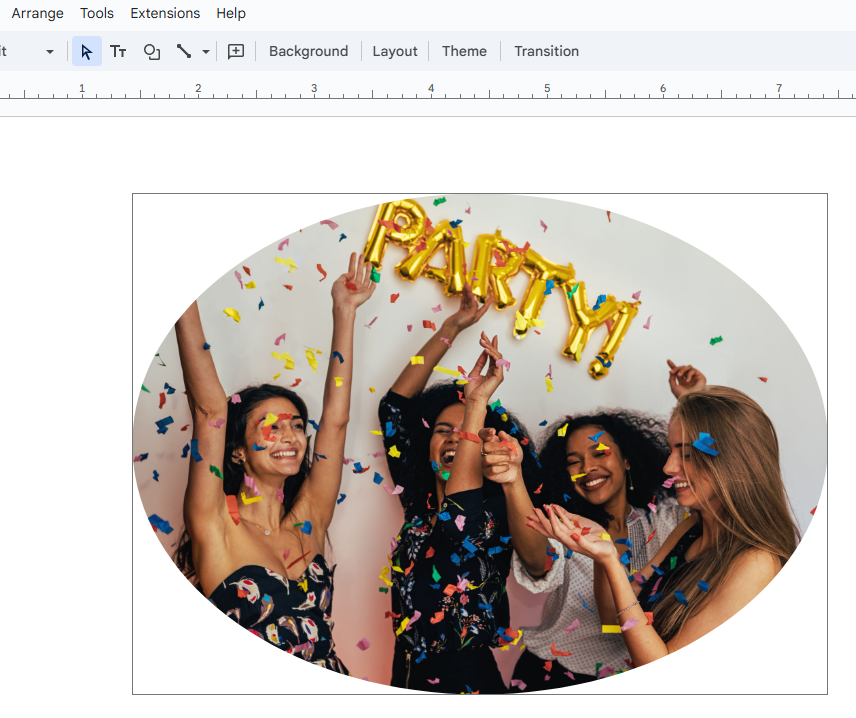
Step 4: Choose a Circular Shape
In the dropdown, hover over “Shapes”, then select the “Oval” shape.
Hold down the Shift key while dragging your mouse to adjust the crop.
Drag the crop handles until your image looks centered and circular.

Step 5: Apply the Crop
Once satisfied, press Enter or click outside the image. Your image is now a perfect circle in Google Slides.

✍ [You May Also Like]: How to Put an Image in a Shape Google Slides
Common Mistakes to Avoid When Cropping Picture into Circles
Even though the process of making a picture a circle in Google Slides seems easy, beginners often make mistakes that affect the final look. Here’s what to watch out for:
1. Forgetting to Hold Shift: Without the Shift key, the crop may become an oval instead of a perfect circle.
2. Low-Resolution Images: Small or pixelated image leads to blurry edges after cropping. Always start with high-quality images.
3. Distorted Proportions: Resizing without holding Shift can stretch the image unnaturally.
4. Overlapping Borders: If borders look cut off, it might be due to overlapping shapes. Reapply the border using the toolbar.
By avoiding these mistakes, your circular photos in Google Slides will always look crisp and professional.
Design Smarter with WorkPPT AI
Tired of spending hours designing your Google Slides? Try WorkPPT for free today and transform plain slides into eye-catching presentations!
How to Revert or Edit a Circular Crop
Sometimes, you might need to adjust your circular image or revert it back to its original shape. Here’s how:
Step 1 – Select the Image: Click on the circular image you want to edit.
Step 2 – Click the Crop Icon: Press the Crop image button on the toolbar. The crop handles will reappear, allowing you to adjust the circle.
Step 3 – Resize or Move the Crop Area: Drag the handles to include more or less of the image. You can also reposition the image inside the circle by dragging it.
Step 4 – Revert to Original: To remove the circular crop entirely, right-click the image and choose “Reset image”. This restores the original rectangular image.

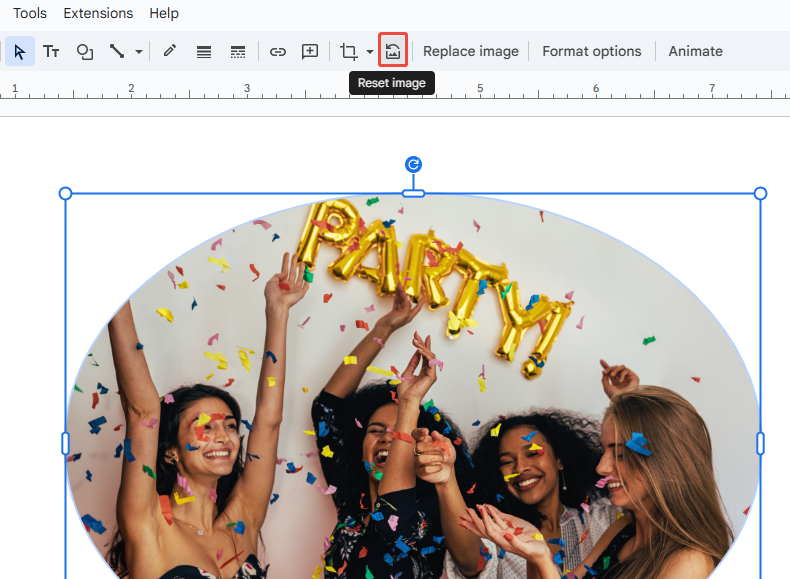
Google Slides does not limit how many times you can edit the crop. You can experiment freely until the image looks perfect.
How to Make a Circular Picture Border in Google Slides
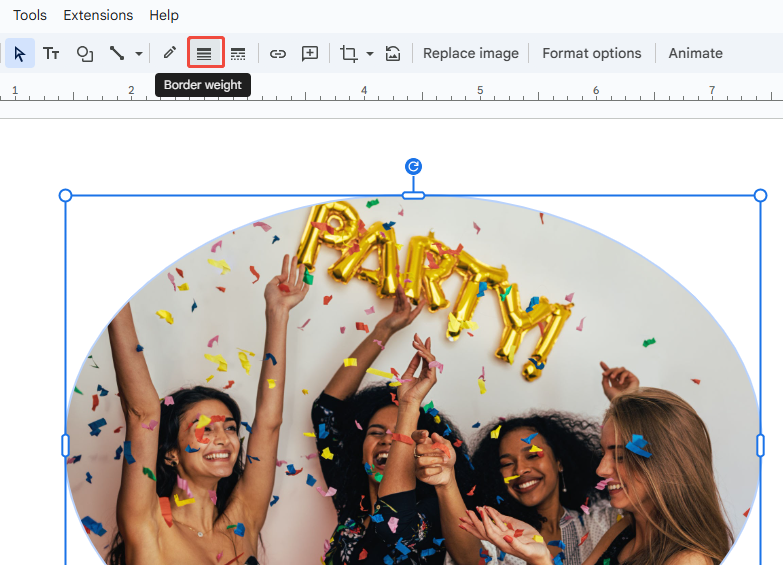
Circular images look even better with a subtle border. It helps them stand out, especially on plain backgrounds. Here’s how to add one:
Step 1: Click on your circular image to select it.
Step 2: From the toolbar, choose “Border color” (the pencil icon).

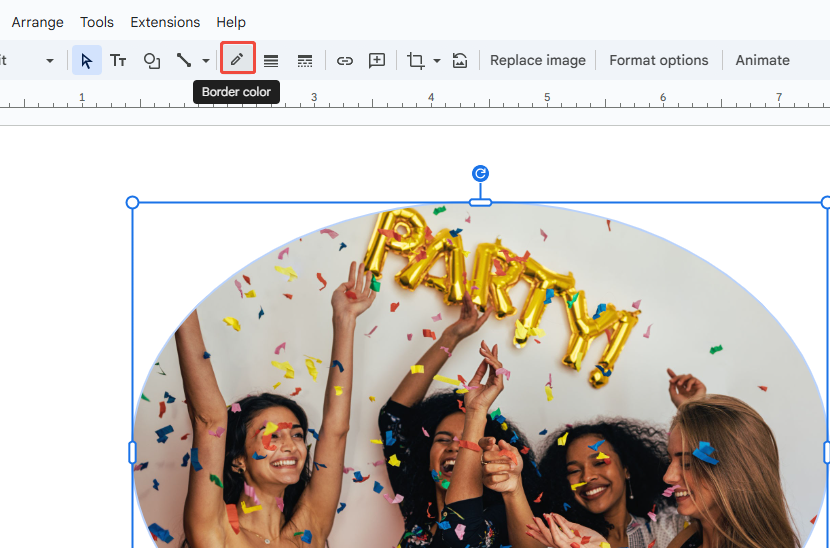
Step 3: Pick your desired shape color. Then select “Border weight” to adjust thickness.

✍ [You May Also Like]: How to Make a Foggy Background Using Google Slides
Effortlessly Create PPT with AI Tools - WorkPPT
If you’re tired of endlessly creating Google Slides, give WorkPPT AI PPT Maker a try.
It’s a great helper for crafting slides, transforming your simple ideas into polished slides quickly and easily without any hassle.
Plus, it boosts productivity with a smooth all-in-one office experience.

FAQs about How to Make an Image Circular in Google Slides
Q: Can I make a circular image without cropping in Google Slides?
A: Not directly. Google Slides doesn’t have a true masking feature. Cropping with the circle shape is the only built-in method.
Q: How do I make multiple circular images in Google Slides at once?
A: Google Slides doesn’t support batch cropping. You’ll need to repeat the process manually for each image. However, you can copy a cropped circular picture and replace the photo (right-click → Replace image) to maintain the shape.
Q: How can I download a circular image from Google Slides?
A: Right-click the circular image → Save as picture (if your browser supports it), or take a screenshot on a plain background.
Q: Can I make a circular image with a transparent background in Google Slides?
A: Google Slides itself doesn’t export transparent backgrounds, but you can use WorkPPT or Canva to make circular PNGs with transparency for your slides
💬 Conclusion:
Making an image a circle in Google Slides is quick and easy once you know the steps. And if you want to take your presentations to the next level, try using AI-powered tools like WorkPPT, which lets you generate stunning slide decks in seconds.
