author image

PDFs are great because their format stays fixed and doesn’t break easily. But the downside is obvious—they’re hard to edit. In classrooms or team meetings, static PDFs often feel flat and lack interactivity. Turning PDF into Google Slides fixes this. You get editable, flexible, and more engaging presentations. Here are 5 proven ways to convert PDF to Google Slides for different needs.

  • Easy Editing: PDFs are fixed, but Google Slides lets you change anything anytime.
  • Quick Updates: Edit text, update data, or add animations in seconds.
  • Work Together: Teammates can edit the same file live, no matter where they are.
  • Better for Presentations: Add charts, notes, or highlights instead of just flipping PDF pages.
  • Access Anywhere: Open Slides on any device with a Google account.

In short, PDFs are more like a record you keep, while Google Slides is made for real presentations and teamwork.

Which Method Should You Use

Different situations call for different ways to convert a PDF to Google Slides. Here’s how to pick the right one:

  • Easiest Way: Convert the PDF into images and drop them into Google Slides.
  • Best for Full Formatting: Turn the PDF to PPT first, then open it in Google Slides.
  • Quick Online Option: Use a PDF converter (third-party tool) for one-click conversion. Great if you don’t want extra steps.
  • No Conversion Needed: If you only need to share, just send the PDF link.
  • Smart Choice for Frequent Use: Install a Google Slides add-on to handle complex or repeated conversions.

Now, let’s take a closer look at each method.

How to Convert PDF to Google Slides with 5 Methods

Method 1: PDF to Images & Convert to Google Slides

This method is the easiest way to get a quick preview. Perfect if you don’t need to edit anything afterward.

Step 1 – Convert: Go to the free PDF to JPG tool. Drag/drop your PDF. Click “Convert to JPG” > “Download” (saves as a ZIP).

convert pdf to img

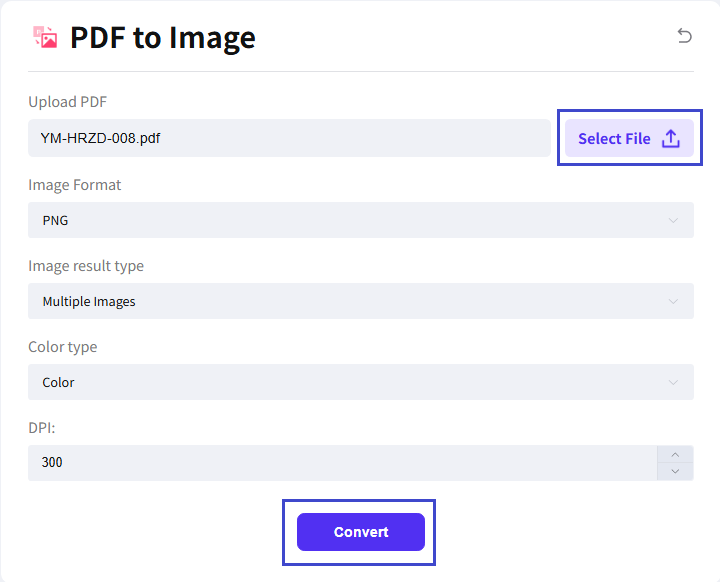
Step 2 – Extract: Unzip the downloaded folder to access individual JPGs or PNGs (one per PDF page).

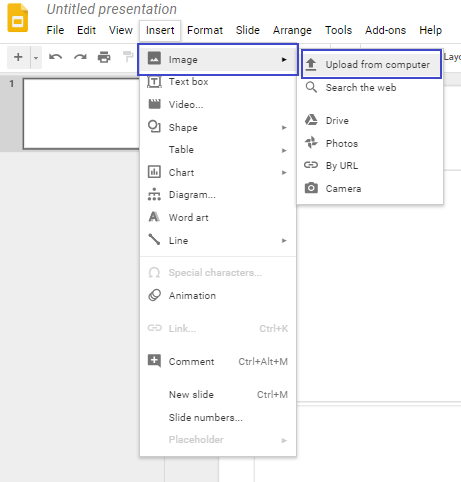
Step 3 – Insert into Slides: Open Google Slides > Blank presentation. Go to “Insert” > “Image” > “Upload from computer”. Select all the images. Click “Open”.

insert image to google slides

Step 4 – Adjust: Each image lands on a separate slide. Resize an image (Click + Drag corners) to fill the slide if needed. Repeat per slide.

😊Pros

😑Cons

Method 2: Turn PDF to PPT and Import to Google Slides

If you want to keep most of the editable elements – like text, tables, and shapes – this method works best.

Step 1: Upload the PDF file in the WorkPPT AI PowerPoint interface by clicking the button below.

upload pdf file to workppt

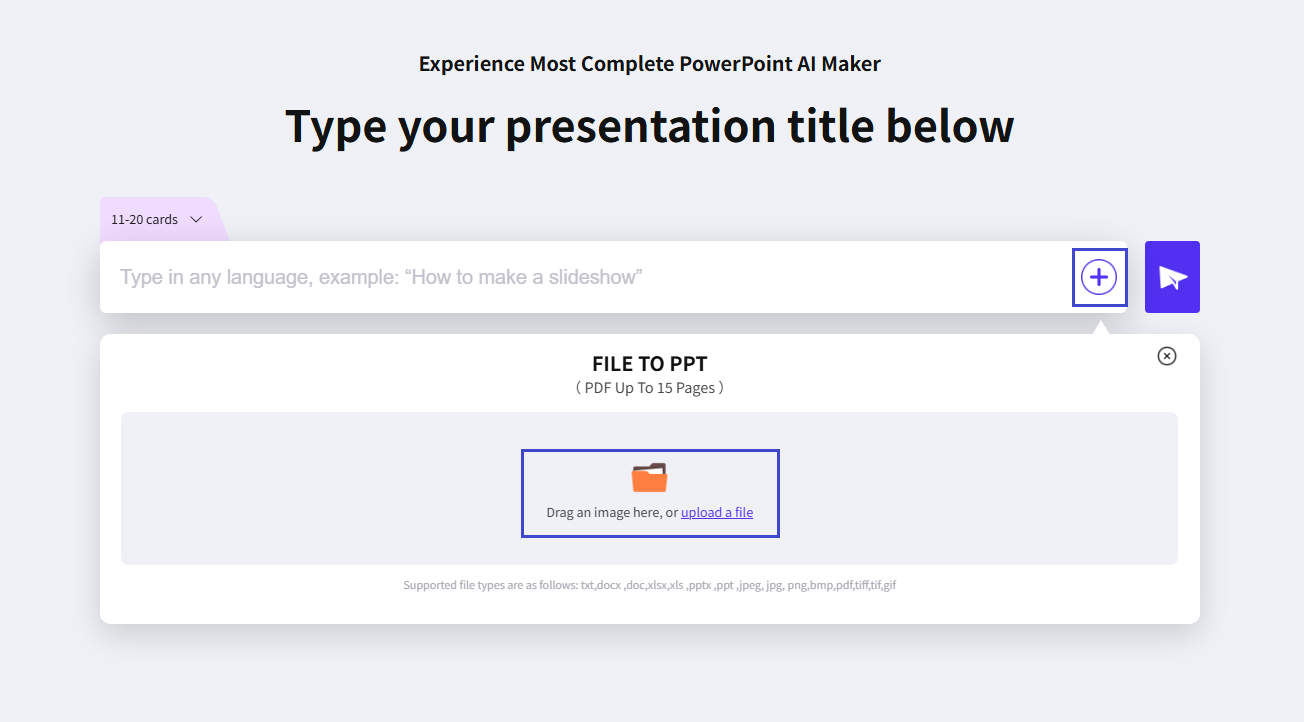
Step 2: Review and modify the outline automatically generated by the AI based on the PDF content. Click “Generate my presentation” and choose a template.

edit-ai-powerpoint-outline

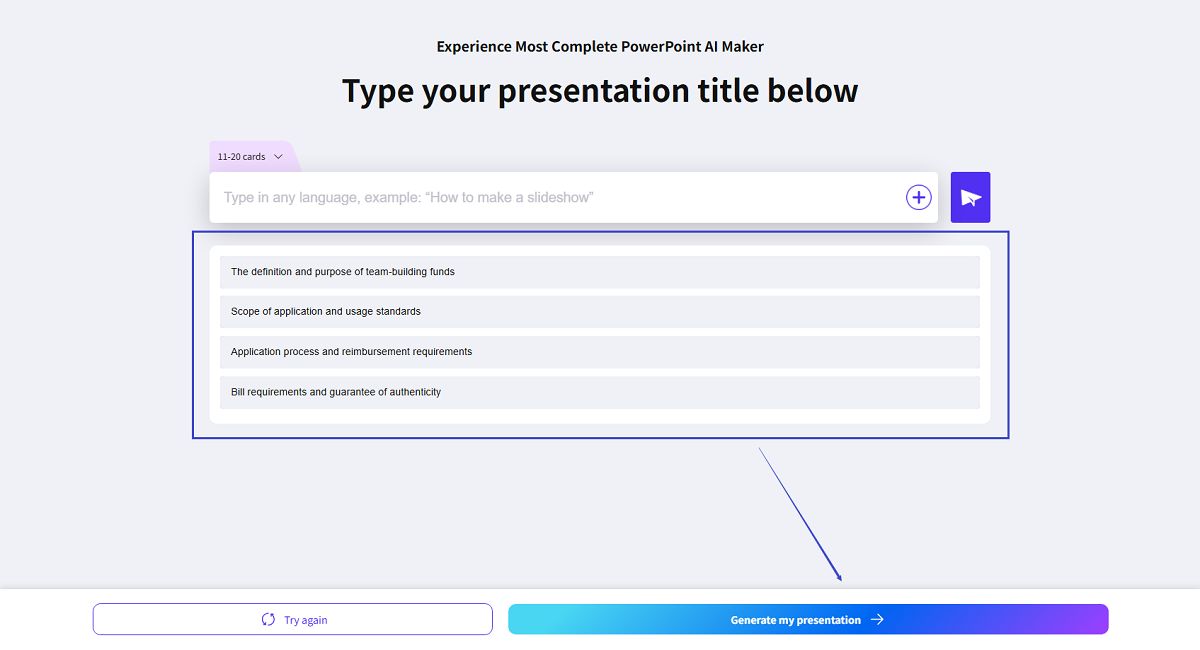
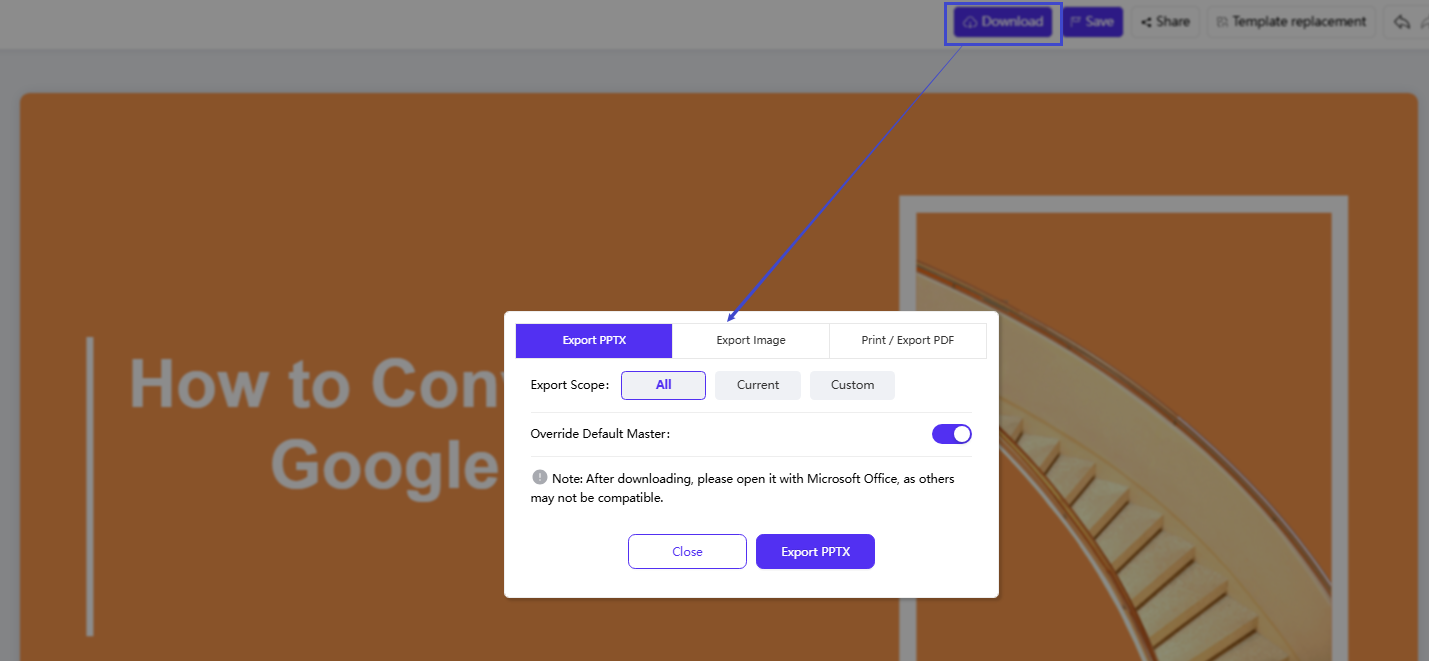
Step 3: Review and modify the content of the generated AI PPT. Click the download button at the top to export the PPTX file.

export ai presentation

Step 4: Open Google Slides, go to the top menu bar, select “File > Import Slides”, choose the generated AI presentation, and upload it to import into Google Slides.

import slides to google slides

😊Pros

😑Cons

WorkPPT – Create Presentation in 1-Click

Simple enter the topic or upload files and get a complete presention ager few mins.

Method 3: Use PDF to PowerPoint Converter

If you don’t have Acrobat and prefer not to install extra software, online tools are a quick solution. Popular tools include Smallpdf, ILovePDF, HiPDF, etc.

Step 1 – Convert: Use PDF to PowerPoint converter like Adobe Acrobat or Smallpdf, iLovePDF. Upload your PDF > “Convert to PPTX” > “Download”.

convert pdf to ppt

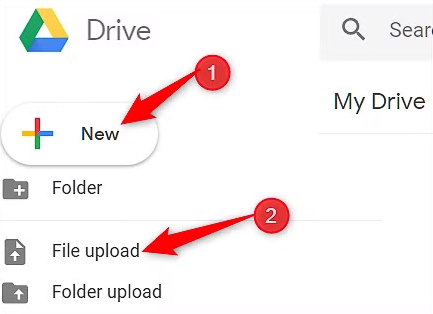
Step 2 – Upload to Drive: Go to your Google Drive. Click “+ New > File upload”. Select the downloaded .pptx file.

upload ppt to google drive

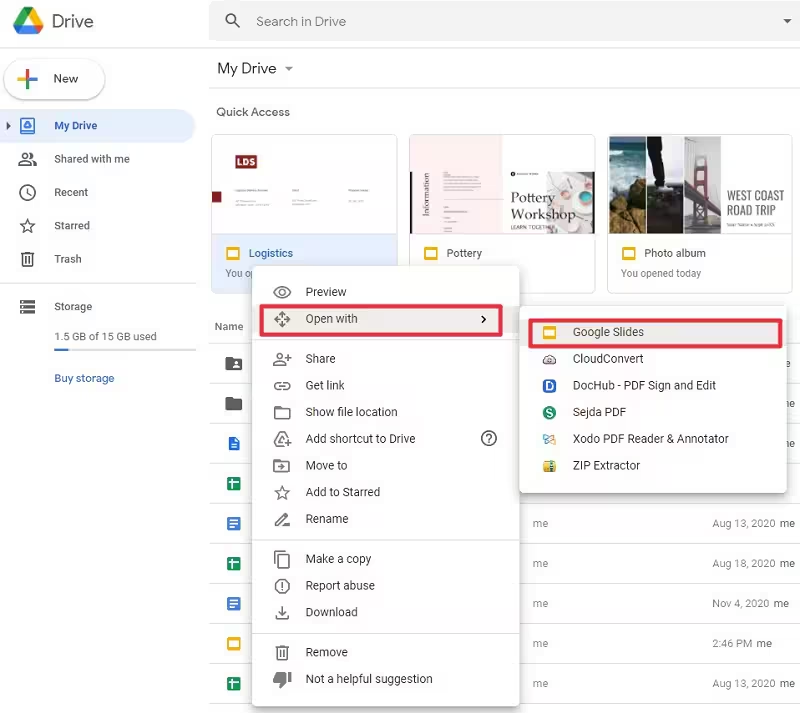
Step 3 – Open with Slides: In Drive, RIGHT-click the uploaded PPTX file. Choose “Open with > Google Slides”.

open with google slides

Step 4 – Review & Edit: A new Slides file is created. Carefully check each slide. Edit text, resize boxes, or adjust layouts as needed.

😊Pros

😑Cons

Method 4: Share PDF as a Link

Sometimes, you don’t need to convert at all. Just share the PDF directly. This works well if your team only needs to read the content and not edit it.

Step 1: Upload your PDF to Google Drive.

Step 2: Right-click the PDF in “Drive > Share > Copy link”. Set link access to “Anyone with the link – Viewer”.

share pdf on google drive

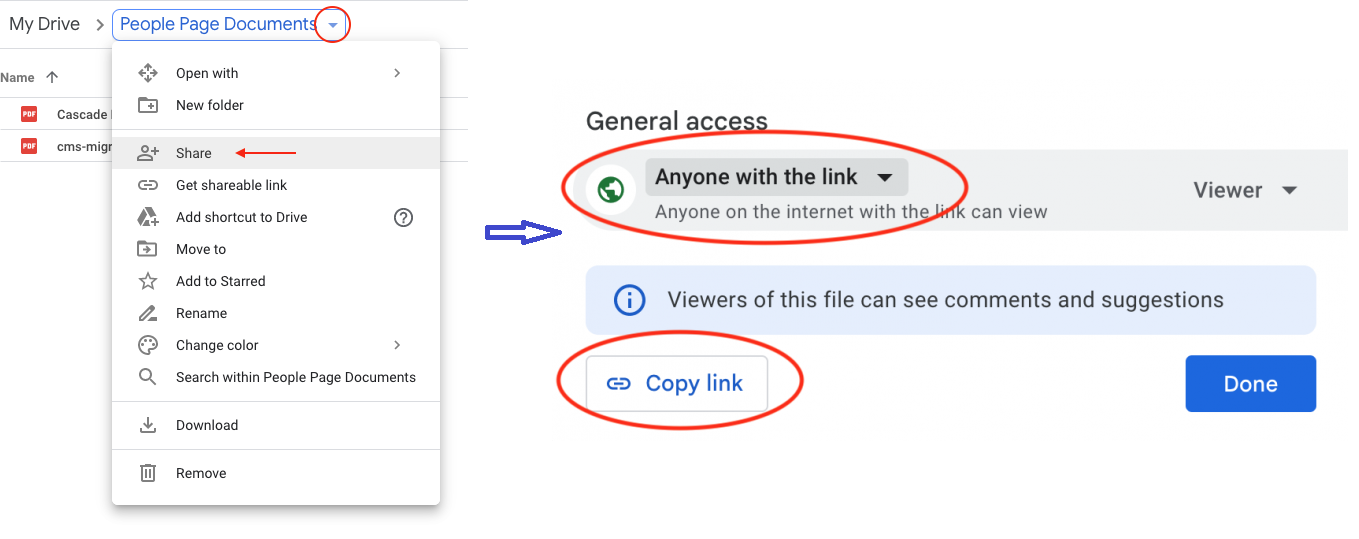
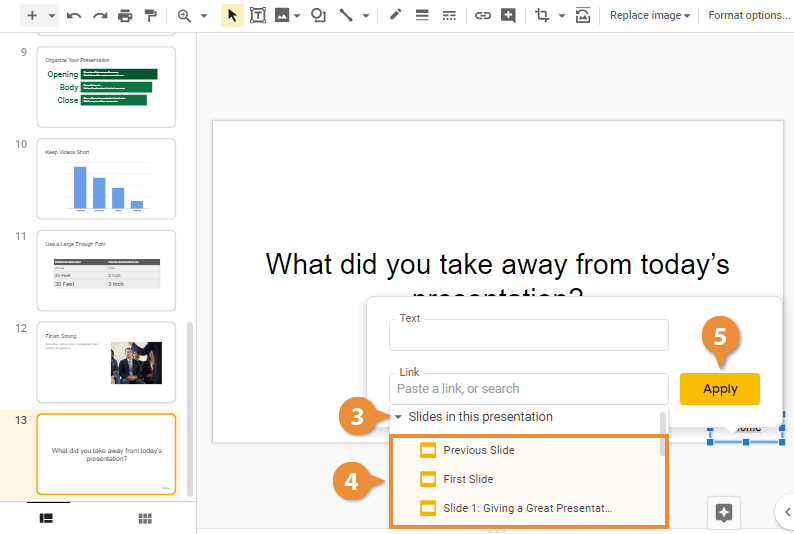
Step 3: Open your Slides presentation. Insert a clear text prompt (e.g., “View Full Report”) or relevant image.

Step 4: Select the text/image. Click the link icon (chain) or press Ctrl+K/Cmd+K. Paste the copied PDF link. Click “Apply”.

insert links to google slides

Step 5: During your slideshow, click the linked element to open the PDF in a new browser tab.

😊Pros

😑Cons

Method 5: Use Google Slides Extension

If you often need to transform PDF to PPT, consider using extension plugins. For example, Slide Translator (mainly for translation but also supports importing content) or the PDF to Slides plugin.

Step 1: Go to the Google Workspace Marketplace. Search “MagicSlides”. Click “Install” > follow prompts.

Step 2: On Google Slides, navigate to “Extensions > MagicSlides App > PDF/Docs” to PPT.

pdf to ppt with google slides extension

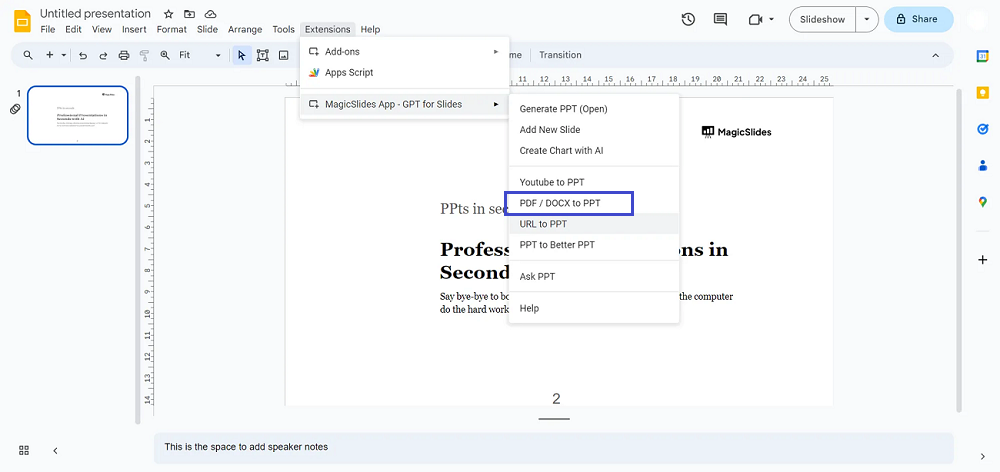
Step 3: In the sidebar, select “PDF/DOCX to PPT”. Upload your PDF file.

Step 4: Enter the desired number of slides. Click “Generate Presentation”. MagicSlides AI processes the PDF content into structured slides.

Step 5: Instantly review the generated slides. Make quick edits if needed. Present directly or “File > Download as PDF/PPTX”.

😊Pros

😑Cons

Fixing Common Formatting Issues of Google Slides

After transforming PDF to PPT, you will run into small formatting problems. Don’t worry—they can all be resolved.

  • Text overflow: Select text box. Shrink the font size or resize the box.
  • Misaligned items: Drag them back into place. Use the “Arrange > Align” for accuracy.
  • Font issues: Switch everything to a default Google Slides font like Arial or Roboto.
  • Table misalignment: Adjust manually, or crop the table and insert it as an image.
  • Blurry images: Export high-resolution images from the PDF before inserting.
  • Missing backgrounds: Save the background as an image, then set it as the slide background.
  • Vertical PDF pages: Go to File > Page Setup, and set custom slide size (e.g., 7.5″ x 10″) for portrait slides.

FAQs about How to Convert a PDF to Google Slides

Q: Are there free tools to convert PDF to Google Slides?

A: Yes. Smallpdf and ILovePDF both support free PDF to Slides conversion. However, they have page or usage limits.

Q: Why does the formatting get messed up after conversion?

A: Because PDFs and Slides display things differently, especially fonts and tables. You’ll need to fix the layout by hand or replace tricky parts with images.

Q: Why are images blurry after conversion?

A: Usually because they were exported at low resolution. Export them at 300 dpi or higher before adding them to Slides.

Q: What if fonts appear as gibberish after PDF to Google Slides conversion?

A: That happens when the PDF uses fonts Slides doesn’t support. Just switch them to common fonts like Arial, Roboto, or Calibri.

Q: Can scanned PDFs be converted into editable Slides?

A: Not directly. A scanned PDF is just an image. Use an OCR tool (like Adobe Acrobat or Google Drive OCR) to turn it into text first, then import it into Slides.

💬 Conclusion:

Converting PDF to Google Slides is easy. For a quick fix, convert it to images and insert them directly. If you need editable slides, convert the PDF to PowerPoint first, then import it into Google Slides. With these methods, you can quickly turn any PDF into a ready-to-use presentation for class, meetings, or work.

Creating presentations can be tedious, but WorkPPT AI slide maker can generate professional slides in minutes. Try it for free by clicking the button below.

workppt banner 2

WorkPPT – Create Presentation in 1-Click