author image

Tired of the same old fonts in your presentations? The right typography can transform a good slideshow into a great one, enhancing readability and reflecting your brand’s personality. Whether you want to change the font in Google Slides or add custom fonts to Google Slides, this guide has you covered.

Modifying the existing fonts, colors, and sizes in your presentation is simple and can be done in a few clicks.

1. How to Change Default Font in Google Slides

For quick adjustments or to emphasize a specific piece of information, you can easily change the font on any individual text box.

1. Select Your Text: Click on a text box and highlight the specific words, sentences, or paragraphs you want to change.

select text box for change font in google slides

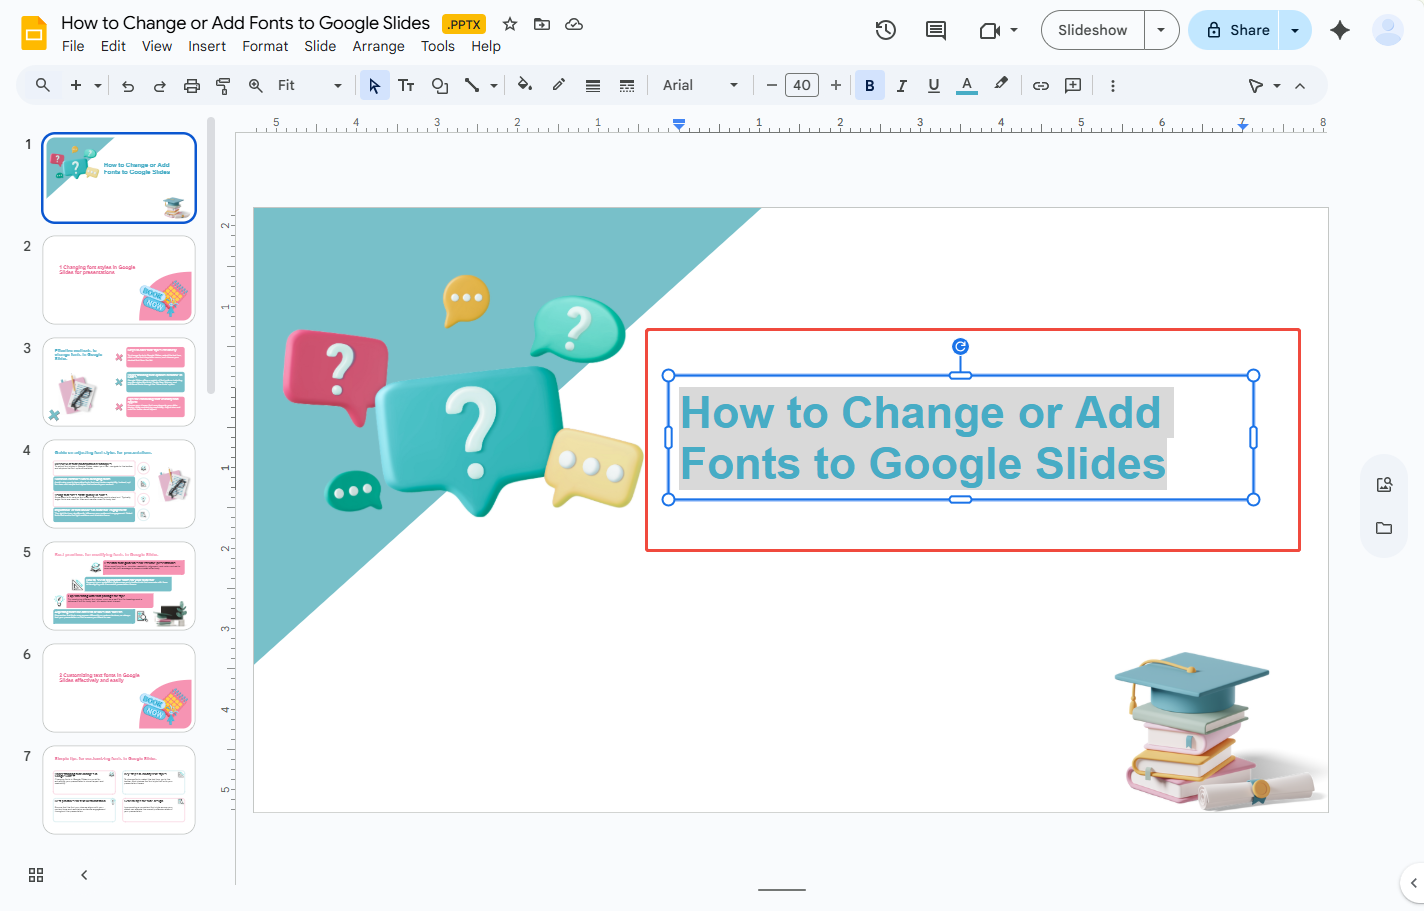
2. Open the Font Menu: In the toolbar at the top of the screen, click on the current font name to open the dropdown menu.

screenshot showing how to change default font in google slides


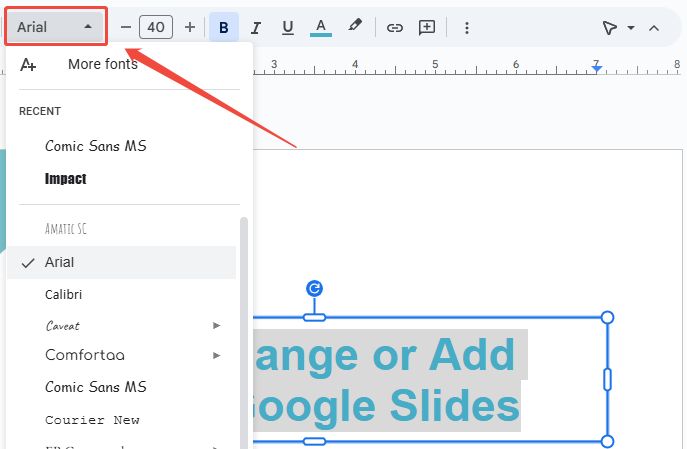
3. Choose a New Font: Scroll through the list of available fonts and click on the one you’d like to use. The selected text will update instantly.

💡Tips: If you want to change multiple text boxes at once on a single slide, press “Ctrl” (or “Cmd” on Mac) and click each text box. Once selected, you can change the font for all of them with a single click.

To ensure a consistent look and feel, it’s best to change the default font in your Google Slideshow for the whole presentation. The Theme Builder is the perfect tool for this.

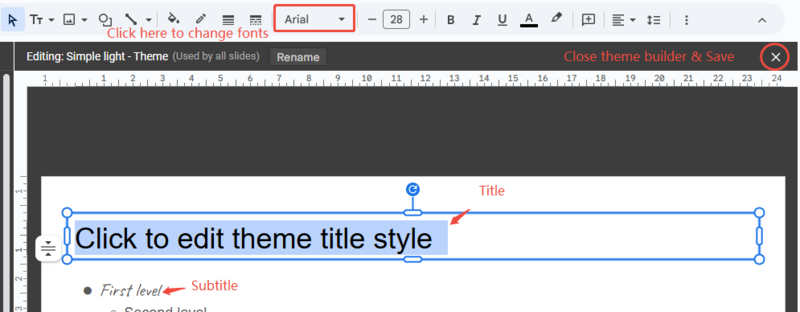
1. Go to the top menu and click View > Theme builder.

open theme builder for changing font in google slids

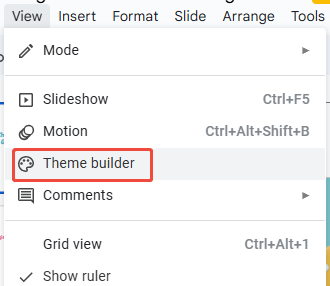
2. In the left-hand pane, click on the very top slide- “Theme”. Any changes made here will apply to all slide layouts in your presentation.

select master slide for changing font in google slids

3. Select the text element you want to update (Title, Subtitle, Body). Change the font type from the toolbar. Click Close theme when finished — the new font will apply across all slides.

select master slide for changing font in google slids

2. How to Change Color of Text in Google Slides

Want to make certain words stand out? Here’s how to change text color in Google Slides.

1. Highlight the Text: Select the text you want to recolor.

2. Choose a Color: In the toolbar, find the Text color icon (an ‘A’ with a bar underneath). Click it to open the color palette.

 click text color icon to change font color in google slids


3. Select Your Color: You can choose from the theme colors, a standard color, or click ‘+ Custom’ to enter a specific HEX code or use the advanced color picker.

change font color in google slides

3. How to Change Font Size in Google Slides

Adjusting font size helps balance your slide layout and readability. Here are the steps:
1. Select the text box or highlight the text.

2. Click the Font size drop-down menu in the toolbar. Choose a preset size or type a custom value.

change font size in google slides


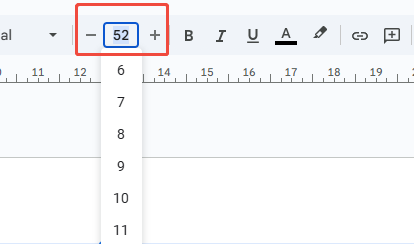
Shortcut: Use Ctrl + Shift + >/<(Windows) or Cmd + Shift + >/<; (Mac) to quickly adjust font size.

How to Add Fonts to Google Slides

Google Slides includes many fonts by default, but you can easily expand your options using Google Fonts or add-ons like Extensis Fonts. Here’s how to do both.

How to Upload Fonts to Google Slides from Google Fonts

Google Slides is directly integrated with the entire Google Fonts library, which contains over 1,500 free font families. Here’s how to insert these fonts into your Google Slides:

1. Click the font dropdown menu in the toolbar and choose “More fonts”.

select more fonts from toolbar to add new font to google slides


2. In the pop-up, browse or search for fonts by name, category, or language. Click the fonts you want to add (they’ll move to “My fonts”). And then Click OK.

upload fonts to google slides from google fonts

Download Fonts via Extensis Fonts Add-on

Although Google Slides doesn’t let you upload local fonts directly (like .ttf or .otf), you can use the Extensis Fonts add-on to access thousands of extra styles.

Here’s how:

1. Go to Extensions → Add-ons → Get add-ons.

get add on in google slides


2. Search for Extensis Fonts and install it.

install extension fonts to add new fonts to google slides

3. Once installed, go to Extensions → Extensis Fonts → Start. A sidebar will appear where you can browse and apply fonts instantly.

download fonts via extensis fonts

FAQs about Changing & Customize Fonts in Google Slides

Q1: How to add custom fonts to Google Slides?​

A: Google Slides doesn’t support direct font uploads (.ttf or .otf), but you can use the Google Fonts or Extensis Fonts add-on to access a larger collection of fonts.

Q2: How do I change multiple text boxes at once in Google Slides?

A: Hold Ctrl (or Cmd on Mac) and click each text box you want to edit. Once selected, you can change the font or color for all of them at once.

Q3: Why are my custom fonts not showing correctly in Google Slides?

A: Some fonts aren’t supported by Google Fonts. Try reapplying the font, or use compatible options through Extensis Fonts or WorkPPT for seamless formatting.

Q4: How do I change the default font in Google Slides?

A: Go to Slide → Edit theme, select a text type (title, body, etc.), and change the font. This will update the font across all slides in your presentation.

Q5: How can I change the color of text in Google Slides?

A: Highlight your text → click the Text color icon (A) in the toolbar → choose a new color or enter a custom HEX code for brand consistency.

💬 Conclusion:

By this step-by-step guide, you can master how to add fonts to Google Slides and how to change font in Google Slides easily. Unique font styles can make your presentation look professional and on-brand.

If you want to save time creating engaging presentations, try WorkPPT AI Presentation Maker. It includes 18 exclusive, presentation-ready fonts that make your slides stand out — plus smart AI layouts that save hours of editing.