author image

When designing a Google Slides presentation, one simple yet effective visual trick is to curve your text. Curved text makes titles, logos, and key information stand out, adding more visual appeal to your slides. In this guide, you’ll learn five easy ways to fix how to curve text in Google Slides, both manually and with the help of design tools.

The answer is no. Google Slides doesn’t have a built-in feature to curve text like PowerPoint or Canva. But don’t worry! There are still a few easy workarounds you can use to fix how to make text curve in Google Slides.

In this guide, we’ll walk you through five practical methods, from the simplest to the more advanced ones, so you can choose what fits your needs best.

Method 1: Rotate Text Box to Curve Text in Google Slides

Although Google Slides doesn’t have a built-in option to curve text, you can still create the effect manually by separating each letter and rotating it one by one.

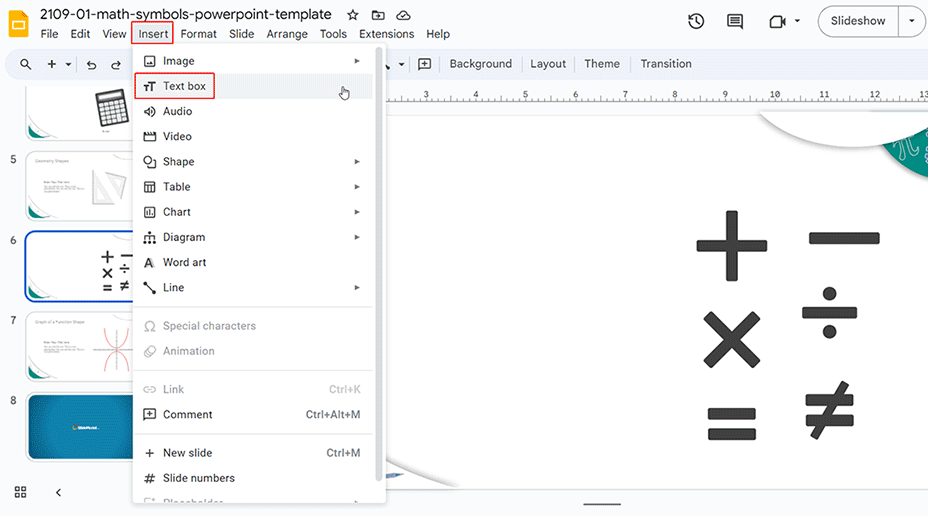
Step 1: Open Google Slides, go to “Insert > Text box”, and type your text or title.

insert text box

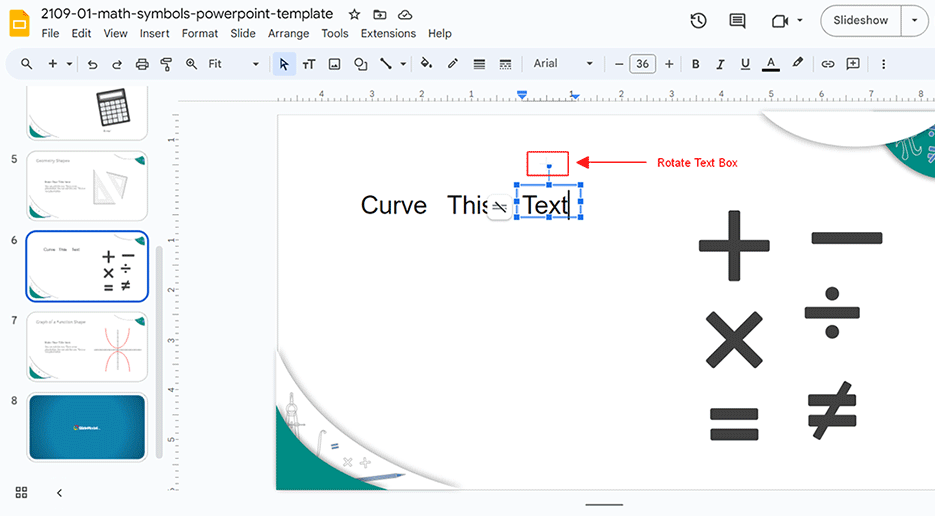
Step 2: Copy and paste each letter into its own text box.

Step 3: Use the rotate handle on each text box to position the letters along a curved line until you get the shape you want.

rotate the text box

This curved text in Google Slides method works best for short words or titles. It takes some manual effort, but it gives you full control over the curve and letter placement.

Method 2: Use PowerPoint to Curve Text & Copy to Google Slides

PowerPoint comes with built-in “Text Effects” that let you easily curve your text into circular or wavy shapes.

Step 1: Open PowerPoint, click “Insert”, and add a text box. Type in your text.

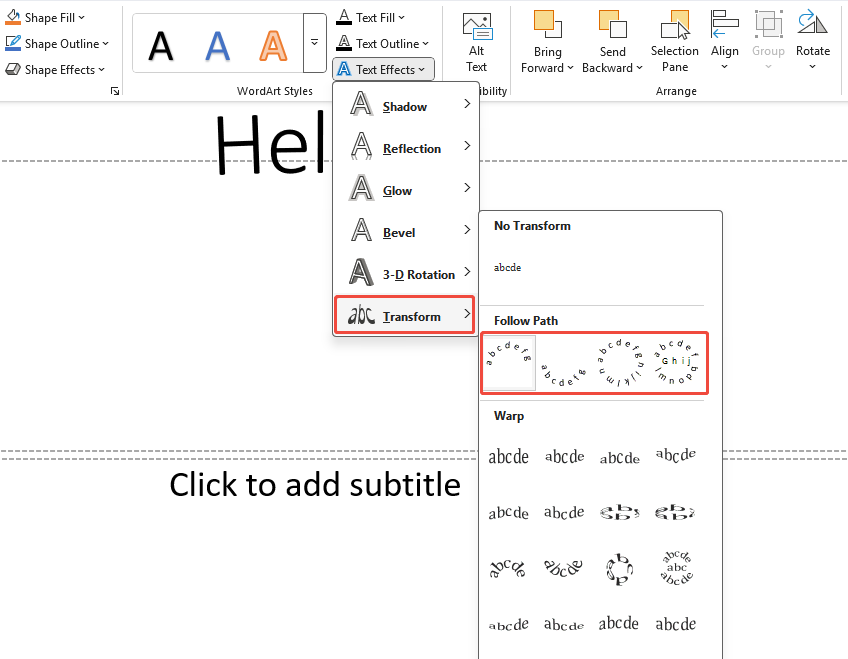
Step 2: Select the text, go to “Shape Format > Text Effects”, and click the dropdown arrow.

click text effects

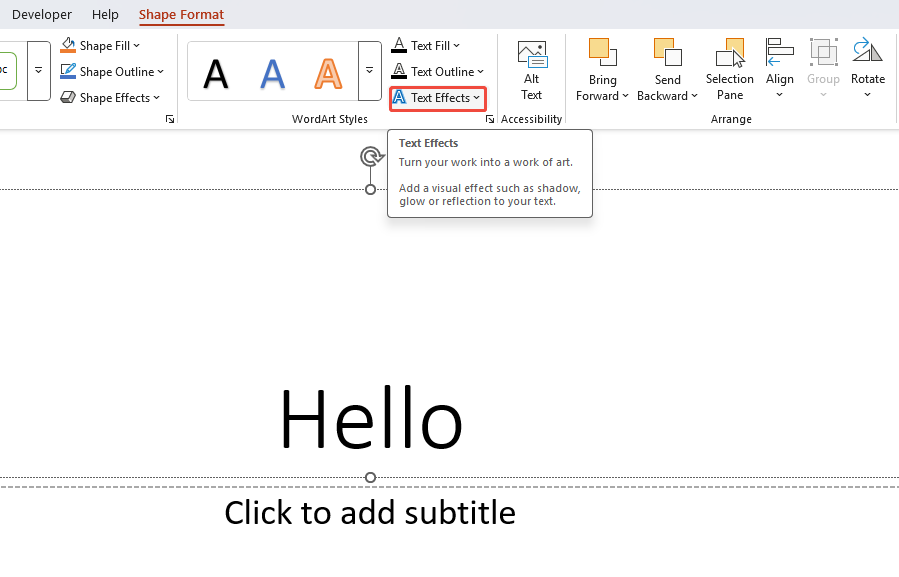
Step 3: Under “Transform”, choose a curved style you like.

choose curved text type

Step 4: Adjust the curve text fonts and size until it looks right, then copy the text box and paste it into Google Slides.

Finally, move or resize the text box in Google Slides as needed. Keep in mind that some PowerPoint text effects may not transfer perfectly to Google Slides.

If manually curving text feels like too much work, try letting WorkPPT handle it for you!

workppt banner
WorkPPT – Create Stunning Slides in 1-Click

WorkPPT is an AI presentation maker that turns your ideas into beautiful slides in seconds. It saves you time so you can focus on delivering your presentation, not building it.

Method 3: Using Canva to Curve Text & Insert to Google Slides

Canva is one of the most powerful online design tools and comes with a built-in curve text feature. It’s perfect for people who want stylish results fast.

Step 1: Open Canva and start a blank design.

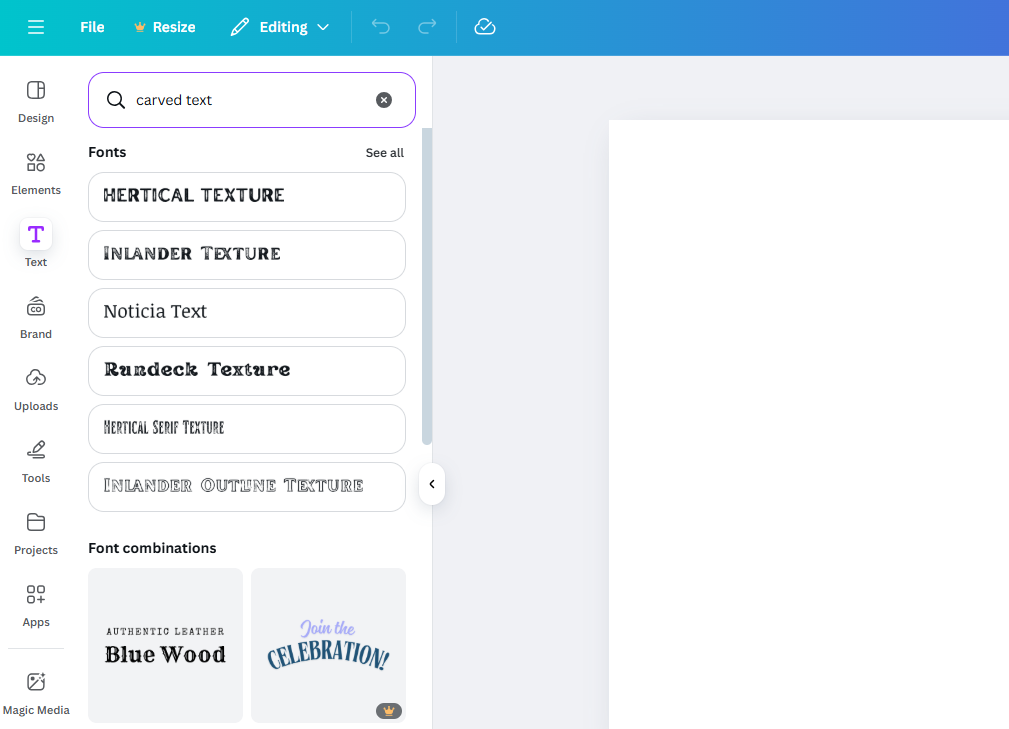
Step 2: In the templates section, search for “curved text” and pick a style you like.

search for the curved text type

Step 3: Replace the sample text with your own words.

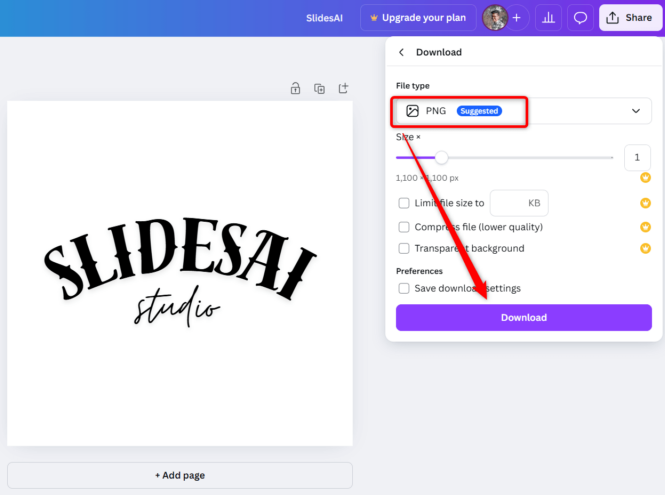
Step 4: Save your curved text design and download it as a PNG file.

download the curved text as image

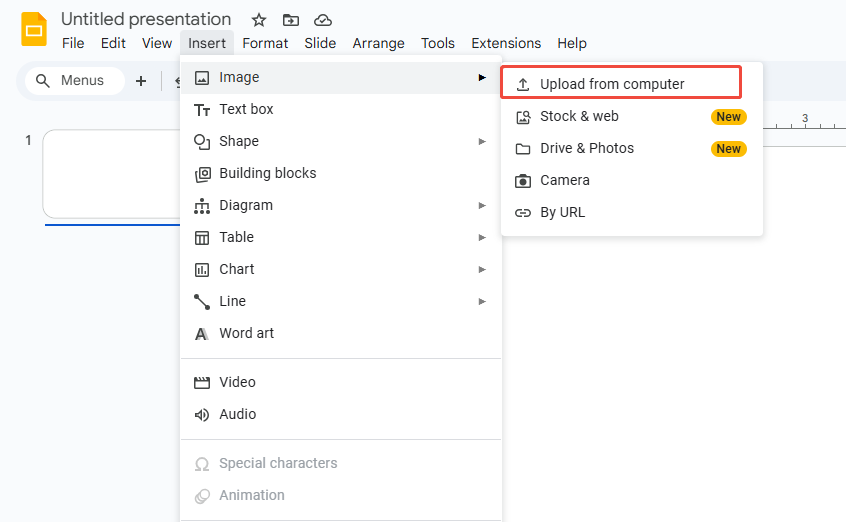
Step 5: Go back to Google Slides, click “Insert > Image”, upload the PNG, and adjust its size and position.

inseret the curved text image

Once you import it into Google Slides, the curved text will appear as an image, so you won’t be able to edit the curve directly.

Method 4: Using MockoFun to Curve Text & Insert to Google Slides

MockoFun is an online text effects tool that lets you create curved text, text along a path, and other advanced styles. Its interface is sleek and creative, making it a great choice for users who want something more visually unique.

Step 1: Go to MockoFun, log in, click “Create”, and select “Text”.

go to text page

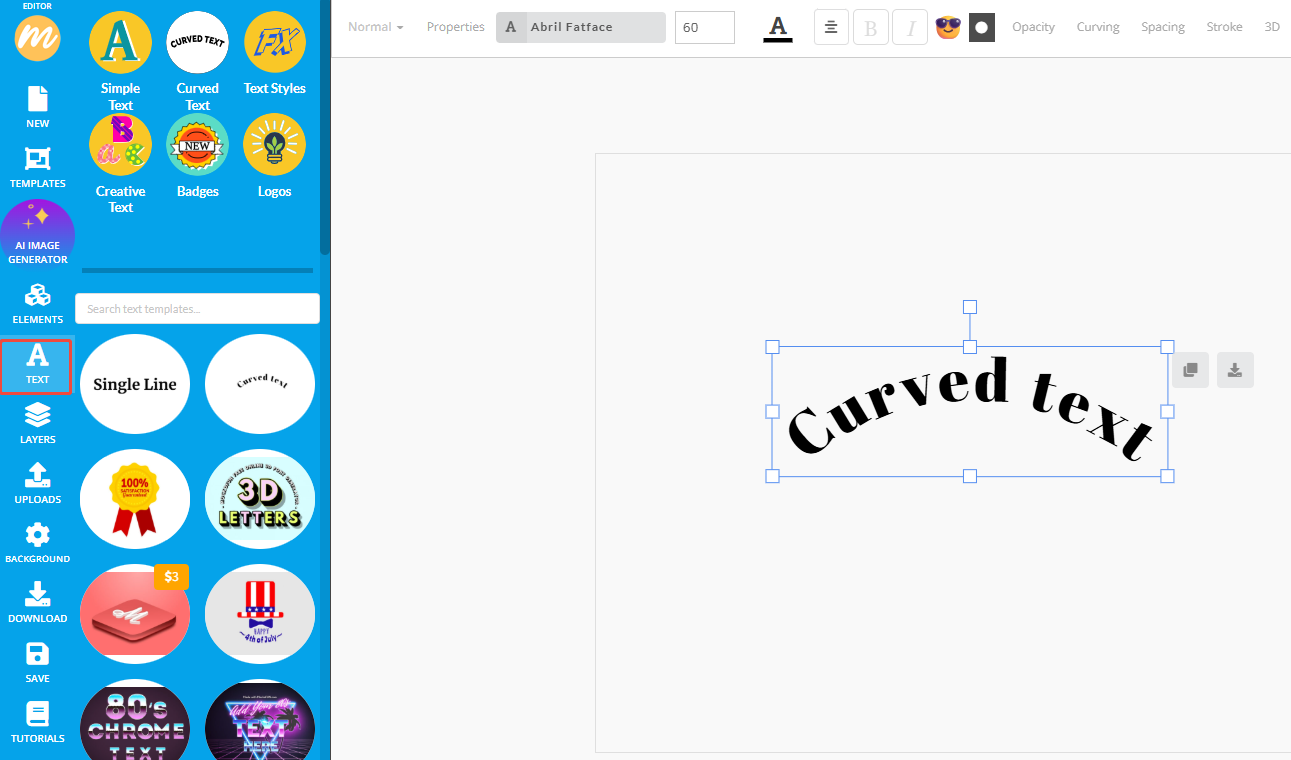
Step 2: Adjust the curved text style and edit your wording as you like.

Step 3: Save your design and download it as a PNG file.

download the curved type in mockofun

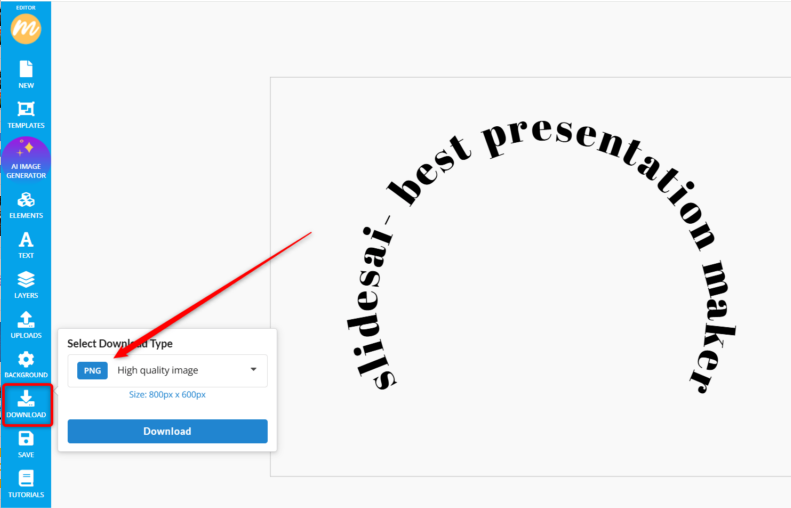
Step 4: Insert the downloaded image into your Google Slides presentation.

insert the text image

Method 5: Using InkPX to Curve Text & Insert to Google Slides

InkPX is a free curved text generator that’s easy to use—no downloads or installations needed. It’s perfect for quickly creating curved text right in your browser.

Step 1: Open the InkPX curved text generator and type the text you want to curve.

Step 2: Customize your text with options like font, size, color, and curve level.

change the text on the type

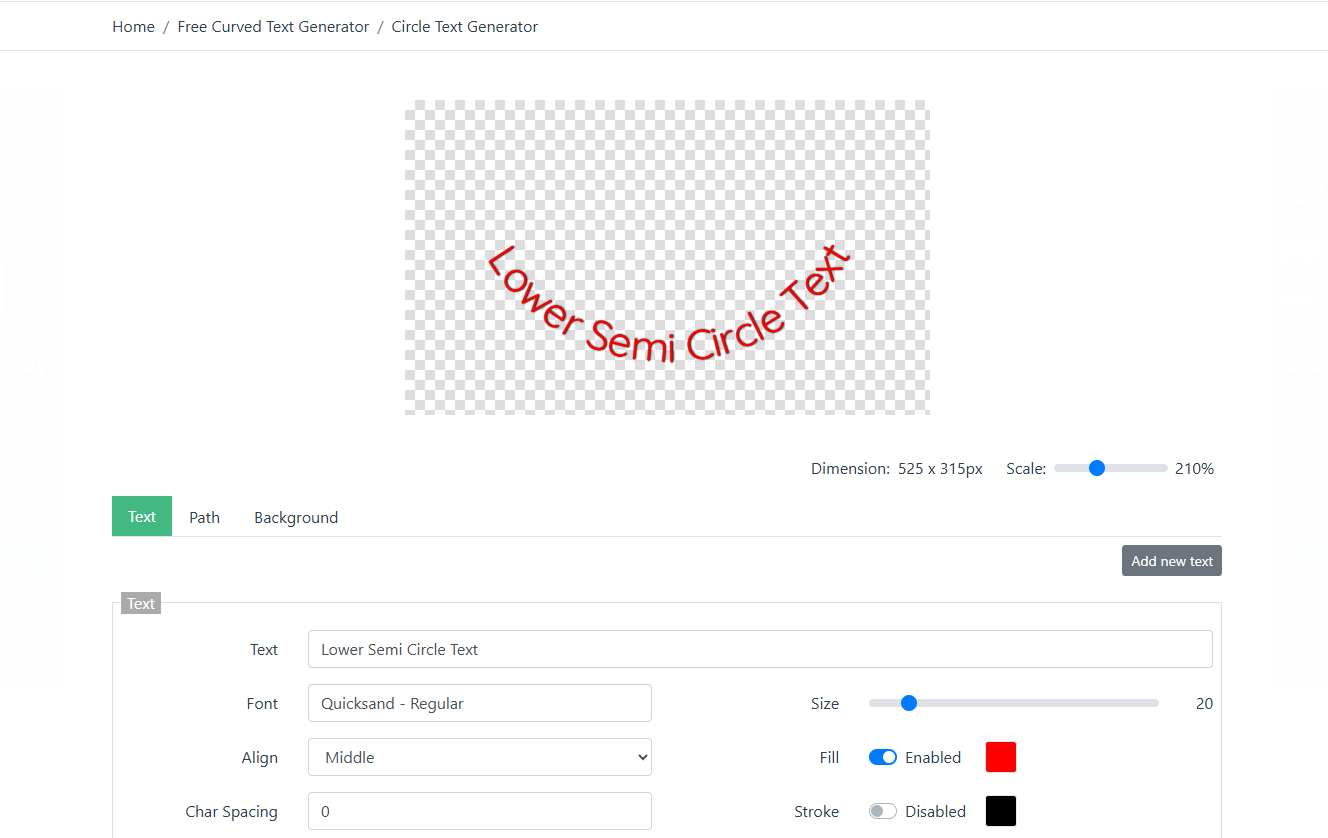
Step 3: Download your curved text as a PNG file and, just like with MockFun, insert it into Google Slides.

FAQs about How to Curve Text in Google Slides

Q: Can I still edit the curved text after importing it to Google Slides?

A: Usually, no. Only the text boxes you created manually in Method 1 can still be edited or rotated. Curved text made with other methods will import as an image, so you won’t be able to adjust the curve inside Slides.

Q: Will exporting as PNG make the image blurry?

A: Not really, as long as you export it at a high resolution or use an SVG file. On most screens, the difference is barely noticeable. But if you’re printing or displaying on a large screen, go with SVG for best results.

Q: How can I make sure curved text looks the same on different devices?

A: Use SVG or a high-resolution PNG and keep the font consistent. If you’re using custom fonts, make sure to embed them or convert them to outlines before exporting (you can do this in PowerPoint or any vector tool).

💬 Conclusion:

Although Google Slides doesn’t have a built-in curved text feature, you can still learn how to curve text in Google Slides by manually rotating text boxes or using tools like PowerPoint, Canva, MockoFun, or InkPX. This lets you easily design creative titles and layouts.

For an even more polished look, try using AI design tools like WorkPPT AI slides maker, which can automatically generate professional slide layouts and visuals to make your presentation stand out.

⭐⭐⭐⭐⭐ Rated 4.8 by 1.3M Users