author image

When giving a presentation, the audience often wants to take notes and review the content later. PowerPoint handouts make this easy. In this article, we’ll explain what handouts are, why they matter, how to create handouts in PowerPoint, and answer common questions.

Handouts are printed or digital versions of a PowerPoint presentation. They usually show several slide thumbnails on one page with space for notes. In short, the presentation is for the speaker, while handouts are for the audience.

In PowerPoint, you can print 1, 2, 3, 6, or even 9 slides per page, often with blank areas for note-taking. For example:

  • Teachers use handouts so students can follow along and take notes.
  • Company shares handouts in training sessions for employees to jot down key points.
  • In business roadshows, handouts sact as a takeaway package for investors.

Why Use Handouts in PowerPoint

The core purpose of using PowerPoint handouts is to help your audience understand and remember your content better.

  • Helps Memory: People can’t remember everything at once. Handouts act as a backup.
  • Keeps Attention: Taking notes while following along keeps listeners more engaged.
  • Easy to Review and Share: After the talk, handouts double as study or reference material.
  • Adds Professionalism: Handouts show you’re well-prepared and make your presentation look more polished.

How to Create Handouts in PowerPoint

Method 1. Create Handouts Using Print Options

The easiest way to create handouts is through PowerPoint’s Print Options.

Step 1: Open your PPT file in PowerPoint and click “File” in the top-left corner.

Step 2: Click “Print”, then select “Full Page Slides” from the dropdown. In the “Handouts” section, choose your preferred layout.

select full page slides

Step 3: Click “Edit Header & Footer” to set page numbers, date, title, and other information.

edit your handouts layout

Step 4: After confirming, click “Print” to generate handouts for your audience.

Method 2. Create Handouts with Word

Step 1: Open your presentation and click “File” in the top-left corner.

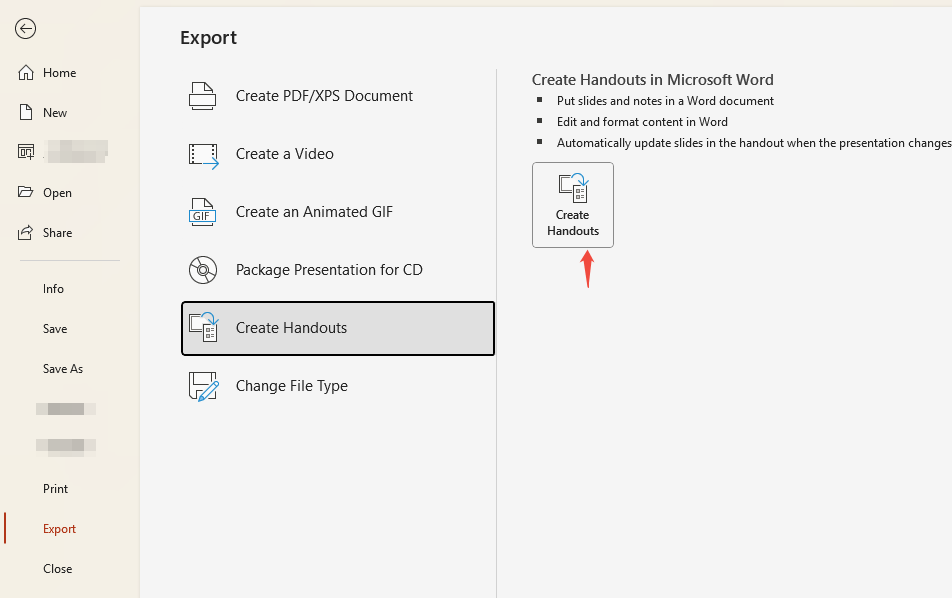
Step 2: Click “Export > Create Handouts”, then click “Create Handouts” again to confirm.

click create handouts

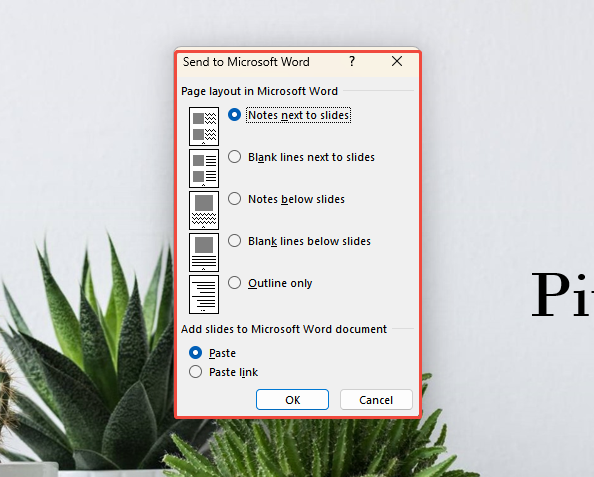
Step 3: The pop-up window will offer multiple options, including annotations and blank lines. Pick the one you prefer and click “OK”.

click ok to confirm

Step 4: A Microsoft Word document will automatically open, displaying your handout layout. You can make minor adjustments before printing.

handouts appear in word

workppt banner 2

Is There an Easier Way?

With WorkPPT, you can turn any idea into a ready-to-use PPT in minutes.

How to Customize PowerPoint Handouts

To make your handouts look more professional, use “Handout Master” under the “View” menu.

customize handouts

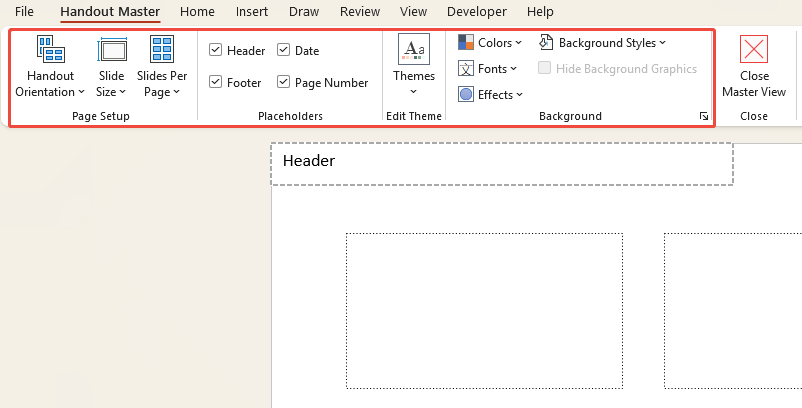
1. In the “Page Setup” section, configure the display style for handouts, such as:

  • Slides Per Page: Sets the number of slides displayed per handout page, up to a maximum of 9 slides.
  • Handout Orientation: Set your handout to portrait or landscape.
  • Slide Size: Adjust how big the slides appear.

2. In the “Placeholders” section, determine the display elements on the handout, such as headers, footers, dates, etc.

3. In the “Background” section, adjust colors, fonts, effects, and more to enhance the visual appeal of your handouts.

Tips for Making Effective Handouts

A good presentation handout is not a duplicate of slides, but rather an enhanced version of materials.

  • Keep it light: Don’t overload a page with too much information.
  • Pick clear fonts: Arial, Calibri, or Microsoft Yahei work well.
  • Leave white space: Blank areas give readers room to think and process.
  • Show, don’t tell: Use charts and tables instead of long blocks of text.
  • Stay consistent: Use the same fonts, colors, and logos to look professional.
  • Match the setting:
    • Training/Classrooms: 3 slides + note area recommended.
    • Business meetings: 6 slides per page for quick scanning.
  • Go digital: Share PDFs instead of printing to save paper and make it easier to distribute.
[You May Also Like]: How to Create a PowerPoint Progress Bar

The Difference Between Handouts and Speaker Notes

Dimension Handouts Speaker Note
Purpose Provide to audience to assist understanding and note-taking Provide to speaker as cues during presentation
Audience Audience Speaker only
Content Slide thumbnails + additional notes Detailed slide-related notes, tips, talking points
Display Can be printed or exported to Word/PDF Not visible to audience, only in presenter view
Typical Scenario Training materials, meeting handouts, classroom distribution Speaker practice, cues during formal presentations

FAQs about How to Make a Handout in PowerPoint

Q: What's the difference between Handouts and Notes Pages?

A: Handouts are condensed materials for the audience, while Notes Pages are speaker prompts.

Q: Can speaker notes be displayed in Handouts?

A: They are not shown by default, but you can export to Word and add the notes there.

Q: Do Handouts reveal the full content?

A: If sensitive information is present, you can choose to export only specific slides or add a watermark.

Q: Why are my printed Handouts blank?

A: This may occur if the wrong print range was selected, or if the slide background color and font color are too light. Check your print settings.

💬 Conclusion:

PowerPoint handouts make your presentations clearer and easier to follow. They let your audience take notes, review content afterward, and share materials easily. With simple options like view settings, print layouts, and exports, you can create professional handouts quickly. Perfect for classrooms, trainings, or business meetings, handouts help your presentations be more effective and memorable.