author image

Sometimes, not every slide in your PowerPoint needs to be shown. Maybe it’s extra notes, backup data, or details that only fit certain situations. That’s when the Hide Slide feature in PowerPoint comes in handy. It won’t delete your slide, it just skips it during the presentation.

This way, you keep your materials intact while making slideshow cleaner and more focused. Next, we’ll explore how to hide slides in PowerPoint with different versions, plus a few pro tips.

Windows offers the most comprehensive PowerPoint features, and you can solve how to hide slides in PPT in several different methods:

Method 1: Hide Slides from Thumbnails

Step 1. Open your PowerPoint file.
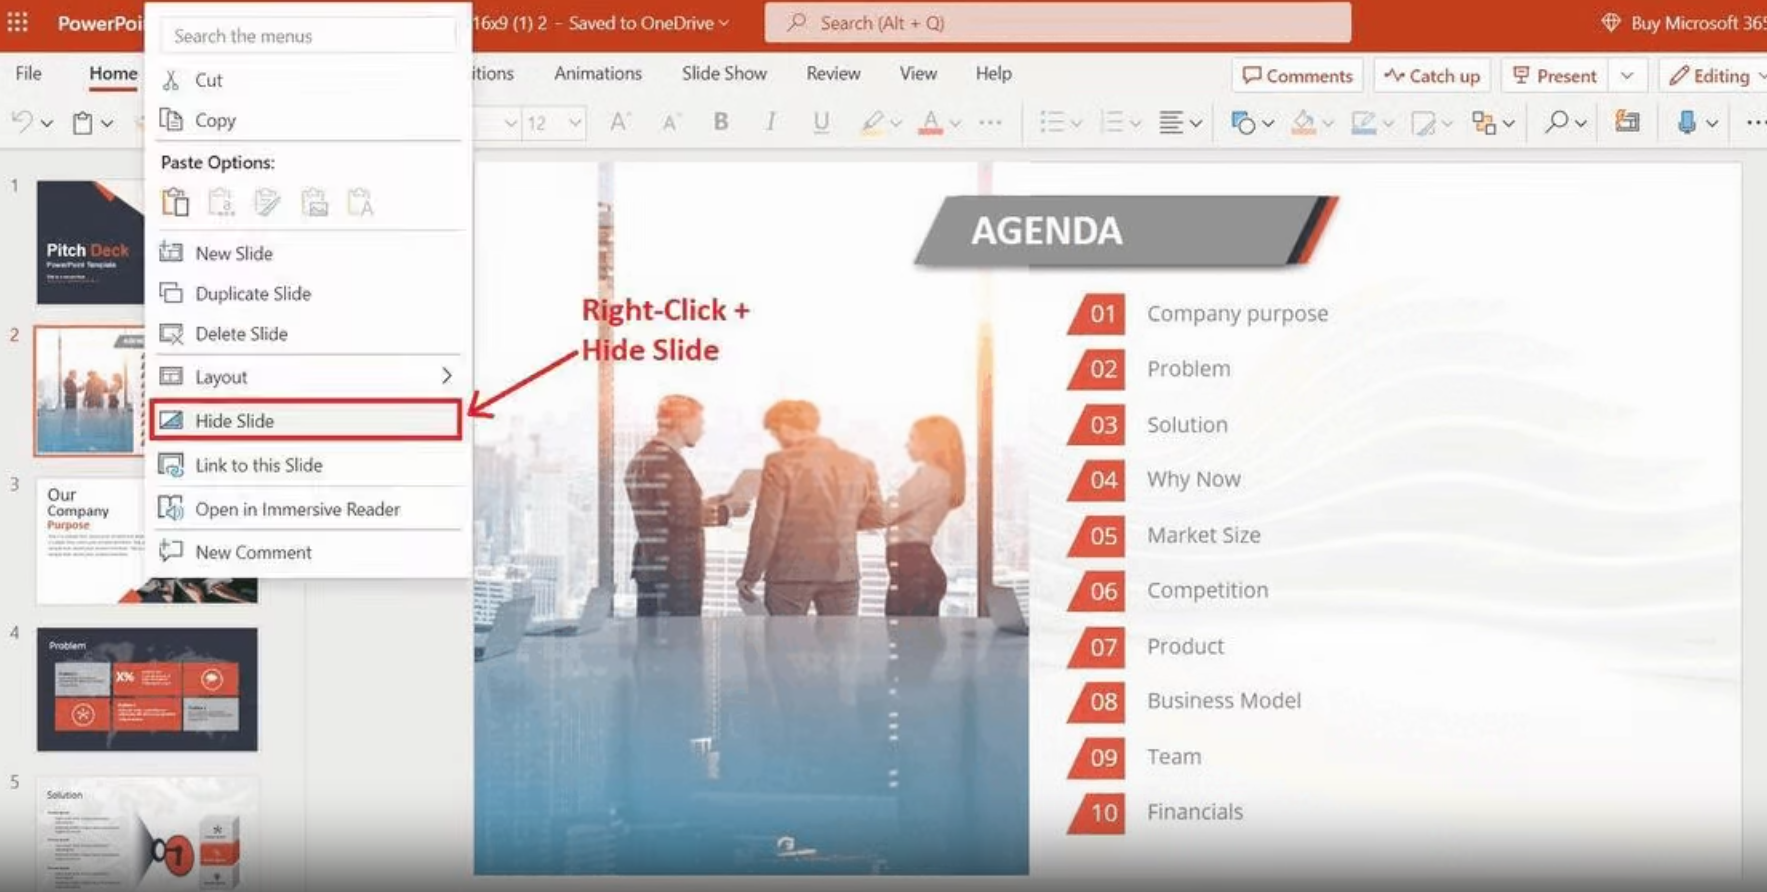
Step 2. In the left thumbnail panel, find the slide you want to hide.
Step 3. Right-click it and select “Hide Slide”.

click hide slide in the thumbnails

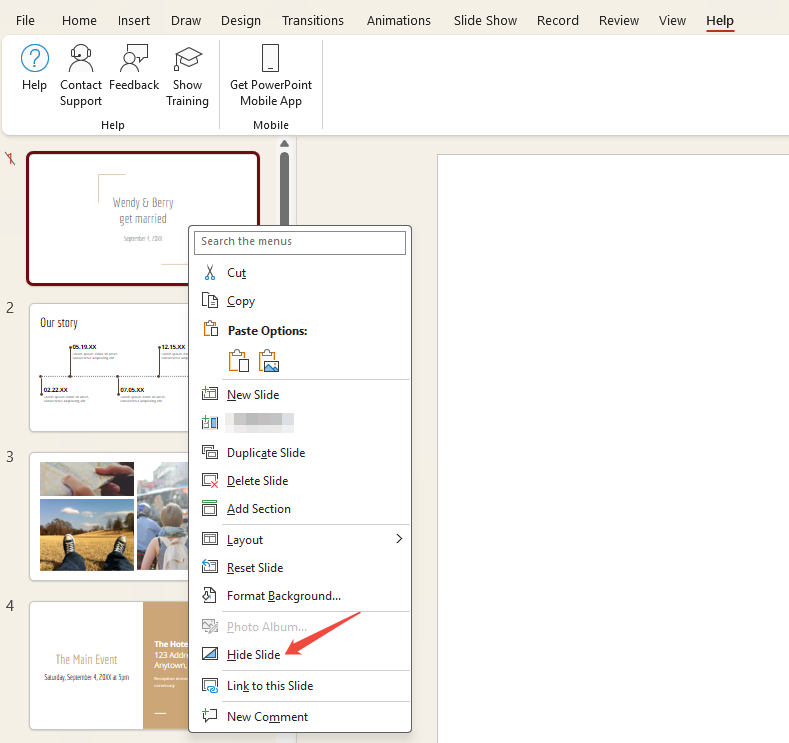
Step 4. A slash will appear on the slide thumbnail, showing it’s hidden. It won’t show up when you present.

Tip:

  • Hold “Ctrl” to select multiple slides at once, then right-click to hide them in bulk.
  • Hiding slides is safer than deleting them when testing presentation effects, as it preserves the original content.

Method 2: Hide in View Mode

Step 1. Go to the “View” tab and choose “Slide Sorter” to see all your slides.

click hide slide in the view mode

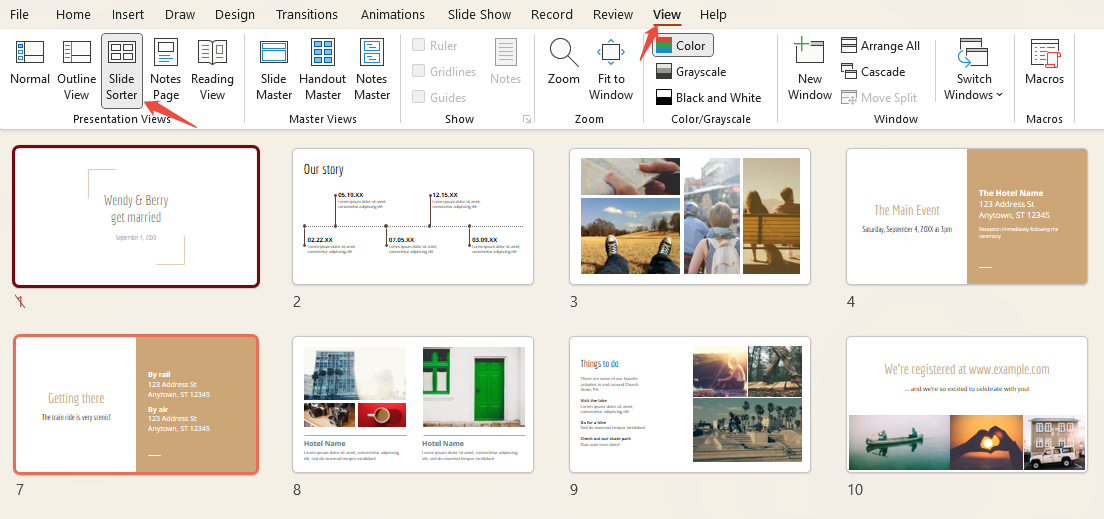
Step 2. Right-click the one you don’t want to show and select “Hide Slide”.

click hide slide in the view mode

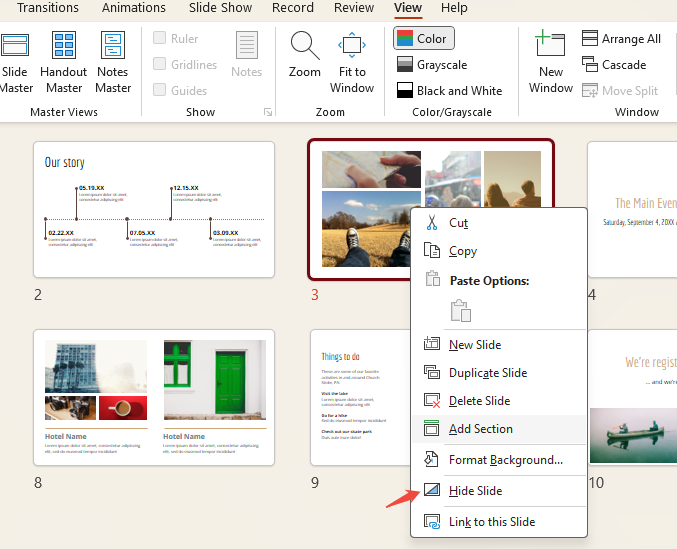
Step 3. This method visually shows all slides, ideal for hiding multiple slides at once.

Method 3: Using Keyboard Shortcuts

If you prefer keyboard navigation:
Step 1. Open the slide in Home view and click the slide.
Step 2. Hold “Alt + S” to open the “Slide Show” menu.
Step 3. Press “H” to hide the selected slide.

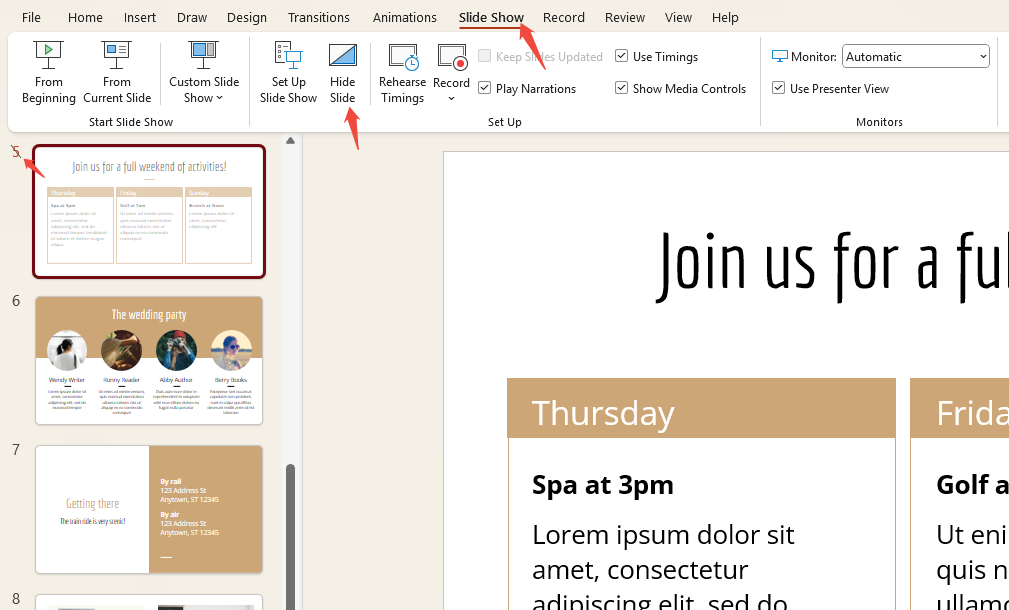
Method 4: Hiding in Slide Show Mode

Step 1. Click “Slide Show” and select the slide to hide.
Step 2. Click “Hide Slide”. The slide number will show a line through it, meaning it’s hidden.

click hide slide in the side show

How to Hide Slides in PowerPoint on Mac

The Mac version works like Windows, though the interface looks a bit different:

Step 1. In the left navigation pane, select the slide to hide.
Step 2. Right-click the slide thumbnail and choose “Hide Slide”.
Step 3. As with Windows, hidden slides display a diagonal slash on their thumbnails.

Note: On a Mac, many users prefer the menu bar. You can also hide slides via Menu → “Slides” → “Hide Slide”.

How to Hide a PowerPoint Slide in Web

If using PowerPoint for Web, the steps of how to hide a slide in PowerPoint are more intuitive:

Step 1. Open your PPT and select the slide in the left thumbnail area.
Step 2. Right-click the slide and choose “Hide Slide”.

click hide slide in the web

The web version has fewer features than the desktop version, but you can still fully hide or unhide slides. This works well for quick online presentations.

How to Unhide a Slide in PowerPoint

Hidden slides are not permanent. You can restore them at any time.

In Windows

  • For Thumbnails: Locate the slide with a slash in the left pane. Right-click → Uncheck “Hide Slide”.
  • For View: Click “View” > “Slides Sorter”. Right-click the hidden slide and select Unhide.
  • For keyboard shortcut: In Home view, click the hidden slide while holding “Alt + S”, then press “H” to unhide.
  • For Slide Show: Click “Slide Show” > select the slide, then click “Hide Slide” again to unhide.

In Mac

Locate slides marked with a slash in the navigation pane. Right-click → Unhide, or via the menu: “Slides” → “Hide Slide” → click again to unhide.

In PowerPoint Web

Locate hidden slides (thumbnails display a marker). Right-click → Select “Hide Slide” (click again to unhide).
workppt banner 2

Is There an Easier Way?

With WorkPPT, you can turn any idea into a ready-to-use PPT in minutes.

Advanced Techniques for Hiding Slides in PPT

PowerPoint also lets you control which slides show, making it easy to pace your presentation the way you want.

1. Set Up Custom Shows
Create multiple custom slide shows under the Slide Show menu to present different versions for various scenarios.

2. Jump with Action Buttons
If you want to use hidden slides as “backup information”, insert a button (e.g., “More Resources”) on the main slide. Clicking it jumps to the hidden slide and then back. This doesn’t disrupt the main flow and allows on-demand access.

3. Utilizing Presenter View
In Presenter View, you can see hidden slides while your audience cannot. Decide on the spot whether to show them based on the situation.

[You May Also Like]: How to Create Mind Map in PowerPoint

How to Print a PPT with Hidden Slides in PowerPoint

If you’re printing a PPT and unsure whether hidden slides will appear in the printed document, try this method to determine:

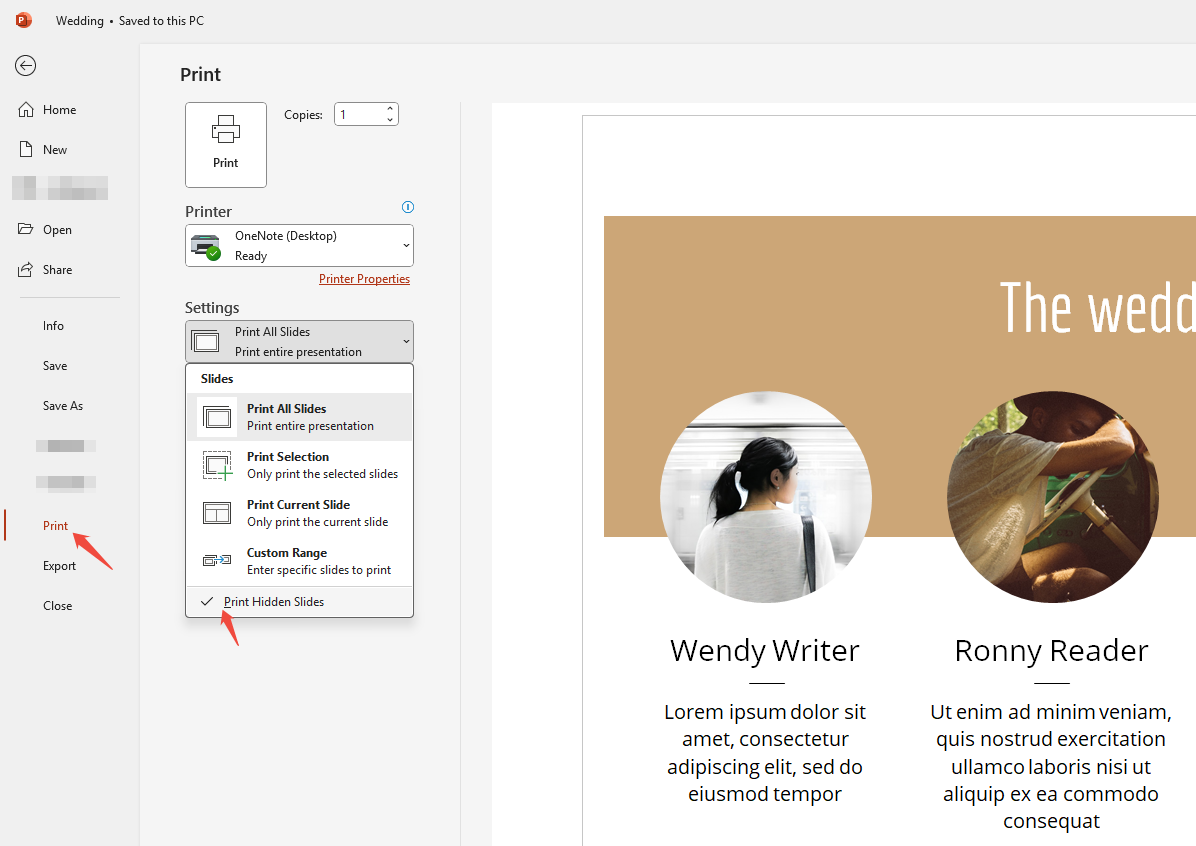
Step 1. Click “File → Print”.
Step 2. In the print options, locate the Print hidden slides checkbox.
Step 3. Select as needed:

  • Checked: Includes all hidden slides in the printout.
  • Unchecked: Skips hidden slides during printing.

check if print the hidden slide

This is great for handouts. You can share just the key points with your audience while keeping the full details for yourself.

FAQs about How to Hide Slides in PowerPoint

Q: Does hiding slides affect file size?

A: No. Hiding is a presentation setting—it doesn’t delete or compress slides.

Q: If I share the PPT, can others see hidden slides?

A: Yes. They remain visible in Normal View but won’t appear during slide show mode.

Q: Will hidden slides remain hidden when exported to PDF?

A: By default, all slides are included in PDF exports. To exclude hidden content, use “Custom Show” or delete them before exporting.

Q: Do hidden slides affect slide numbering?

A: No. Slide numbering continues as if the slide remains in the sequence. For example, if Slide 3 jumps to Slide 5 in the presentation, the numbering stays consistent.

Q: Do hidden slides retain animations and transitions?

A: Yes. They fully preserve all formatting, animations, and transitions. If later unhidden, all content displays normally.

💬 Conclusion:

Hiding slides in PowerPoint is a simple but useful trick. It helps you:

  • Keep your presentation smooth and focused
  • Save backup slides without deleting them
  • Adjust your content easily for different situations

It works on Windows, Mac, and the web. Pair it with custom slide shows or action links, and your presentation becomes more flexible and professional.