

First, learn how to use PowerPoint’s built-in recording feature in Windows to easily capture presentations and audio.
Step 1: Open PowerPoint
- Launch PowerPoint (Office 365 or 2019 + recommended) and open your presentation.
- Make sure slides, animations, and transitions are correct.
- If slides contain video or audio, test it in Slide Show mode first.
Step 2: Access the Recording Feature
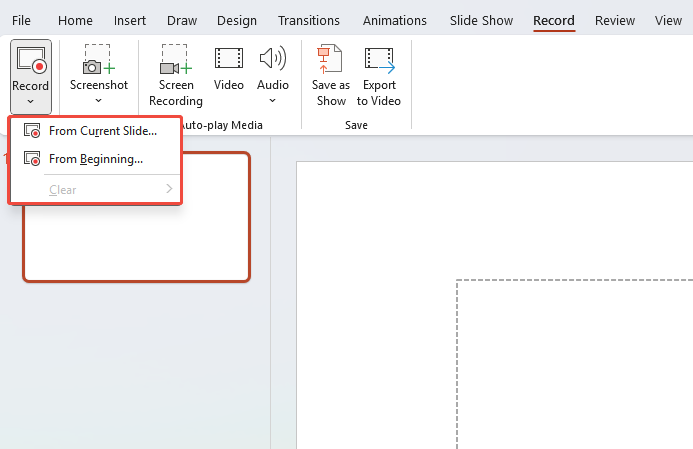
- Click the “Record” tab in the menu bar.
- In the “Record” tab dropdown, you’ll see two options: “From Current Slide” and “From Beginning”.
- Select the option that best suits your recording starting point.
Step 3: Record Your Presentation
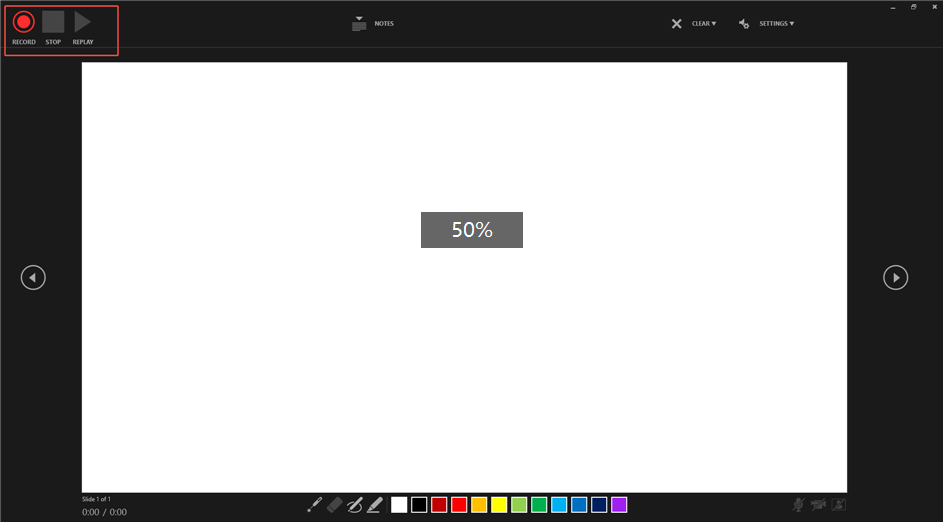
- Click the button to begin recording, which will open a dedicated recording interface.
- Speak into your microphone while moving through your slides.
- You can also use handy tools like the pen, laser pointer, or highlighter directly on your slides during recording.
Step 4: Stop Recording
Once done, press “Esc” or click the “End” button. The system will automatically save the audio for each slide as narration.
Important: Do not close PowerPoint directly, or your audio might not save.
Step 5: Review Your Recording
After recording, click “Slide Show” to preview the entire presentation with audio and verify accuracy.
Checklist:
- Is your speaking pace consistent?
- Does audio start at the intended position on each slide?
- Are there any background noises or popping sounds?
- Is volume consistent throughout the presentation?
Step 6: Save and Export
Finally, click “File → Save” (or press Ctrl+S). If uploading to YouTube or Vimeo, export as an MP4 video.
Recording PowerPoint presentations with audio on Windows is simple. However, if you’re a Mac user, the following tutorial is more suitable for you.
PowerPoint on Mac lets you record just like on Windows, though the interface and audio settings are a bit different.
Step 1: Open your PowerPoint presentation.
Step 2: Select “Record > From Beginning or From Current Slide”.

Step 3: A recording interface will appear—here you can enable/disable your camera and microphone. If you need to record audio only, toggle off the camera button.

Step 4: Click the “Record” button to start. Narrate your slides and use the navigation to move through them. Also, you can pause and then click “Resume” button to begin.

Step 5: When finished, click “End Show”.
Step 6: To save as a video, go to “File > Export”, then select “MP4” or “MOV”.


Here’s how to record your PowerPoint presentation with your camera (Cameo) and audio on a Mac:
Step 1: Open Your Presentation: Launch PowerPoint and open the slide deck you want to record.
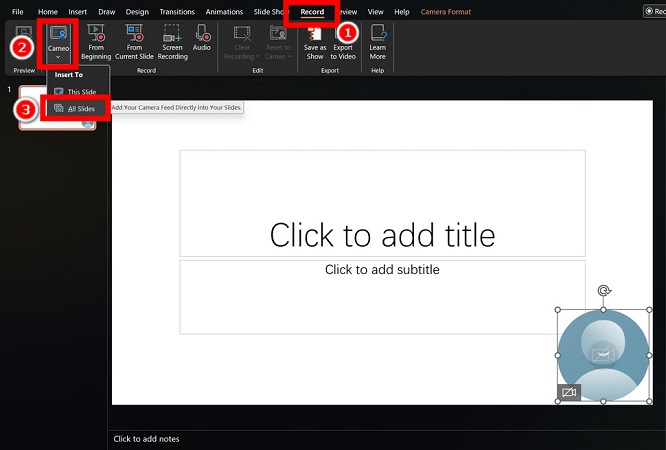
Step 2: Add Cameo to Slide(s):
- Go to the slide where you want your camera to appear.
- Click the Record tab on the tool menu.
- Click “Cameo > Insert to This Slides or All Slides”.
Optional: Resize/position the placeholder. Click the Camera Format tab to apply styles, borders, or effects.

(Repeat for other slides if needed).
Step 3: Start Recording:
- Go to the Slide Show tab.
- Click the arrow under “Record Slide Show > Record from Beginning… or Record from Current Slide….”
Step 4: Set up Camera & Microphone (In Recording Studio):
The recording studio opens. You’ll see your slides and a preview of your Cameo feed.
- Camera: Ensure your webcam is on and you’re visible in the Cameo box. Click the Camera icon (bottom left) to toggle it on.
- Microphone: Click the Microphone icon (bottom left) and select your desired input device (e.g., Mac’s internal mic or an external mic). Click the icon again to unmute.

(Optional: Click “Settings” (gear icon) to adjust camera/mic sources or quality).
Step 5: Record Your Presentation:
- Click the big red “Record button” to start.
- Advance slides normally (click, arrow keys, or remote). Your camera feed (Cameo) and audio will be recorded.
- Use the toolbar for laser pointer, pen, highlighter, or eraser. Click the Pause button if you need a break.
Step 6: Stop, Review & Save:
- Click the Stop button (■) when finished.
- Click the Play button (▶︎) to review your recording on the current slide. Use the timeline below the slide to navigate.
- Click Re-record if needed for a specific slide.
- Click “Export” when satisfied.
Step 7: Export Your Video:
Choose a file name and location and select MPEG-4 Video (*.mp4) as the format. Moreover, you can adjust resolution/quality via Options.
Zoom is perfect for pre-recording a presentation with audio (and video). Here are the steps to pre-record a PowerPoint Presentation with Audio on Zoom:
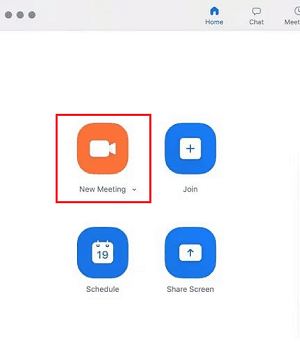
Step 1: Open Zoom and click “New Meeting” to start a new meeting (by yourself).
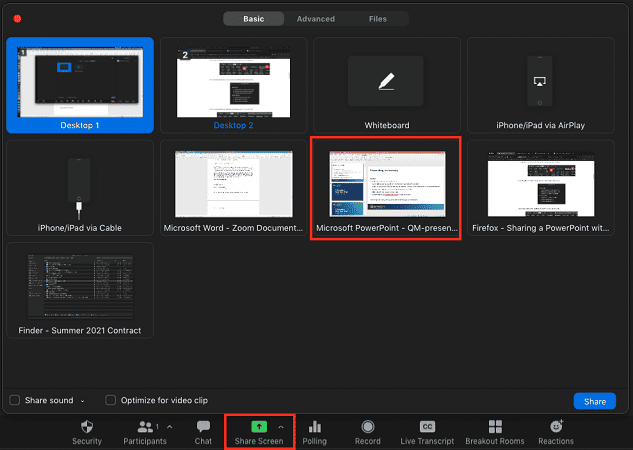
Step 2: Share your screen and select your PowerPoint window.
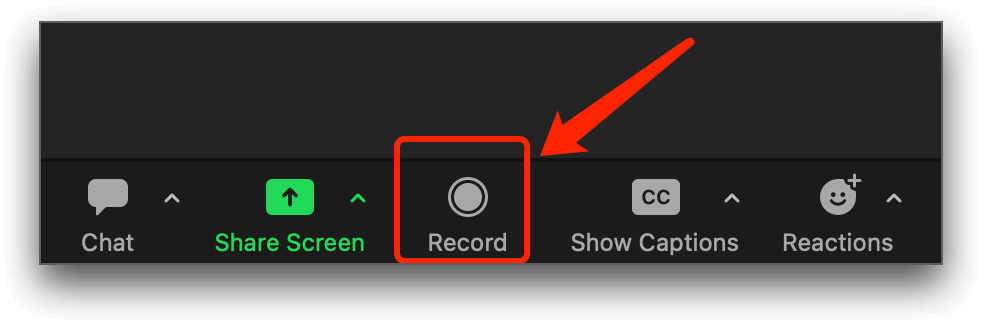
Step 3: Click Record (bottom Zoom toolbar).
Step 4: Begin your presentation, narrating as you go. Your audio and video (if webcam is on) will be recorded.
Step 5: When done, click Stop Recording and end the meeting.
Step 6: Zoom will save your recording as an MP4 video file.
I was recommended this website by my cousin. I am not sure whether this post is written by him as
nobody else know such detailed about my trouble.
You are wonderful! Thanks!