
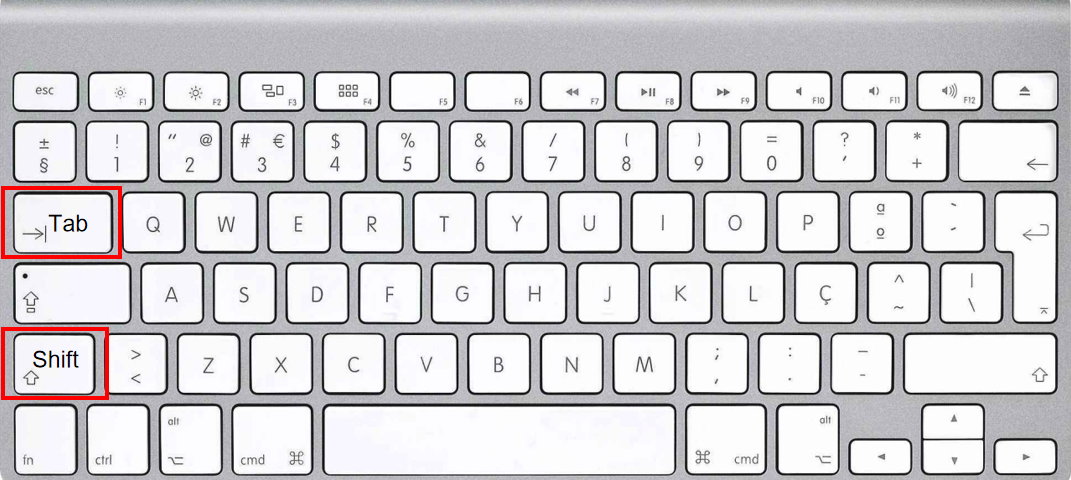
If you need a fast solution, this method uses a simple shortcut:
1. Open your presentation
Enter Google Slides, open or import the slides that you need to edit.
2. Adjust the cursor
Place your cursor at the beginning of the line you want to format.
3. Create the hanging indent
Press “Tab” to create a hanging indent. Each time you press the “Tab” key, the indentation will increase. If you want to reduce the indentation, you can do it by pressing “Shift + Tab”.
For better precision, use the ruler tool:
1. Open your presentation
Enter Google Slides, open or import the slides that you need to edit.
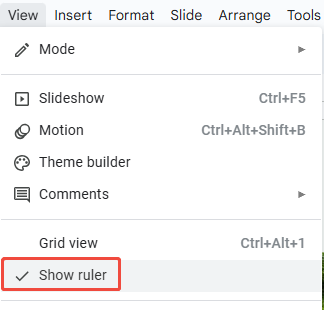
2. Show the ruler
Enable the ruler by going to View > Show ruler (If the ruler is already on, skip this step).
3. Select the Text
Click and drag to highlight the text you want to format. For multiple citations, select all lines.
(Pro Tip: Press Ctrl+A (Windows) / Cmd+A (Mac) to select all text in a text box.)

4. Adjust the Ruler Makers
The ruler has two key markers:
- Left Indent Marker (Blue Triangle): Controls all other lines.
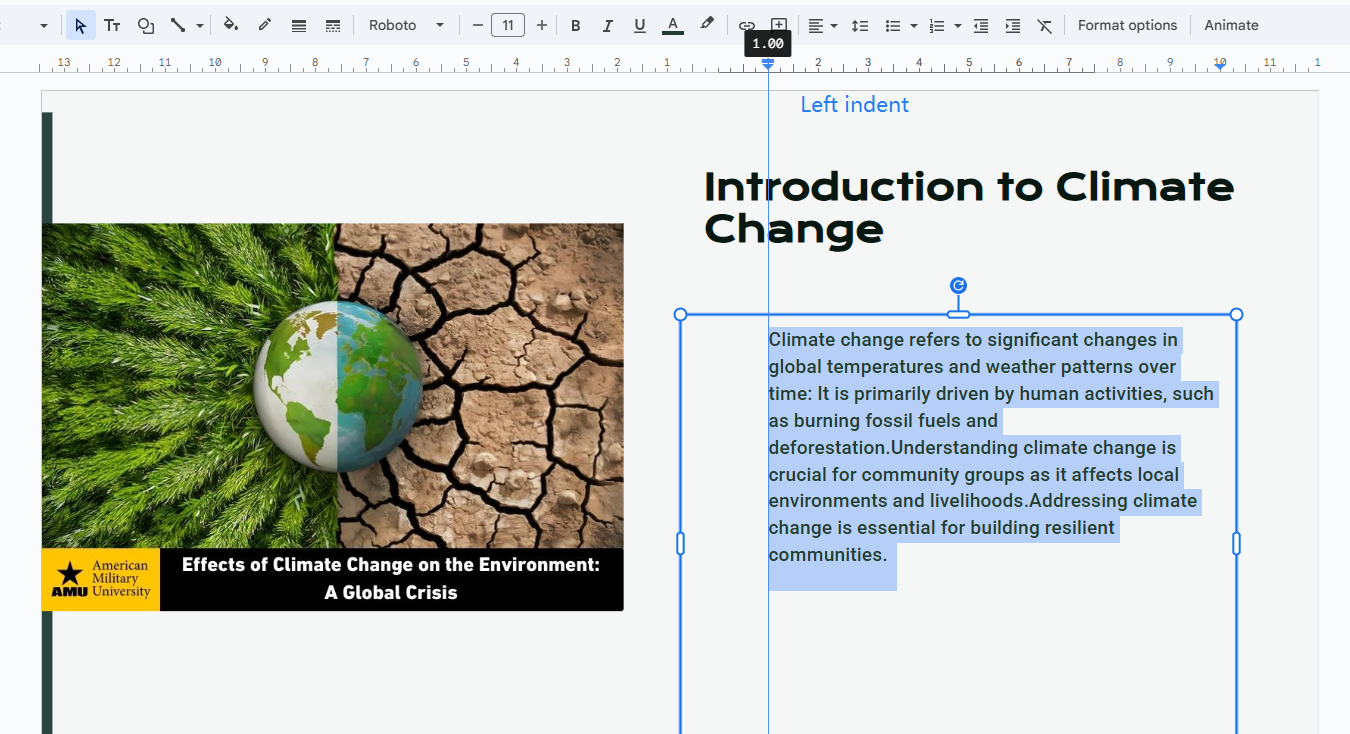
- First-Line Indent Marker (Blue Rectangle): Controls the first line’s position.


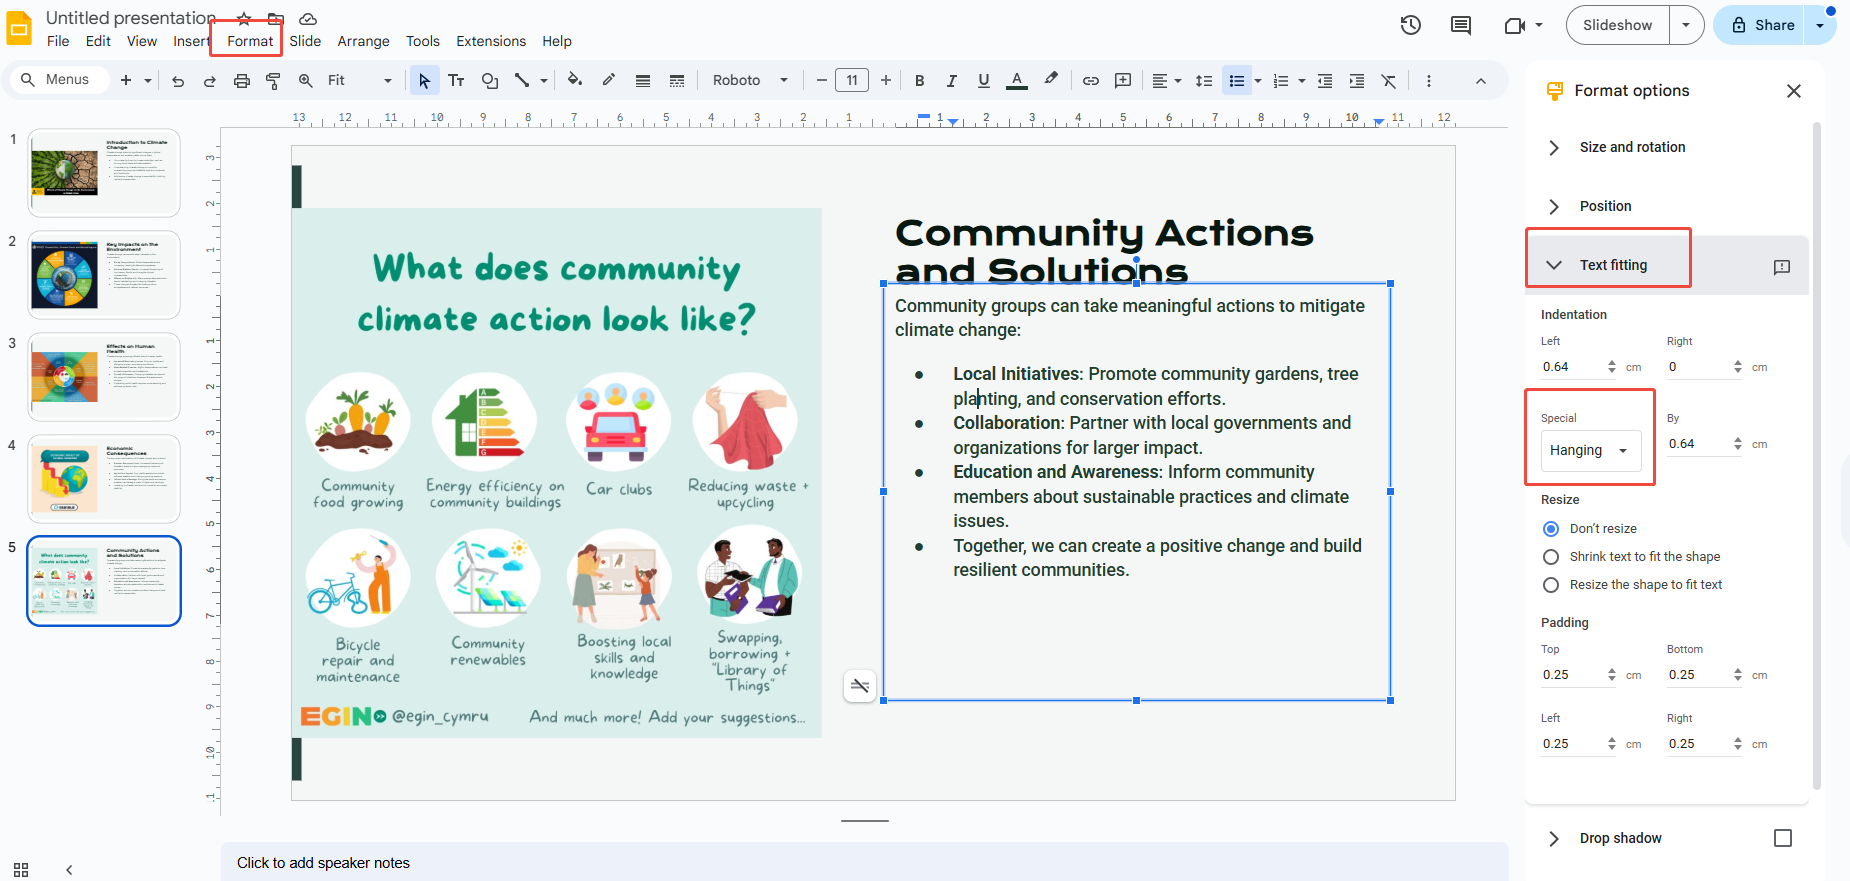
For structured documents, use the indentation menu:
1. Open your presentation
Enter Google Slides, open or import the slides that you need to edit.
2. Select the text
Highlight the text you want to format.
3. Access Text Fitting
Locate the “Format” tab, click on ” Format Options”, and then select “Text Fitting” from the menu.
Under “Special indent”, select “Hanging” and set the indent size.