
When working in Google Slides, images can sometimes block your main content or overlap incorrectly. Luckily, you can move images to the back so they stay behind other elements, keeping your slides neat. This guide covers how to send an image to the back in Google Slides and answers common issues you may encounter.
How to Send Image to Back in Google Slides
To place an image at the bottom layer, the most common method is to use the “Send to Back” feature. Here’s how to do it without messing up your layout:
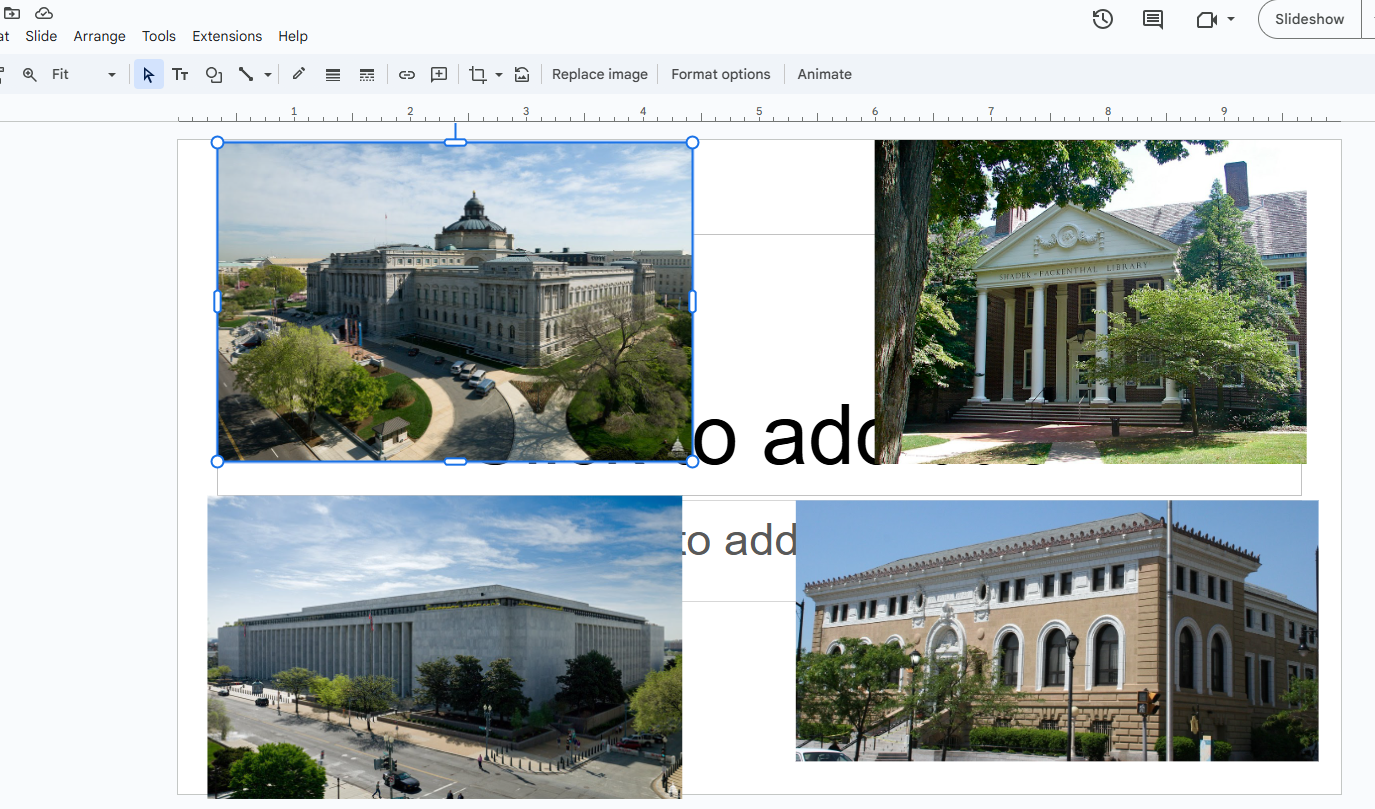
Step 1: Select the Image
- Open your Google Slides presentation and click the image you want to move.
- Once selected, a blue border will appear around the image.
- To select multiple images at once, hold down the “Shift” and click each one.
Step 2: Choose the Order
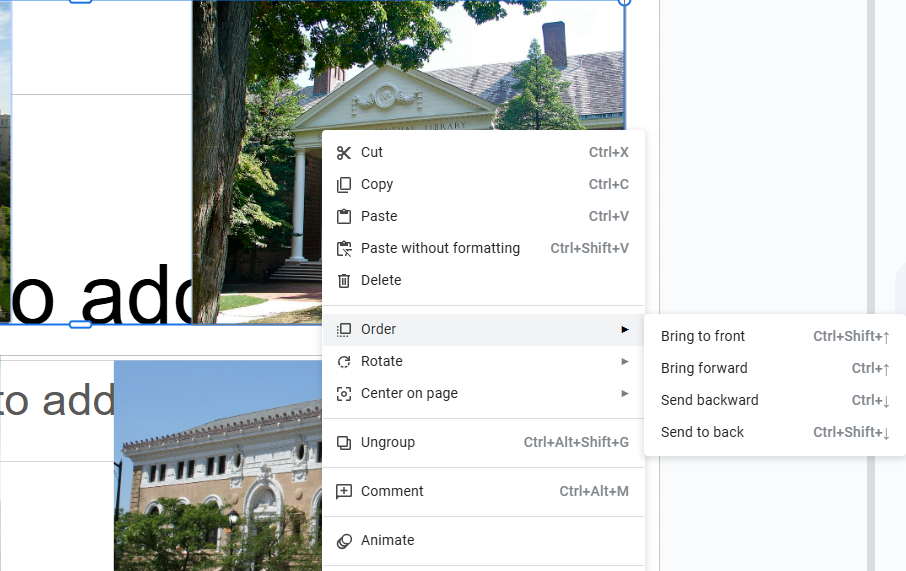
Right-click the selected image and choose “Order”. Four options will appear:
- Bring to front – move the slide object on the topmost layer.
- Bring forward – moves the selected object one step forward.
- Send backward – moves the selected object one step backward.
- Send to back – places the slide object on the bottom layer, beneath all other objects.
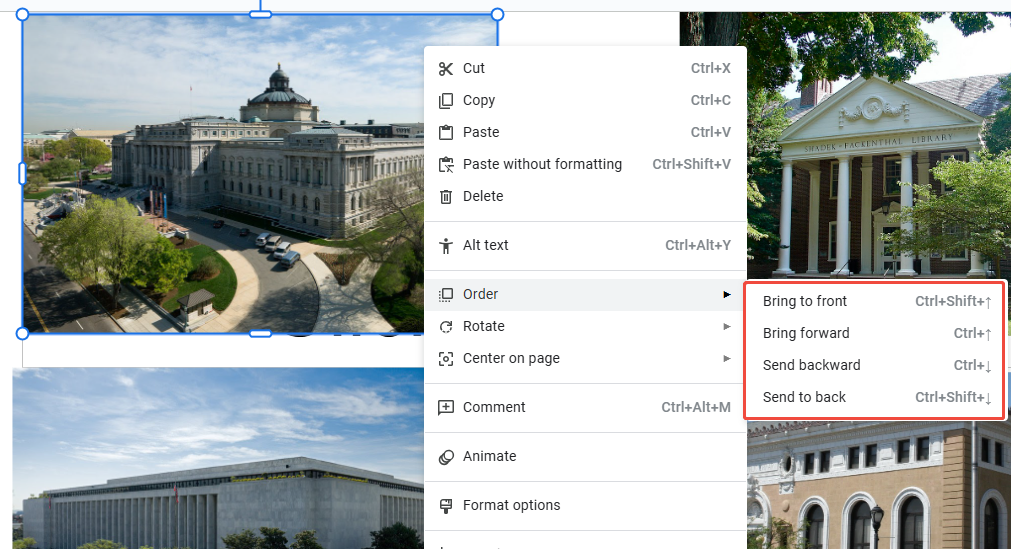
Step 3: Apply Send to Back
Select “Send backward” or “Send to back” to position the image behind text or charts.
On some systems and browsers, use Ctrl + ↓ / Ctrl + ↑ (Windows) or Cmd + Option + ↓ / ↑ (Mac) for quick layer adjustments.
Step 4: Save Changes
Remember to save after completing adjustments to keep the order when reopening.
🌟Tips:
1. Adjust transparency appropriately to ensure background images remain subtle.
2. Lock background items before working on complex slides.
3. For true slide background, use the “Change Background” instead of inserting an image.

Design Smarter with WorkPPT AI
Tired of spending hours designing your Google Slides? Try WorkPPT for free today and transform plain slides into eye-catching presentations!
How to Working with Multiple Images
If you’re working with several images, group them first so you can edit them all at once without repeating steps or getting confused.
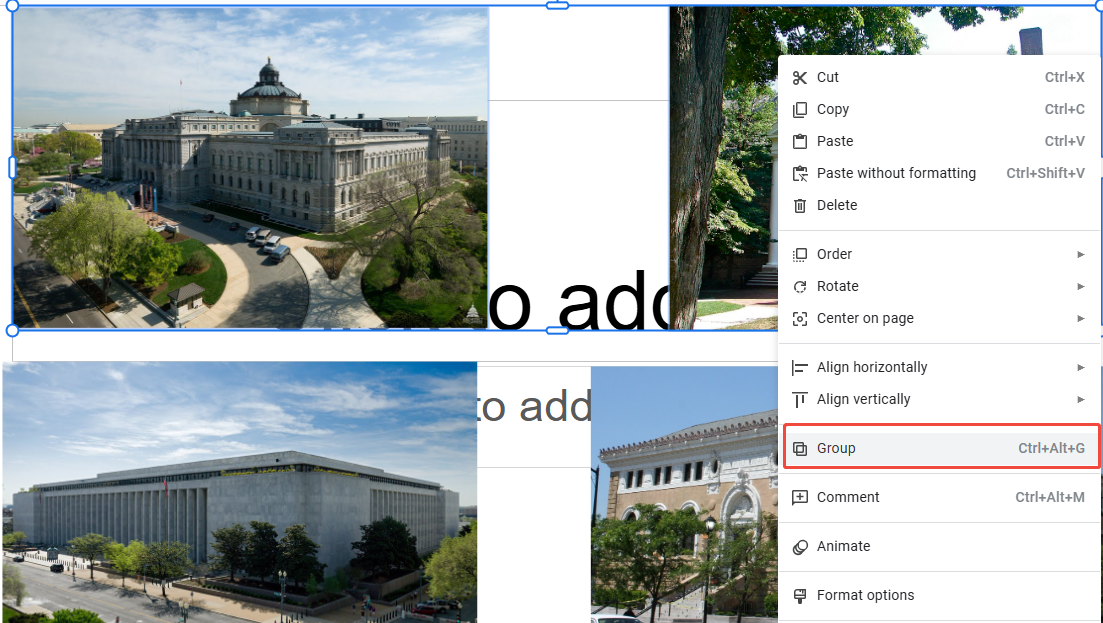
Step 1: Group Images
- Select the images you want to operate on together → Right-click → “Group”.
- Now you can move, resize, or reorder them as one, which saves time.
Step 2: Send Group to Back
- Right-click the grouped items → “Order” → “Send to Back”.
- Any ungrouped elements must be adjusted separately, or they might cover the group.
Step 3: Align and Distribute
- Select multiple objects → “Arrange” → “Align/Distribute”.
- Ensure multiple images are neatly arranged to prevent visual clutter.
Common Issues of Sending to Back in Google Slides
Most problems happen when you use the wrong steps or the wrong objects. Learn these simple tricks to avoid them easily.
Common Issue | Cause | Solution |
Image not behind text | Objects are grouped or locked | Ungroup, edit the image, then regroup |
Text still hidden | Wrong layer order or low image opacity | Adjust opacity or send the image backward |
Shortcut not working | Browser/system limits or wrong object | Use right-click menu, check object type |
Image misaligned | No guides or grid | Turn on grid/guides to align easily |
🌟Practical Tips:
1. Start with the background, then add text and graphics, and finally place decorative images.
2. Don’t copy elements from other sources directly. It can mess up formatting and layout.
FAQs about How to Send to Back in Google Slides
Q: How can I quickly send all newly inserted images to the back?
A: Currently, Google Slides doesn’t support sending images to the back by default. Right after inserting, right-click → Order → Send to Back, or press the shortcut multiple times.
Q: What if an image still covers text after being sent to back?
A: Check transparency and layer order. If necessary, ungroup and rearrange elements.
Q: Can images be set to go behind objects by default upon insertion?
A: No, Google Slides doesn’t allow that. You can, however, use templates with pre-set backgrounds and layers to reduce extra adjustments.
Q: How can I adjust an image if it's locked?
A: First, duplicate the image to a new layer or unlock the original object before adjusting its order.