
Mind maps are basically a way to organize your ideas in a more structured and visual format. When you add them to a presentation, they not only make your logic easier to follow but also make the slides look more engaging. In fact, in formal presentations, swapping out long paragraphs of text for a clean mind map often does a much better job at grabbing attention.
In this post, I’ll share four common ways about how to create a mind map in PowerPoint—from the most basic hand-drawn approach to using ready-made templates and AI tools. Depending on your situation, you can pick the method that saves you the most time and effort.
Tricks for Adding Mind Maps in PowerPoint
Before diving into the how-to part, here are a few small tips that can make mind maps in PowerPoint look more polished and professional:
- Maintain clear hierarchy: Limit each branch to 3-5 sub-points to avoid clutter.
- Keep colors simple: Use a primary theme color + accent color to highlight key points without overwhelming the design.
- Leverage SmartArt: These graphics quickly build the basic framework, eliminating the need to start from scratch.
- Incorporate icons or small illustrations: Adding visual elements creates stronger memory points than plain text.
- Use animations sparingly: “Step-by-step reveal” effects help viewers follow your presentation rhythm.
These little details really elevate the quality of your mind map in PowerPoint.
How to Create a Mind Map in PowerPoint
The following four methods cover everything from building your own structure to using templates and AI tools. Pick the one that works best for you.
1. Using Basic Shapes
The first flexible method is to draw the mid map yourself using PowerPoint built-in shape tools—rectangles, circles, arrows, lines, etc.. This gives you full control over layout and design.
1. Open a new PowerPoint and add a blank slide.
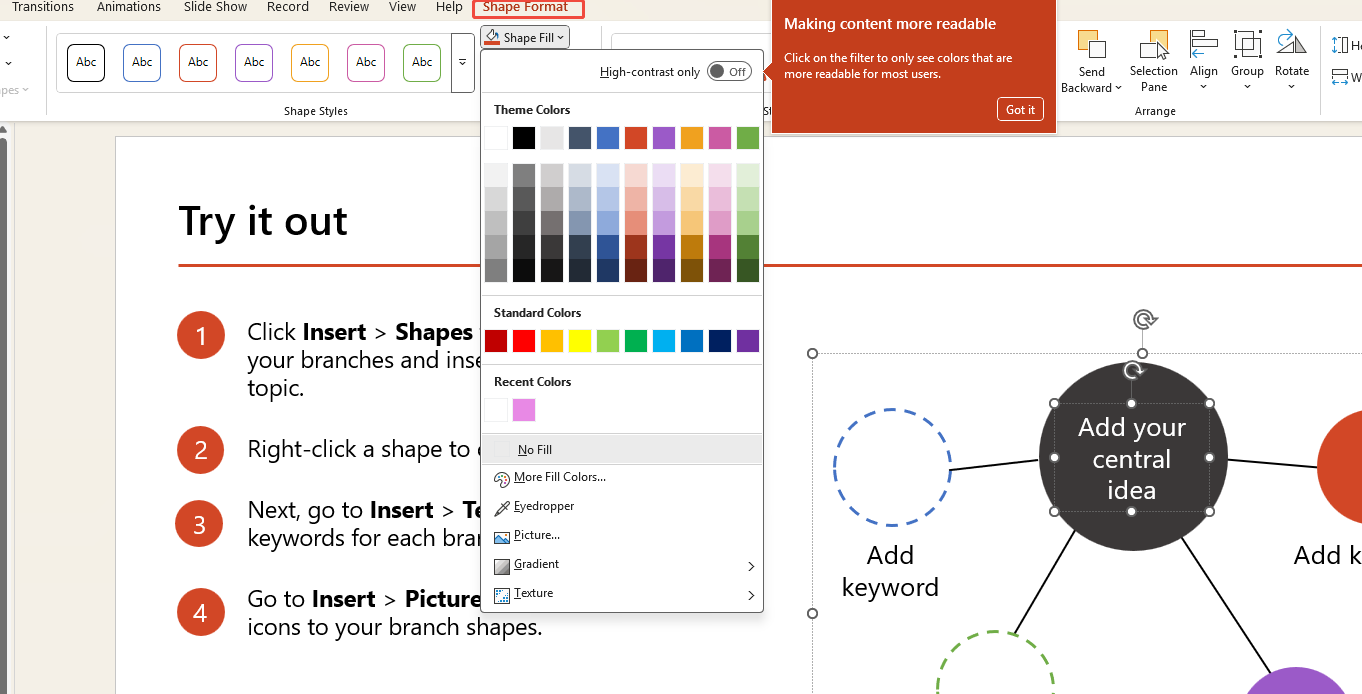
2. Click “Insert” > “Shapes”. Select an appropriate shape for the central theme.
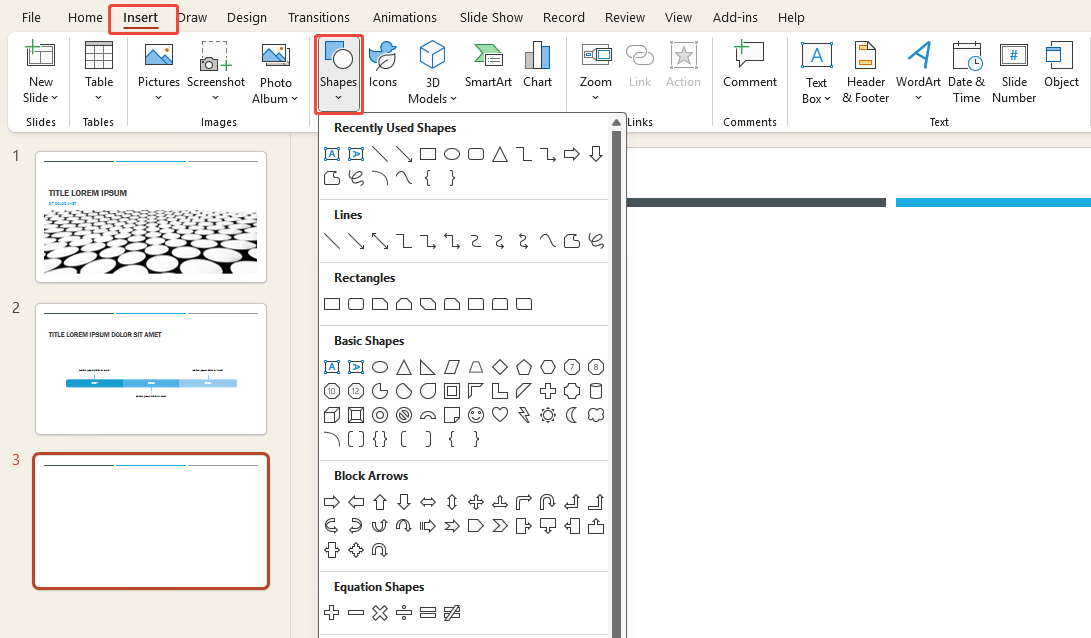
3. Click “Insert” > “Shapes” again. Choose additional shapes and arrange them around the central theme.
4. Use arrows or lines from the Shapes menu to connect the central theme to other branches.
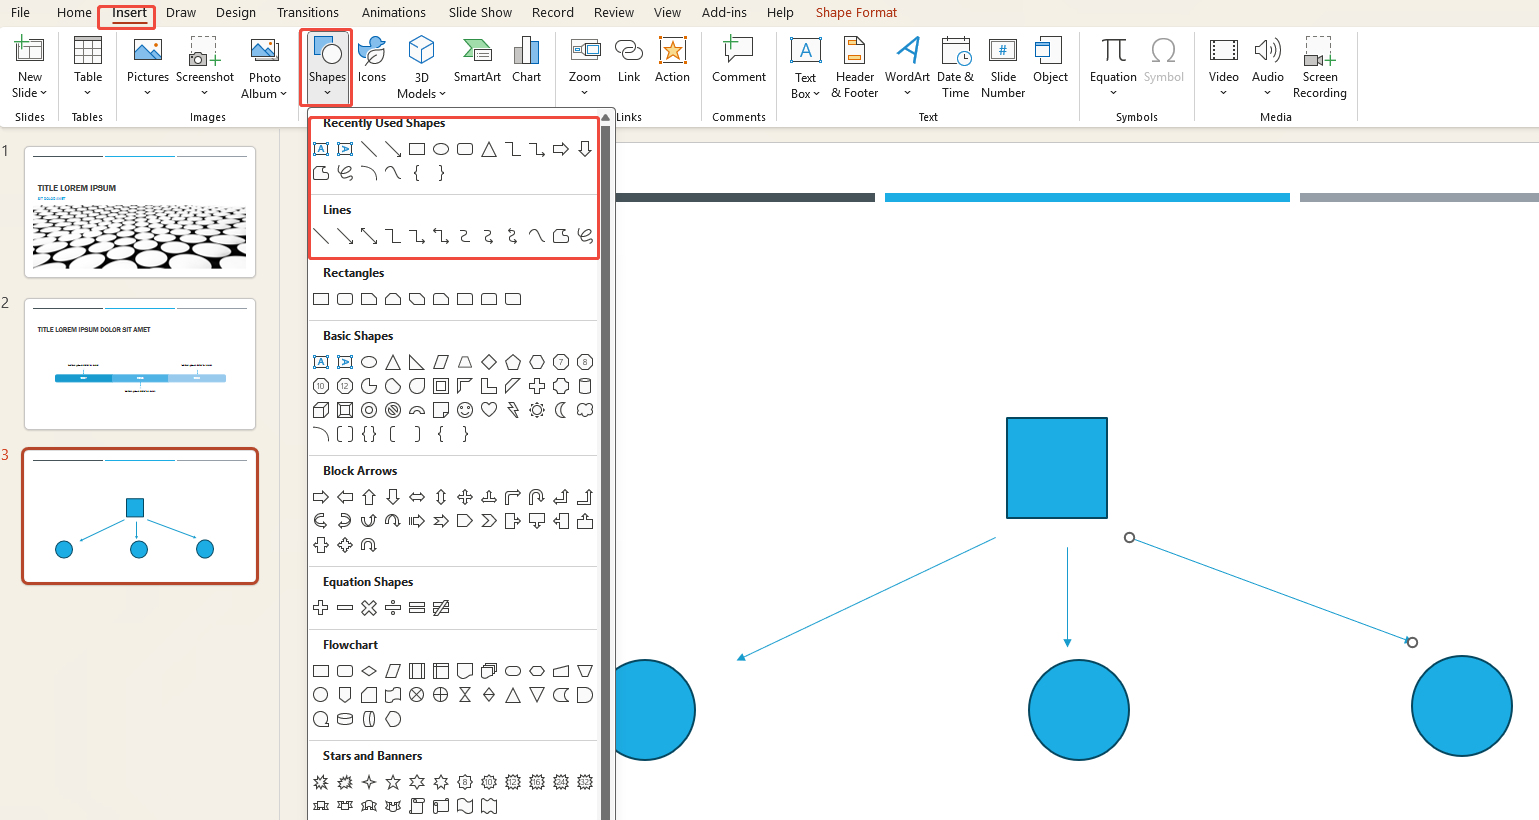
5. Now you can type text into each shape or insert images for enhanced visual appeal.
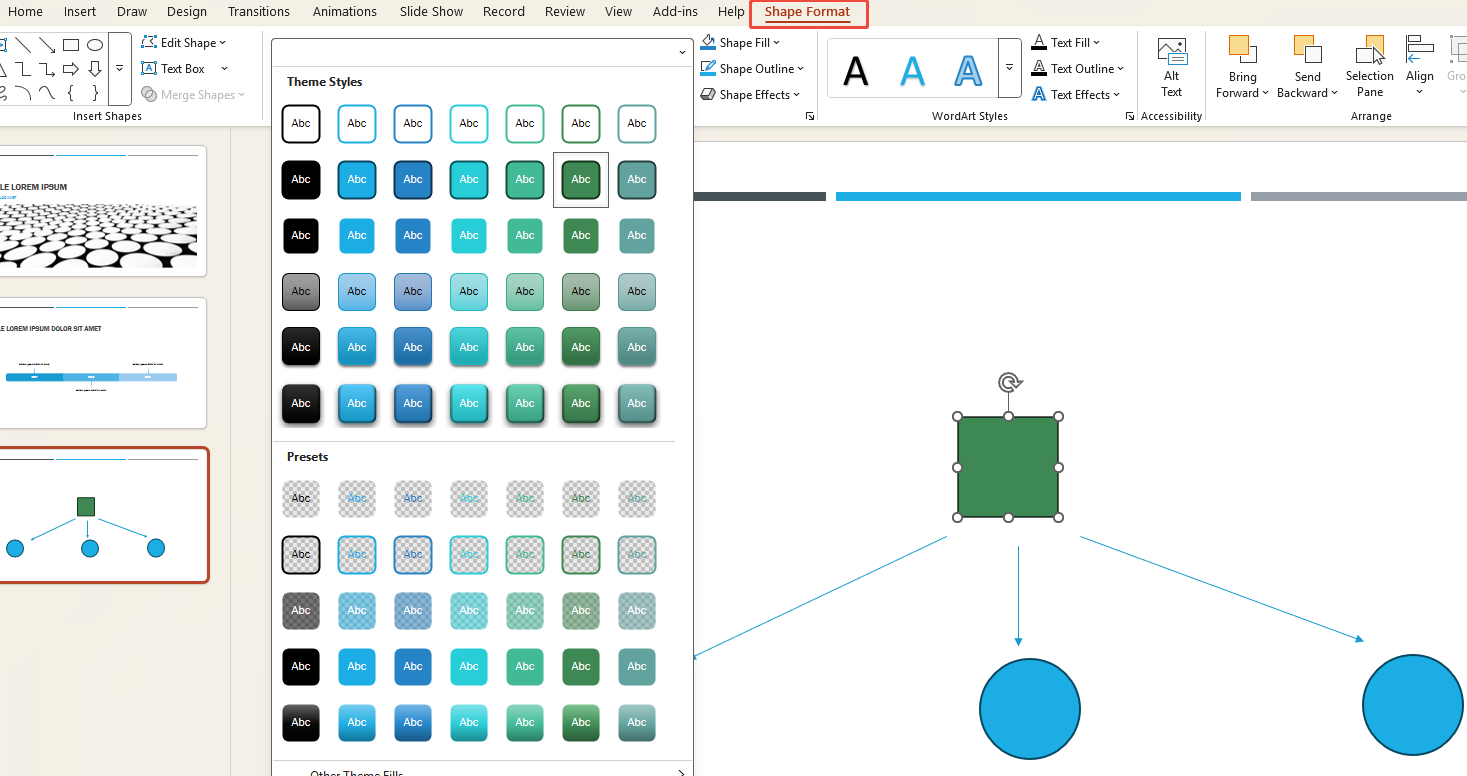
6. Finally, click “Shape Format” to change the mind map’s colors or styles, making your mind map more appealing.
2. Using Mind Map Templates
If you’re short on time, PowerPoint has pre-designed templates that you can use right away.
1. Open your PPT file, click “File” at the top, then click “New” in the left sidebar.
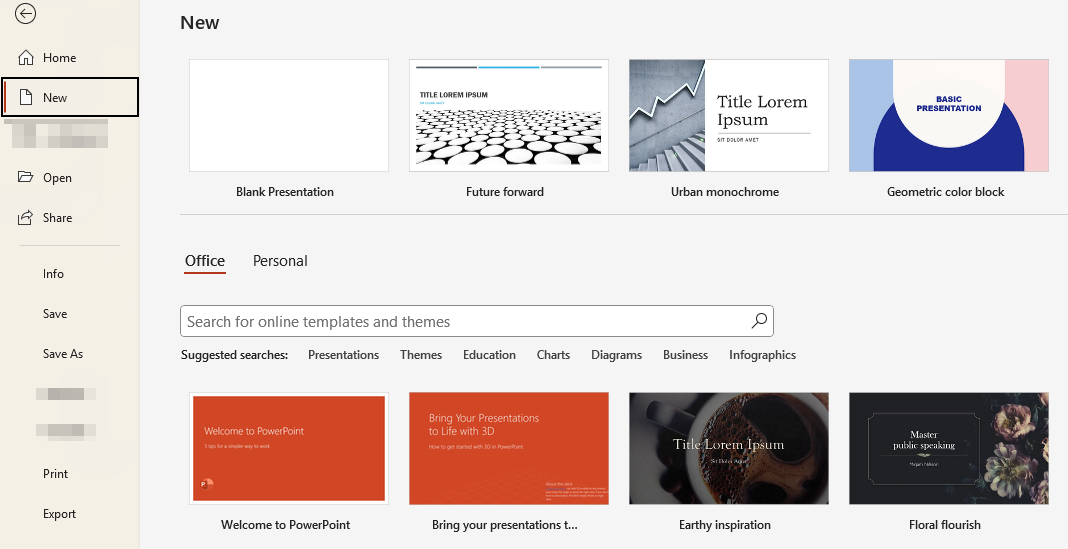
2. Type “Mind Map” in the search box and press Enter. You’ll see PowerPoint’s built-in mind map templates.
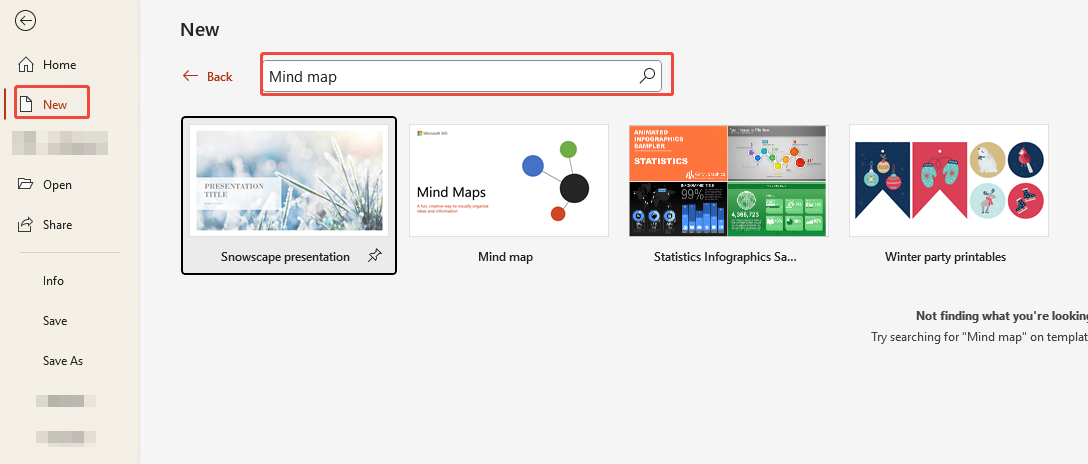
3. Select a template you like and click “Create” to insert it.
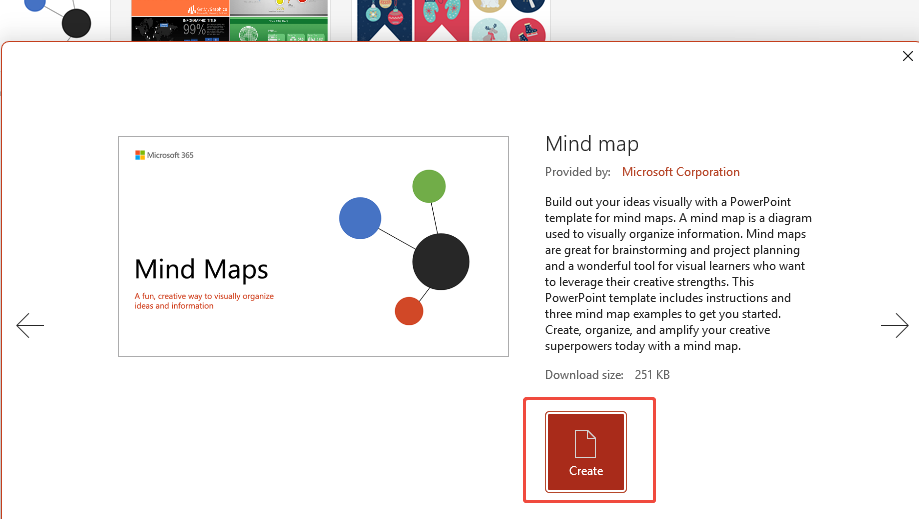
4. You can now start adjusting the mind map: change colors and shapes in “Shape Format”, adjust layouts, etc.
5. Enter your ideas into each topic box, ensure the content is accurate, then click “Save”.
3. Creating Mind Maps Online and Importing Them to PPT
This is the method I use most often because it’s just the easiest. WorkPPT features an AI Mind Map Generator. Its capabilities far surpass those of PowerPoint.
You just input your topic, and it automatically generates a logically structured mind map with the formatting done for you. No more wasting time dragging boxes around or fixing layouts by hand.

Is There an Easier Way?
1. Navigate to the WorkPPT official website and log in to your account.
2. Locate “AI Mind Map” in the top navigation bar and click to access the interface.
3. Enter your idea or topic in the text box, then confirm. The AI will automatically begin expanding your mind map.
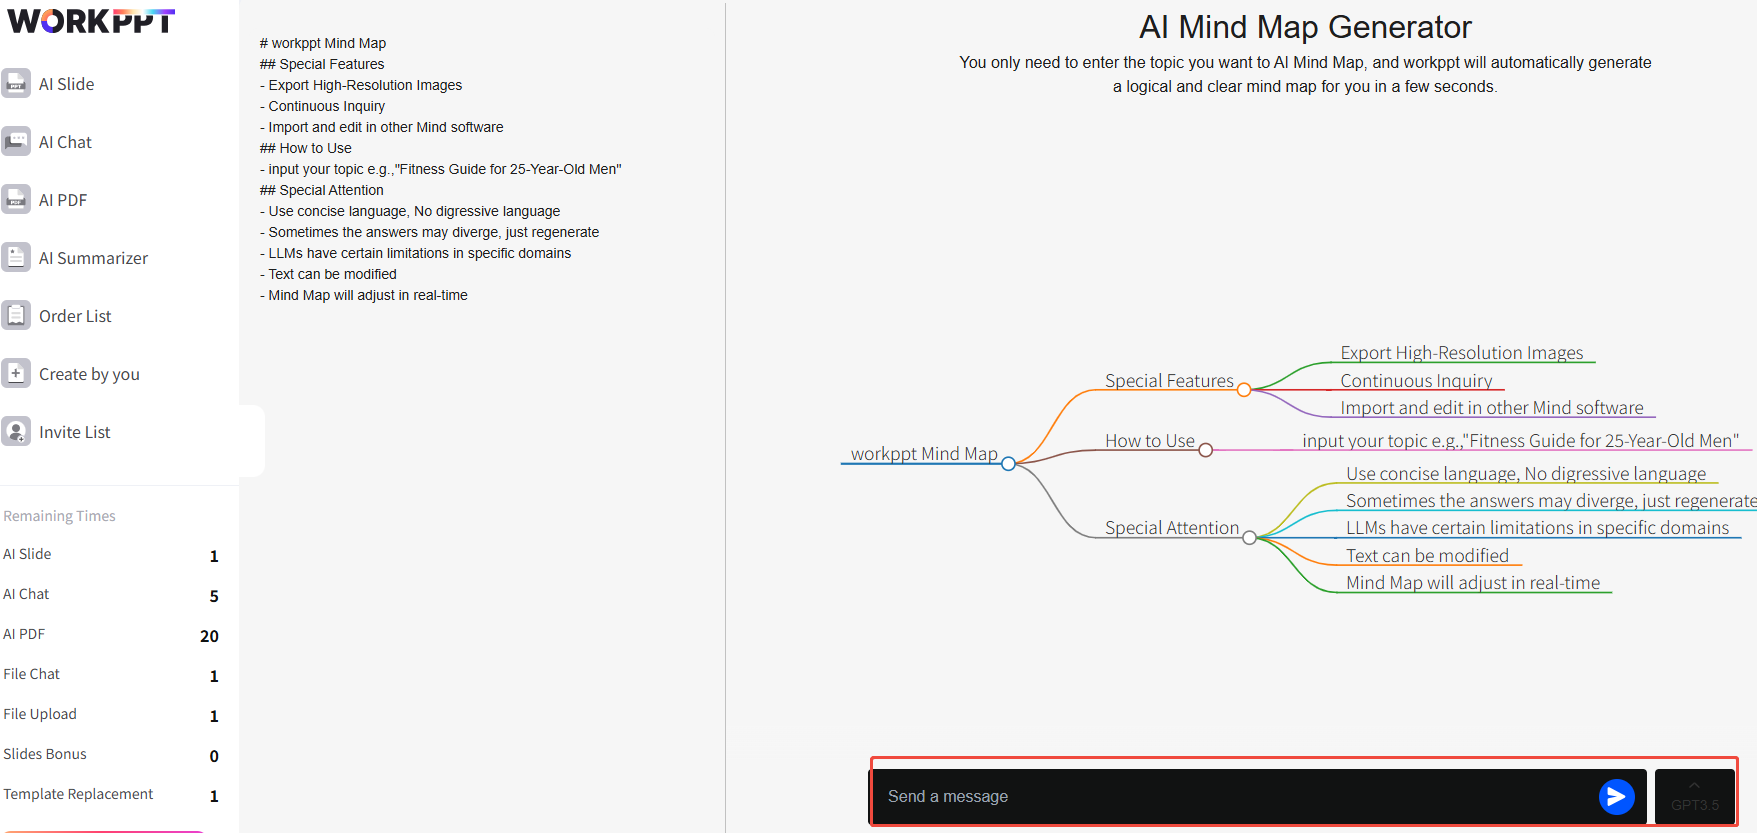
4. Wait one minute. The completed mind map will appear before you.
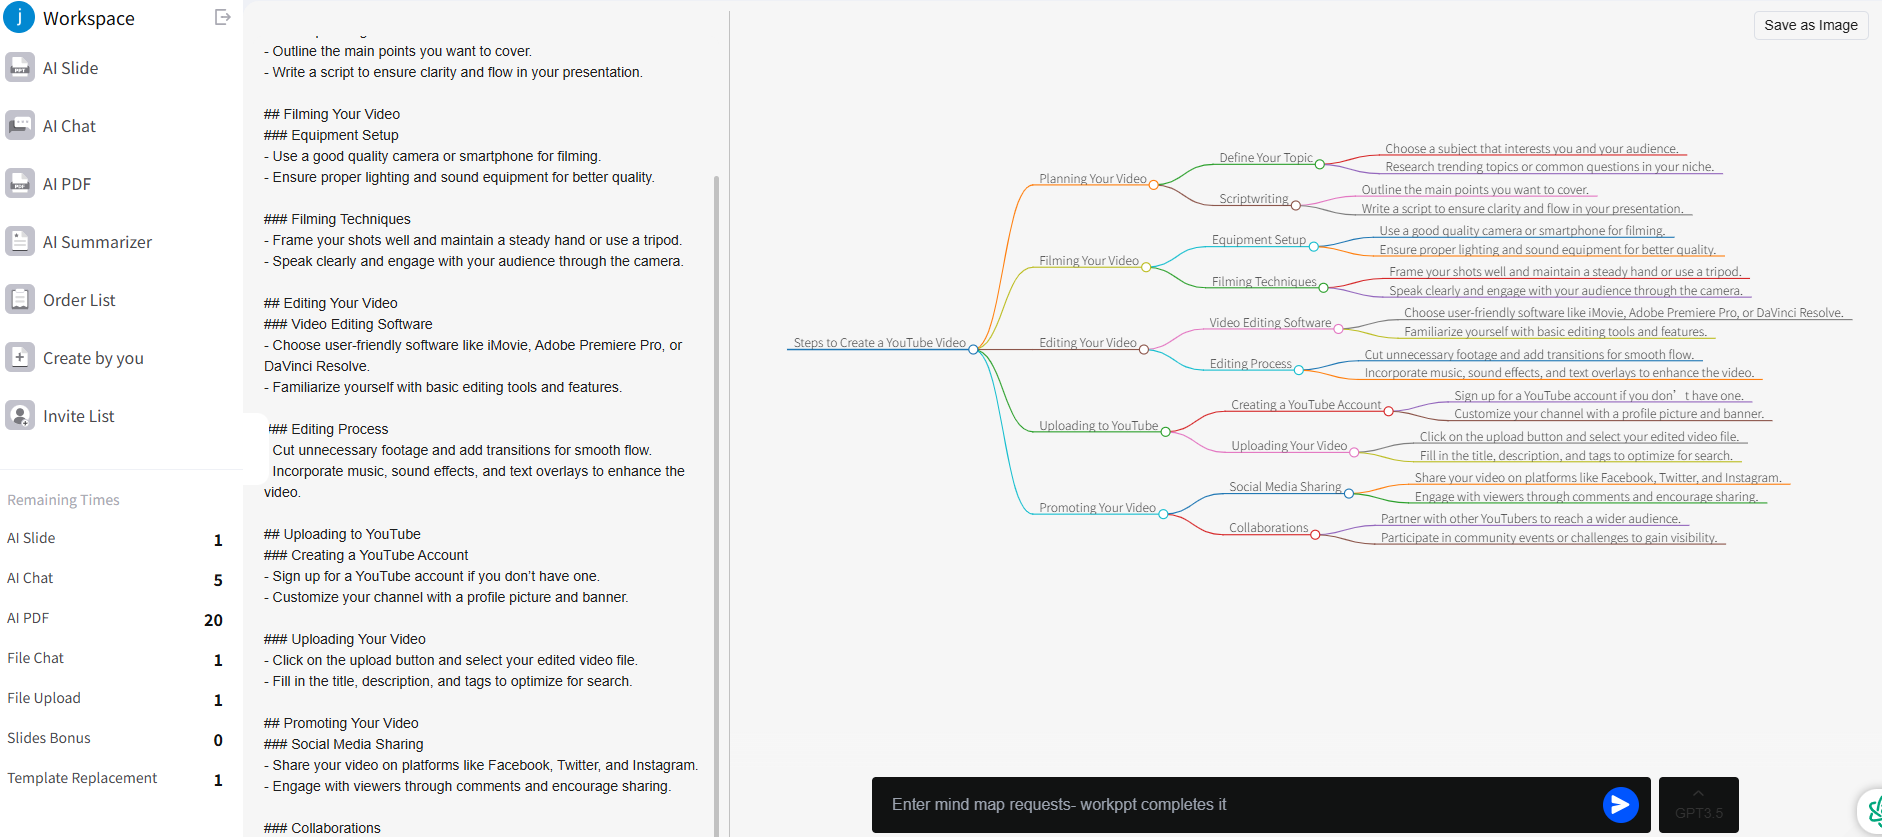
5. Click Save, then upload or insert it into your PPT file.
Compared to manual drawing, this saves significant time—especially for project planning or team presentations—with noticeable efficiency gains.
4. Using SmartArt Graphics
SmartArt in PowerPoint offer pre-designed charts for trees, hierarchies, relationships, and more. Though not dedicated mind mapping tools, it work well for simple logical displays.
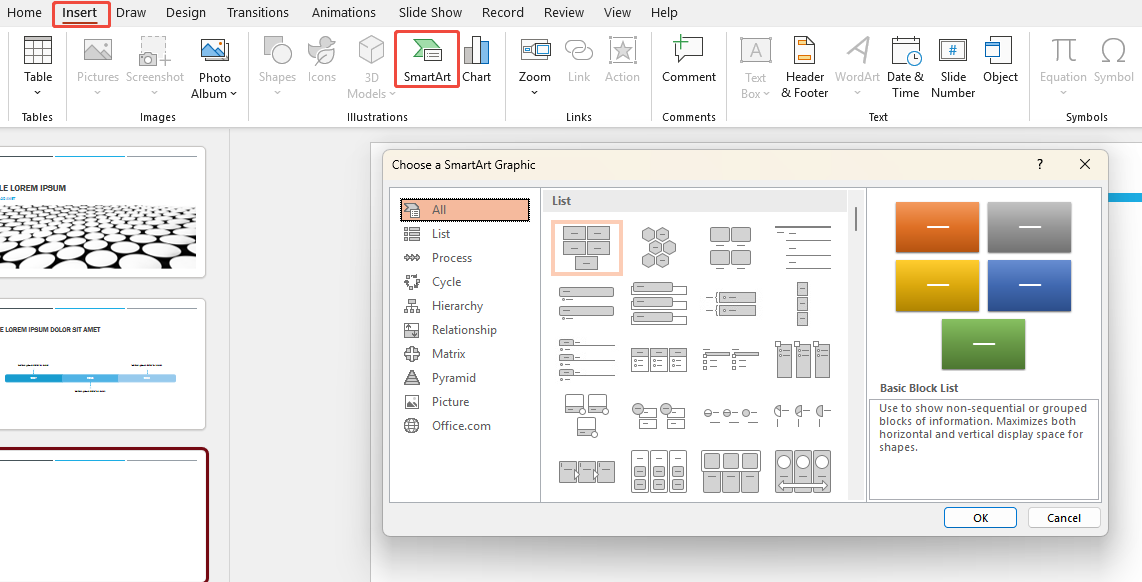
1. Open PowerPoint and add a new slide.
2. Click “Insert”, then select “SmartArt”. A window with different icon options will appear.
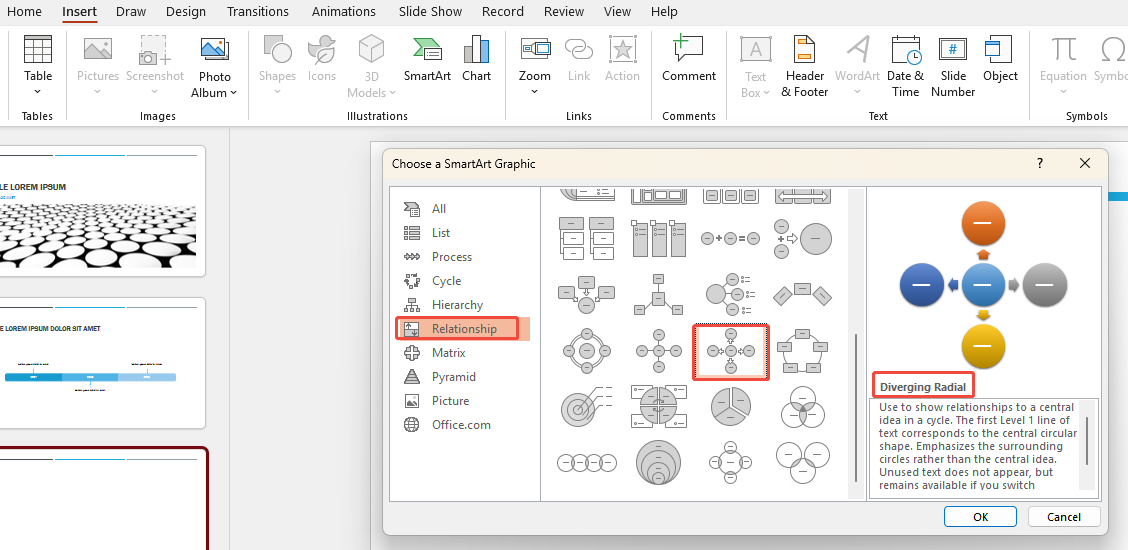
3. Click “Relationship”, then scroll to select “Diverging Radial”.
4. After inserting it into the slide, adjust the map’s colors and styles in “SmartArt Design” and “Format”.
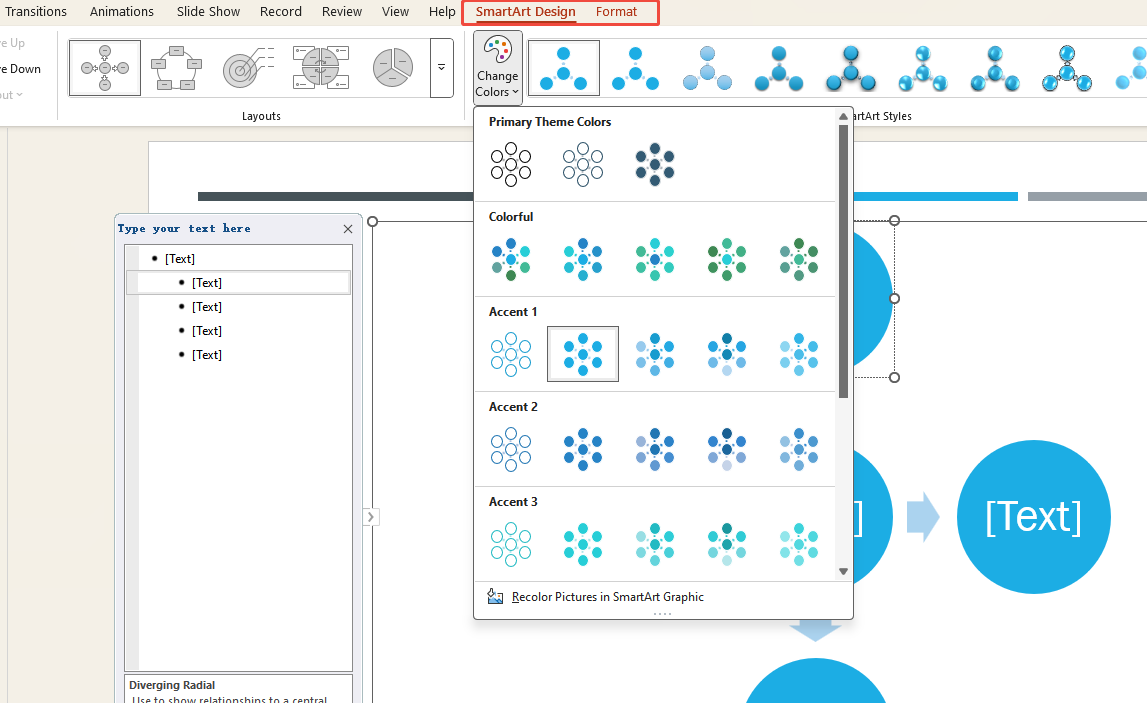
5. Finally, enter your ideas into each shape to complete the content.
Where Mind Maps Can Be Used
Mind maps help organize thoughts and connect ideas quickly, making them suitable for structuring logic in many scenarios.
- Team brainstorming: Visualize everyone’s ideas on a single map for greater clarity.
- Project planning: Break down tasks, timelines, and responsibilities—one map explains it all.
- Study notes: Aid rapid knowledge retention, especially for exam prep or book summaries.
- Presentations/reports: Replace dense text with maps so audiences grasp the structure at a glance.
Essentially, mind maps excel whenever you need to clarify complex concepts.
FAQs about How to Make a Mind Map in PowerPoint
Q1: Does PowerPoint have a built-in mind mapping feature?
Q2: Is SmartArt convenient for mind mapping?
Q3: Can I add animations to mind maps?
Q4: What if my mind map has a lot of content?
Q5: Can mind maps be exported?
💬 Conclusion:
These solutions to how to make a mind map in PowerPoint aren’t complicated at all. By now, you’ve mastered four methods: Shapes, Templates, SmartArt, and AI tools.
If you make mind maps often, I’d strongly recommend giving WorkPPT AI Mind Map Maker a try. It saves you tons of time and lets you focus more on your content instead of struggling with formatting.
